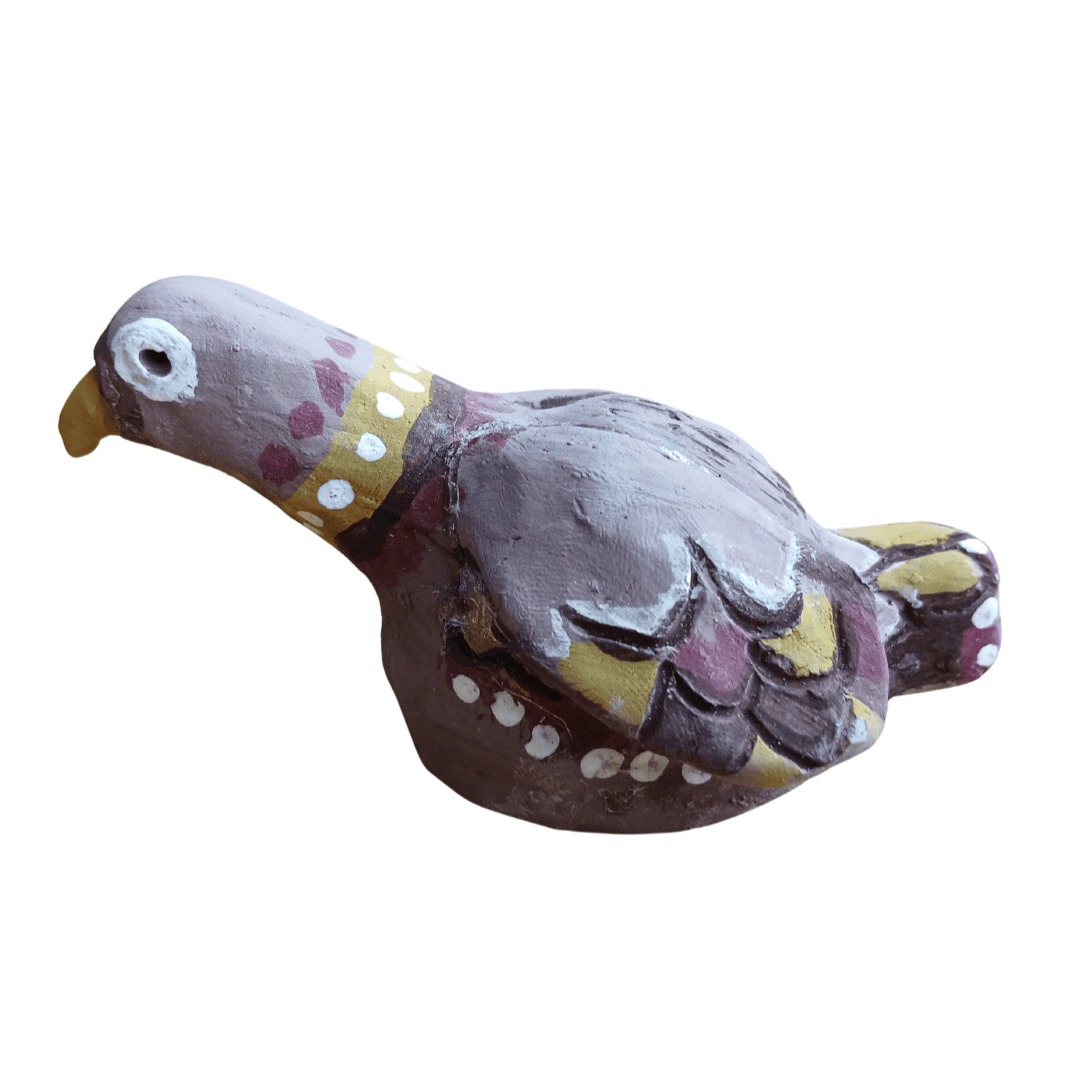
How does the whistle work?
When you blow into the whistle, the air rushes through a tiny tunnel, hits a sharp
edge, and starts to oscillate, creating sound waves. Those sound waves tumble around the
resonating chamber and then come out as the whistle sound you hear!
For trouble-shooting or if you’re struggling with written instructions why not watch this YouTube tutorial on how to make a clay whistle.
Top tips for joining Clay Whistle Pieces!
To make sure the different parts of your clay whistle stick together firmly, score and slipyour joints:
Score: Use a toothpick to gently scratch criss‑cross lines on both surfaces you want to join.
Slip: Add a tiny bit of water to make the clay slightly sticky.
Join: Press the two scored areas together and smooth
the seam. This helps the clay bond properly so your whistle stays strong as it dries.
Younger children may need help from an adult and should be supervised whilst using a wooden knife.
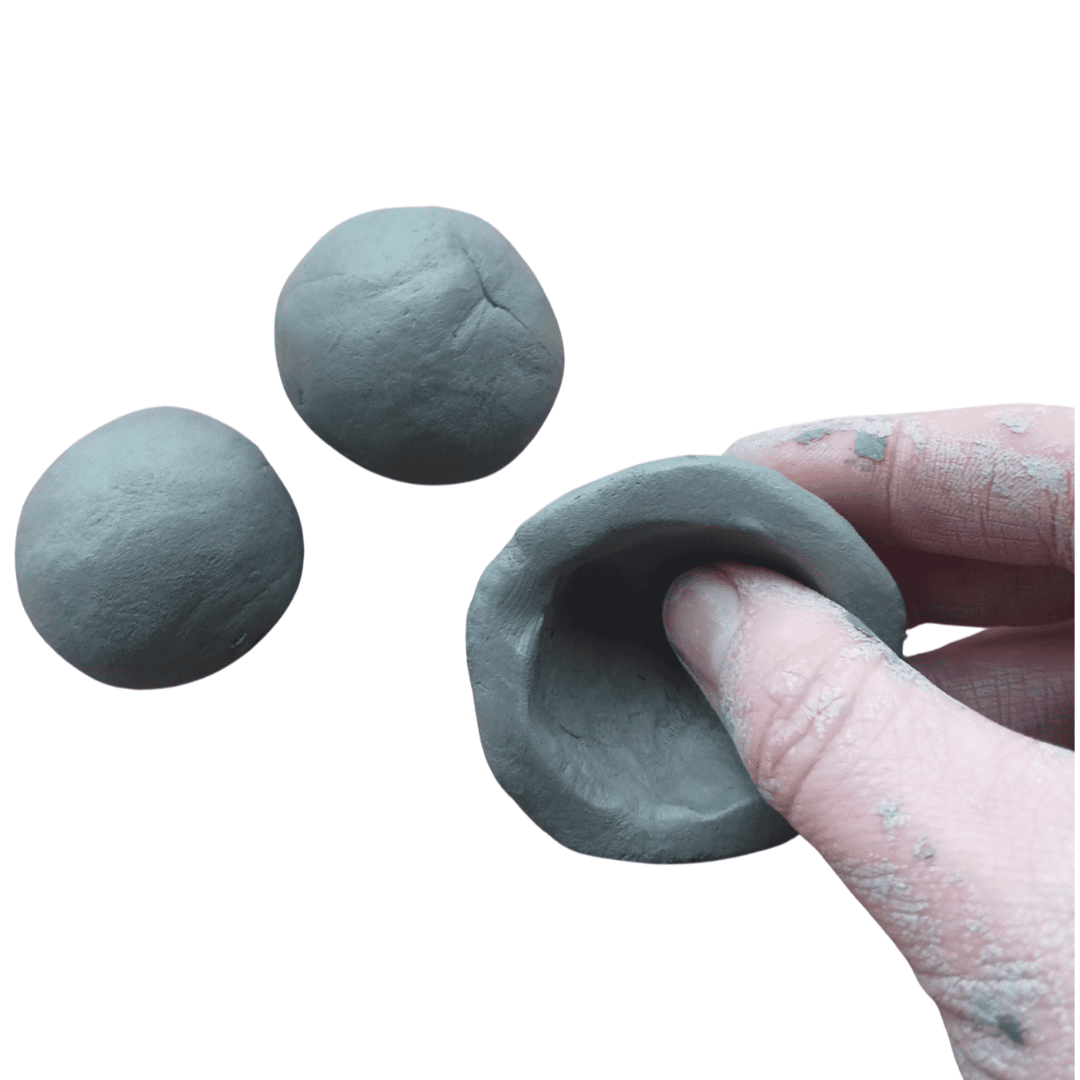
Step 1
Shape the pinch pot: Take one ball of clay. Use your thumb and fingers to make a pinch pot with walls at least 3mm thick. This hollow space will become the whistle’s air chamber- so keep it even and don’t let the walls get too thin.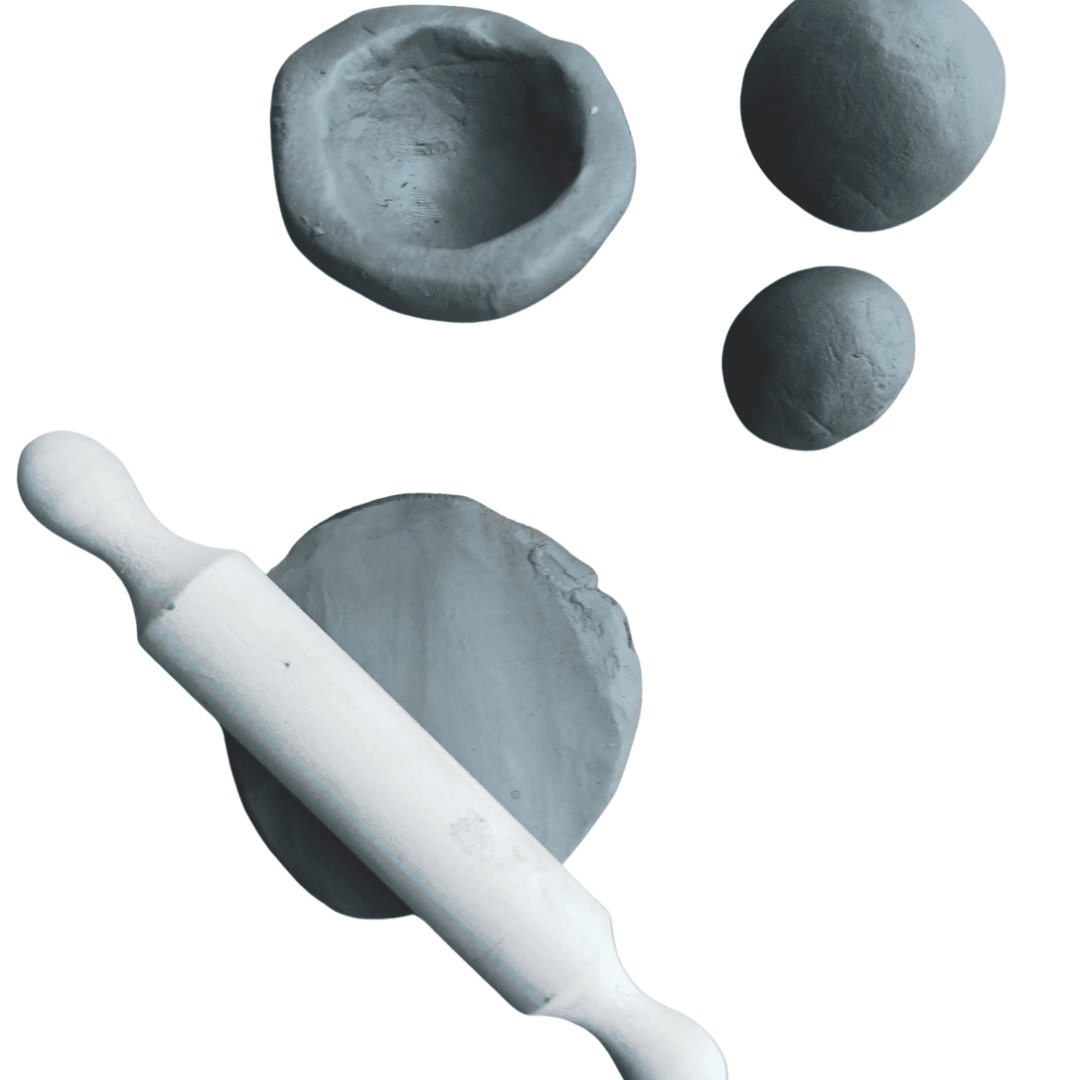
Step 2
Create the base: Take a second ball of clay and split it in half. Put one half aside for later. Roll the other half into a flat disc, again at least 3mm thick.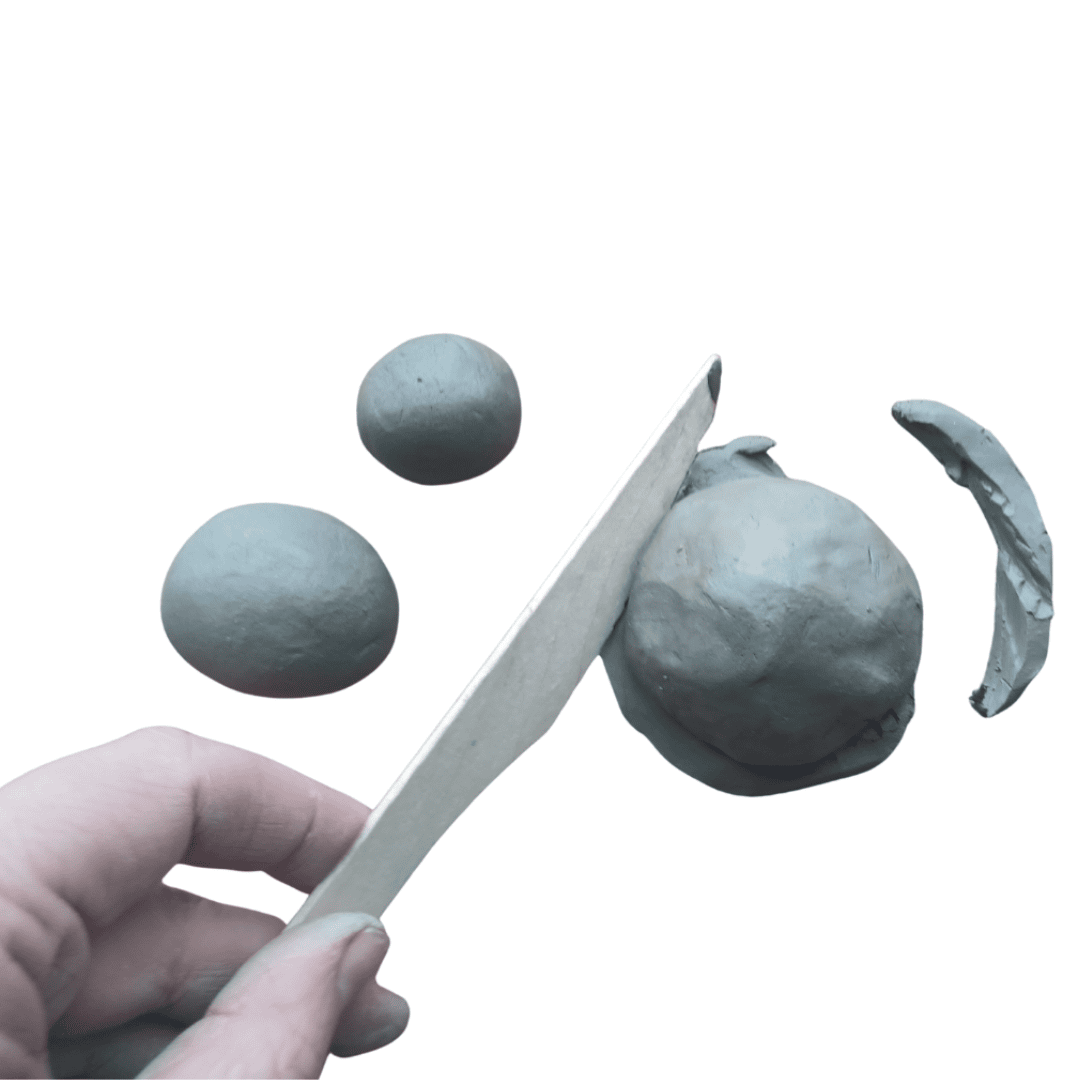
Step 3
Join the two pieces: Place your pinch pot upside‑down on top of the clay disc — it should look a bit like a tortoise shell. Use your knife to trim away the extra clay around the edges. Carefully smooth the two pieces together with a lollipop stick or your fingers.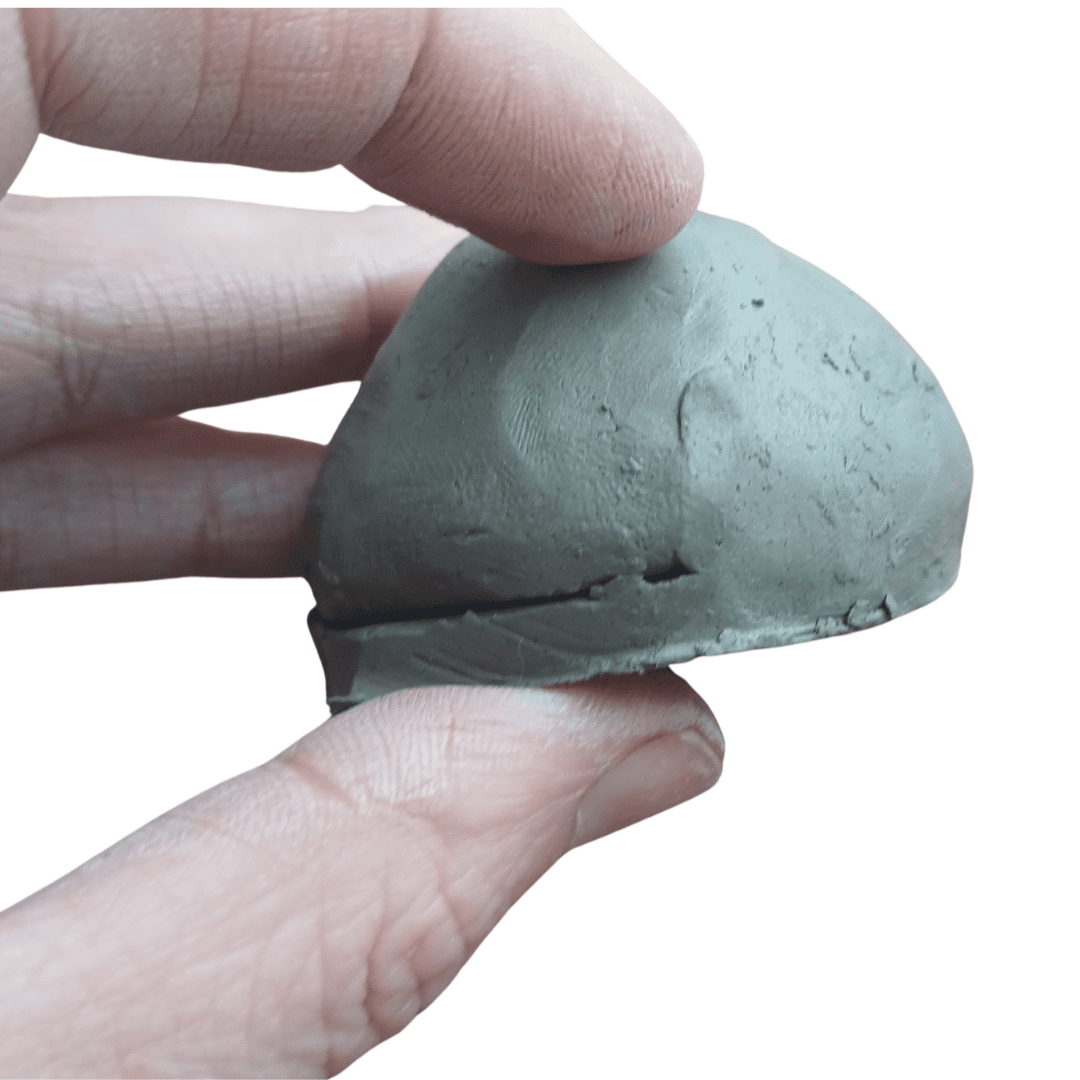
Step 4
Important: Keep the inner chamber intact. Don’t press so hard that you collapse the hollow space inside.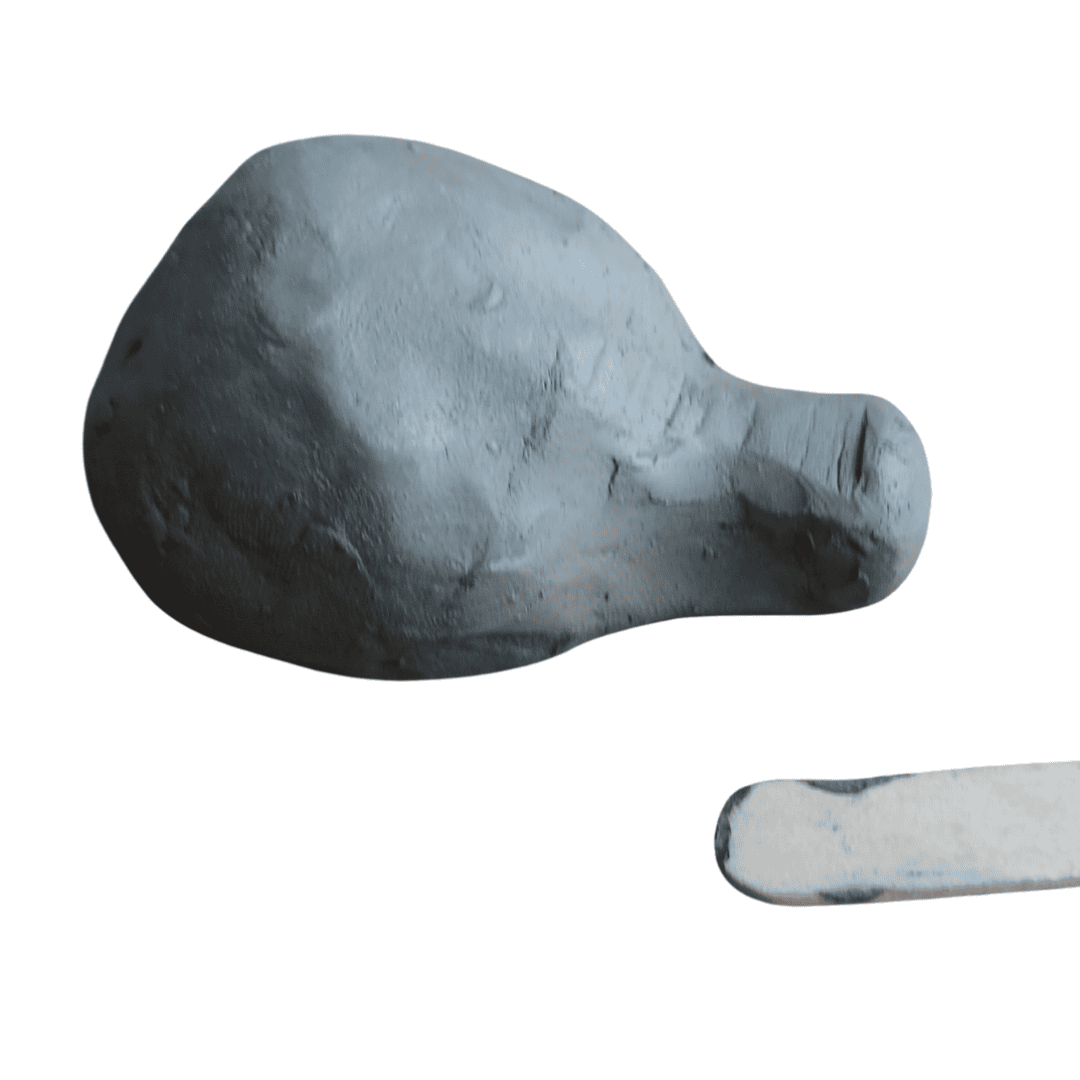
Step 5
Make the Mouth Piece: Use the half‑ball of clay you set aside to form the bird’s tail, which also becomes the mouthpiece. Split it in half again, roll it into a ball, and shape it into a wedge‑shaped tail that’s thick enough to hold the airway. Line it up with the base of the whistle body and join it gently. Remember: Keep that inner chamber intact! Don’t let your clay whistle stick to the surface you’re working on. See our top tips for joining.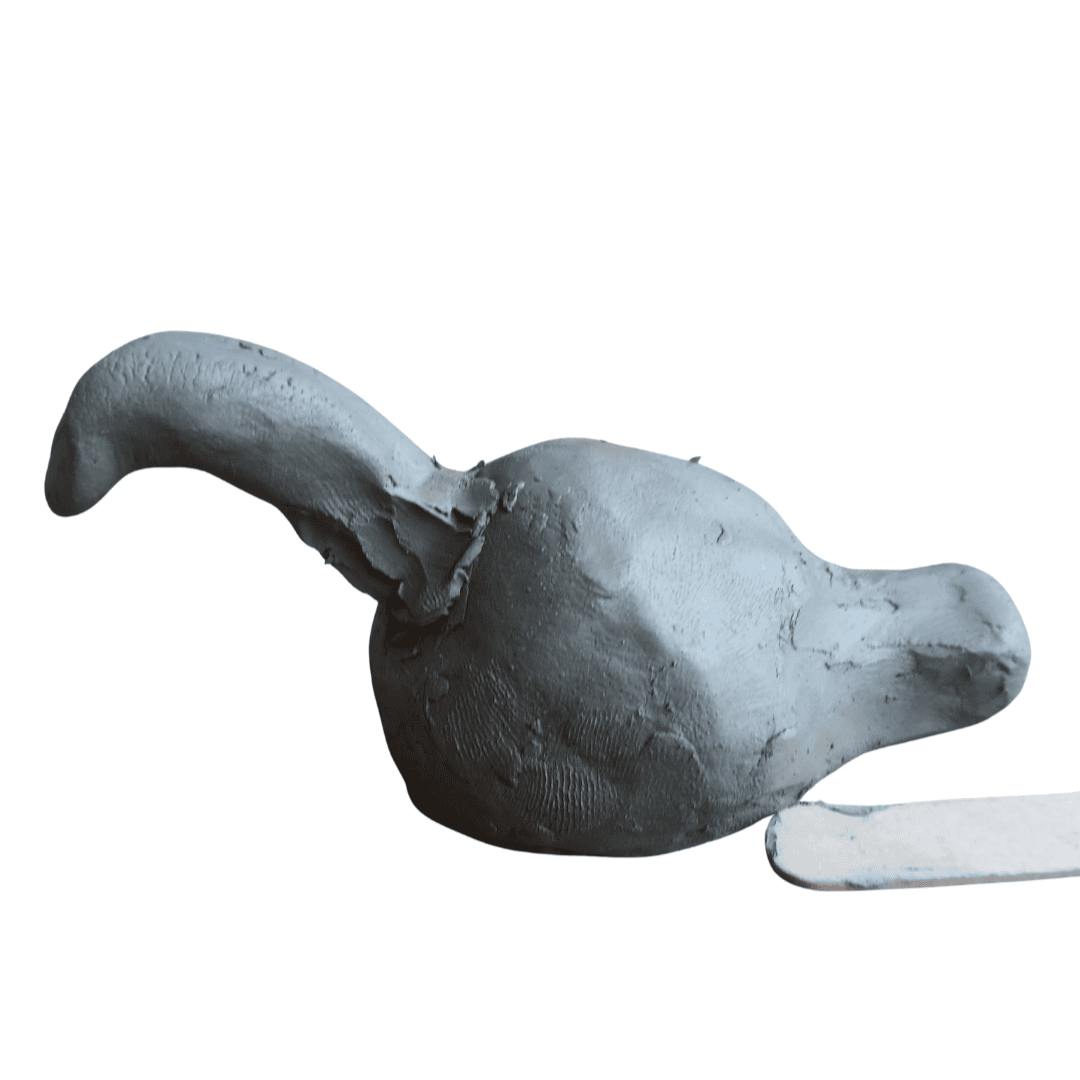
Step 6
Attach the Neck and Head: Roll some of the remaining clay into a small cone for the neck and head, then bend the tip to make the beak. Cut a 45° wedge from the base so it fits neatly onto the body. Press the neck onto the whistle and smooth the join with your fingers or a lollipop stick. If the clay feels dry, dab on a tiny bit of water to help it blend. Add a little extra clay if the neck needs more support.
Step 7
Make the Whistle (Tricky part!) Push a lollipop stick horizontally through the tail (mouthpiece) until it reaches the body chamber. Leave it in place — letting the clay firm up for a few minutes can make the next step easier.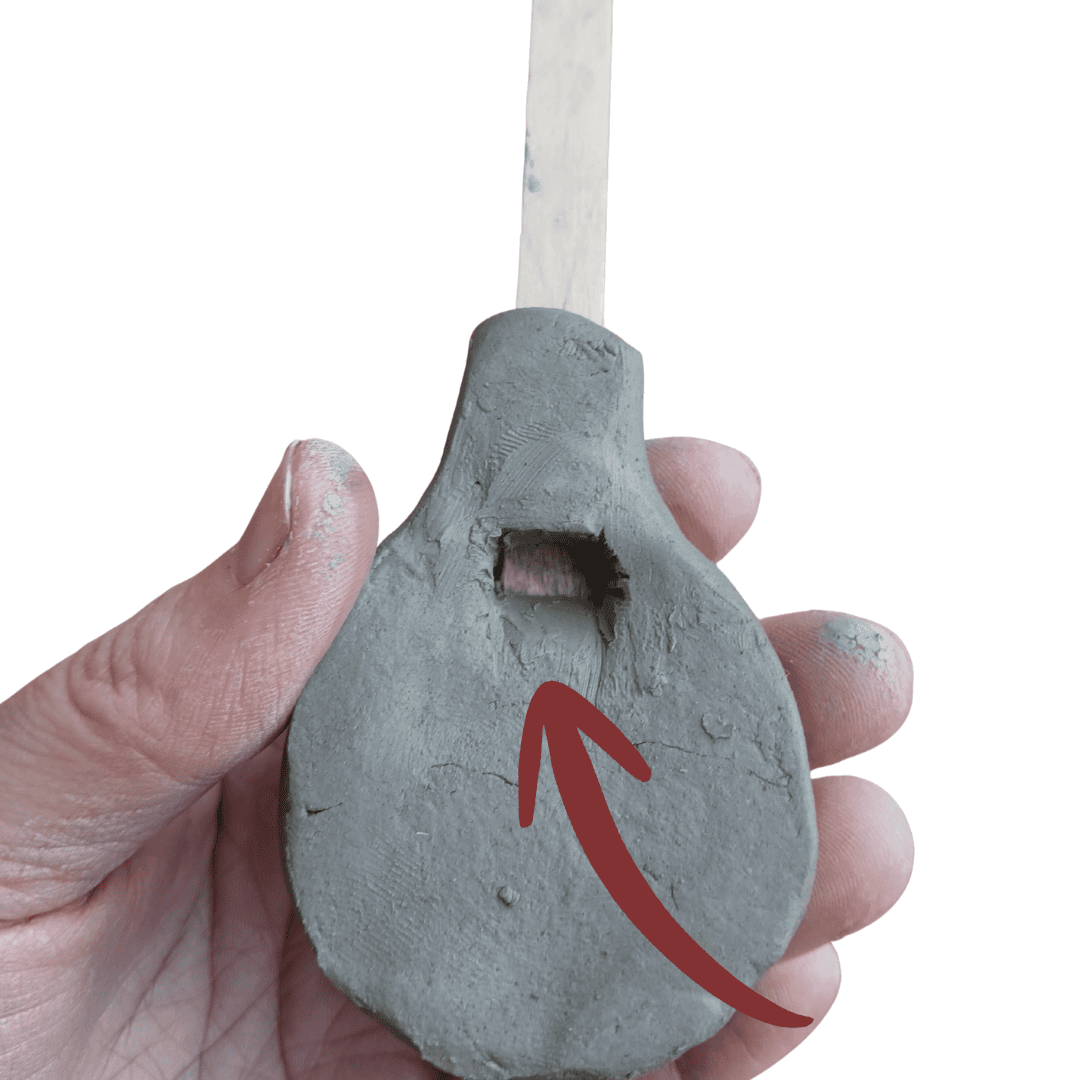
Step 8
Slide the squared‑off lollipop stick under the body at a 45° angle towards the tail until it touches the first stick. Make a small opening here using your knife, then tidy the edges with the end of your metal teaspoon.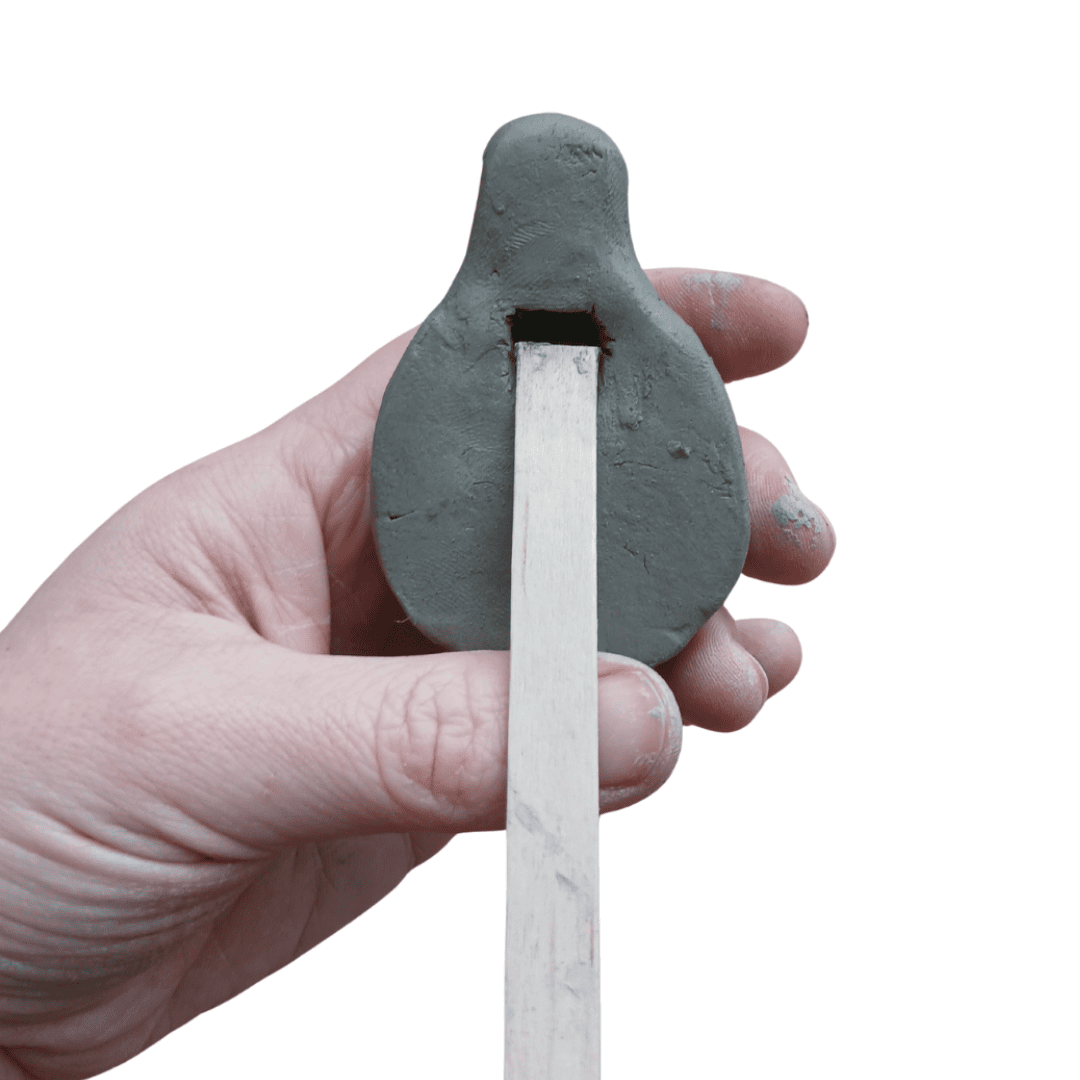
Step 9
Carefully remove both sticks, making sure the airway stays open and the angled hole is still sharp. Blow through the mouthpiece to test it. If it doesn’t whistle, reinsert the sticks and clean up the edges again.