A rectangular structure made from biscuits and marshmallows representing an Roman fort

Make an edible Roman fort

Learn about the fascinating archaeology of Roman forts and have a go at creating your own edible version from biscuits and sweets!

The Romans invaded Britain in 43AD and the building of military forts was key to establishing their control. Forts were where soldiers would live, train and where important military decisions were made. Sometimes a fort would later grow a colonia (civilian settlement) beyond its walls where non-military people would live and work, providing food and resources for the army. Some of these forts and their surrounding settlements are still towns today, such as York, Lincoln and Chester. Other forts did not spawn large towns but were positioned defensively along Hadrian’s Wall for military operations.

Roman forts in Britain usually had the same features such as a distinctive rectangular shape resembling a playing card, barrack blocks where soldiers would live and a principia or headquarters building at the centre. Many forts are still visible above-ground today and are exciting visitor attractions, whereas others are not visible or only partially visible. In recent years archaeologists have used technologies such as Ground Penetrating Radar (GPR) to detect the remains of Roman forts underground without having to dig.

This activity was inspired by Humber YAC who enjoyed learning about their own local Roman fort of Petuaria (Brough) and recreated it in edible form!

Warning: adult supervision required when using cocktail sticks or knives. Keep cocktail sticks away from eyes.

A selection of drawings and images of an archaeological Roman fort laid on a wooden table with a pencil

Step 1

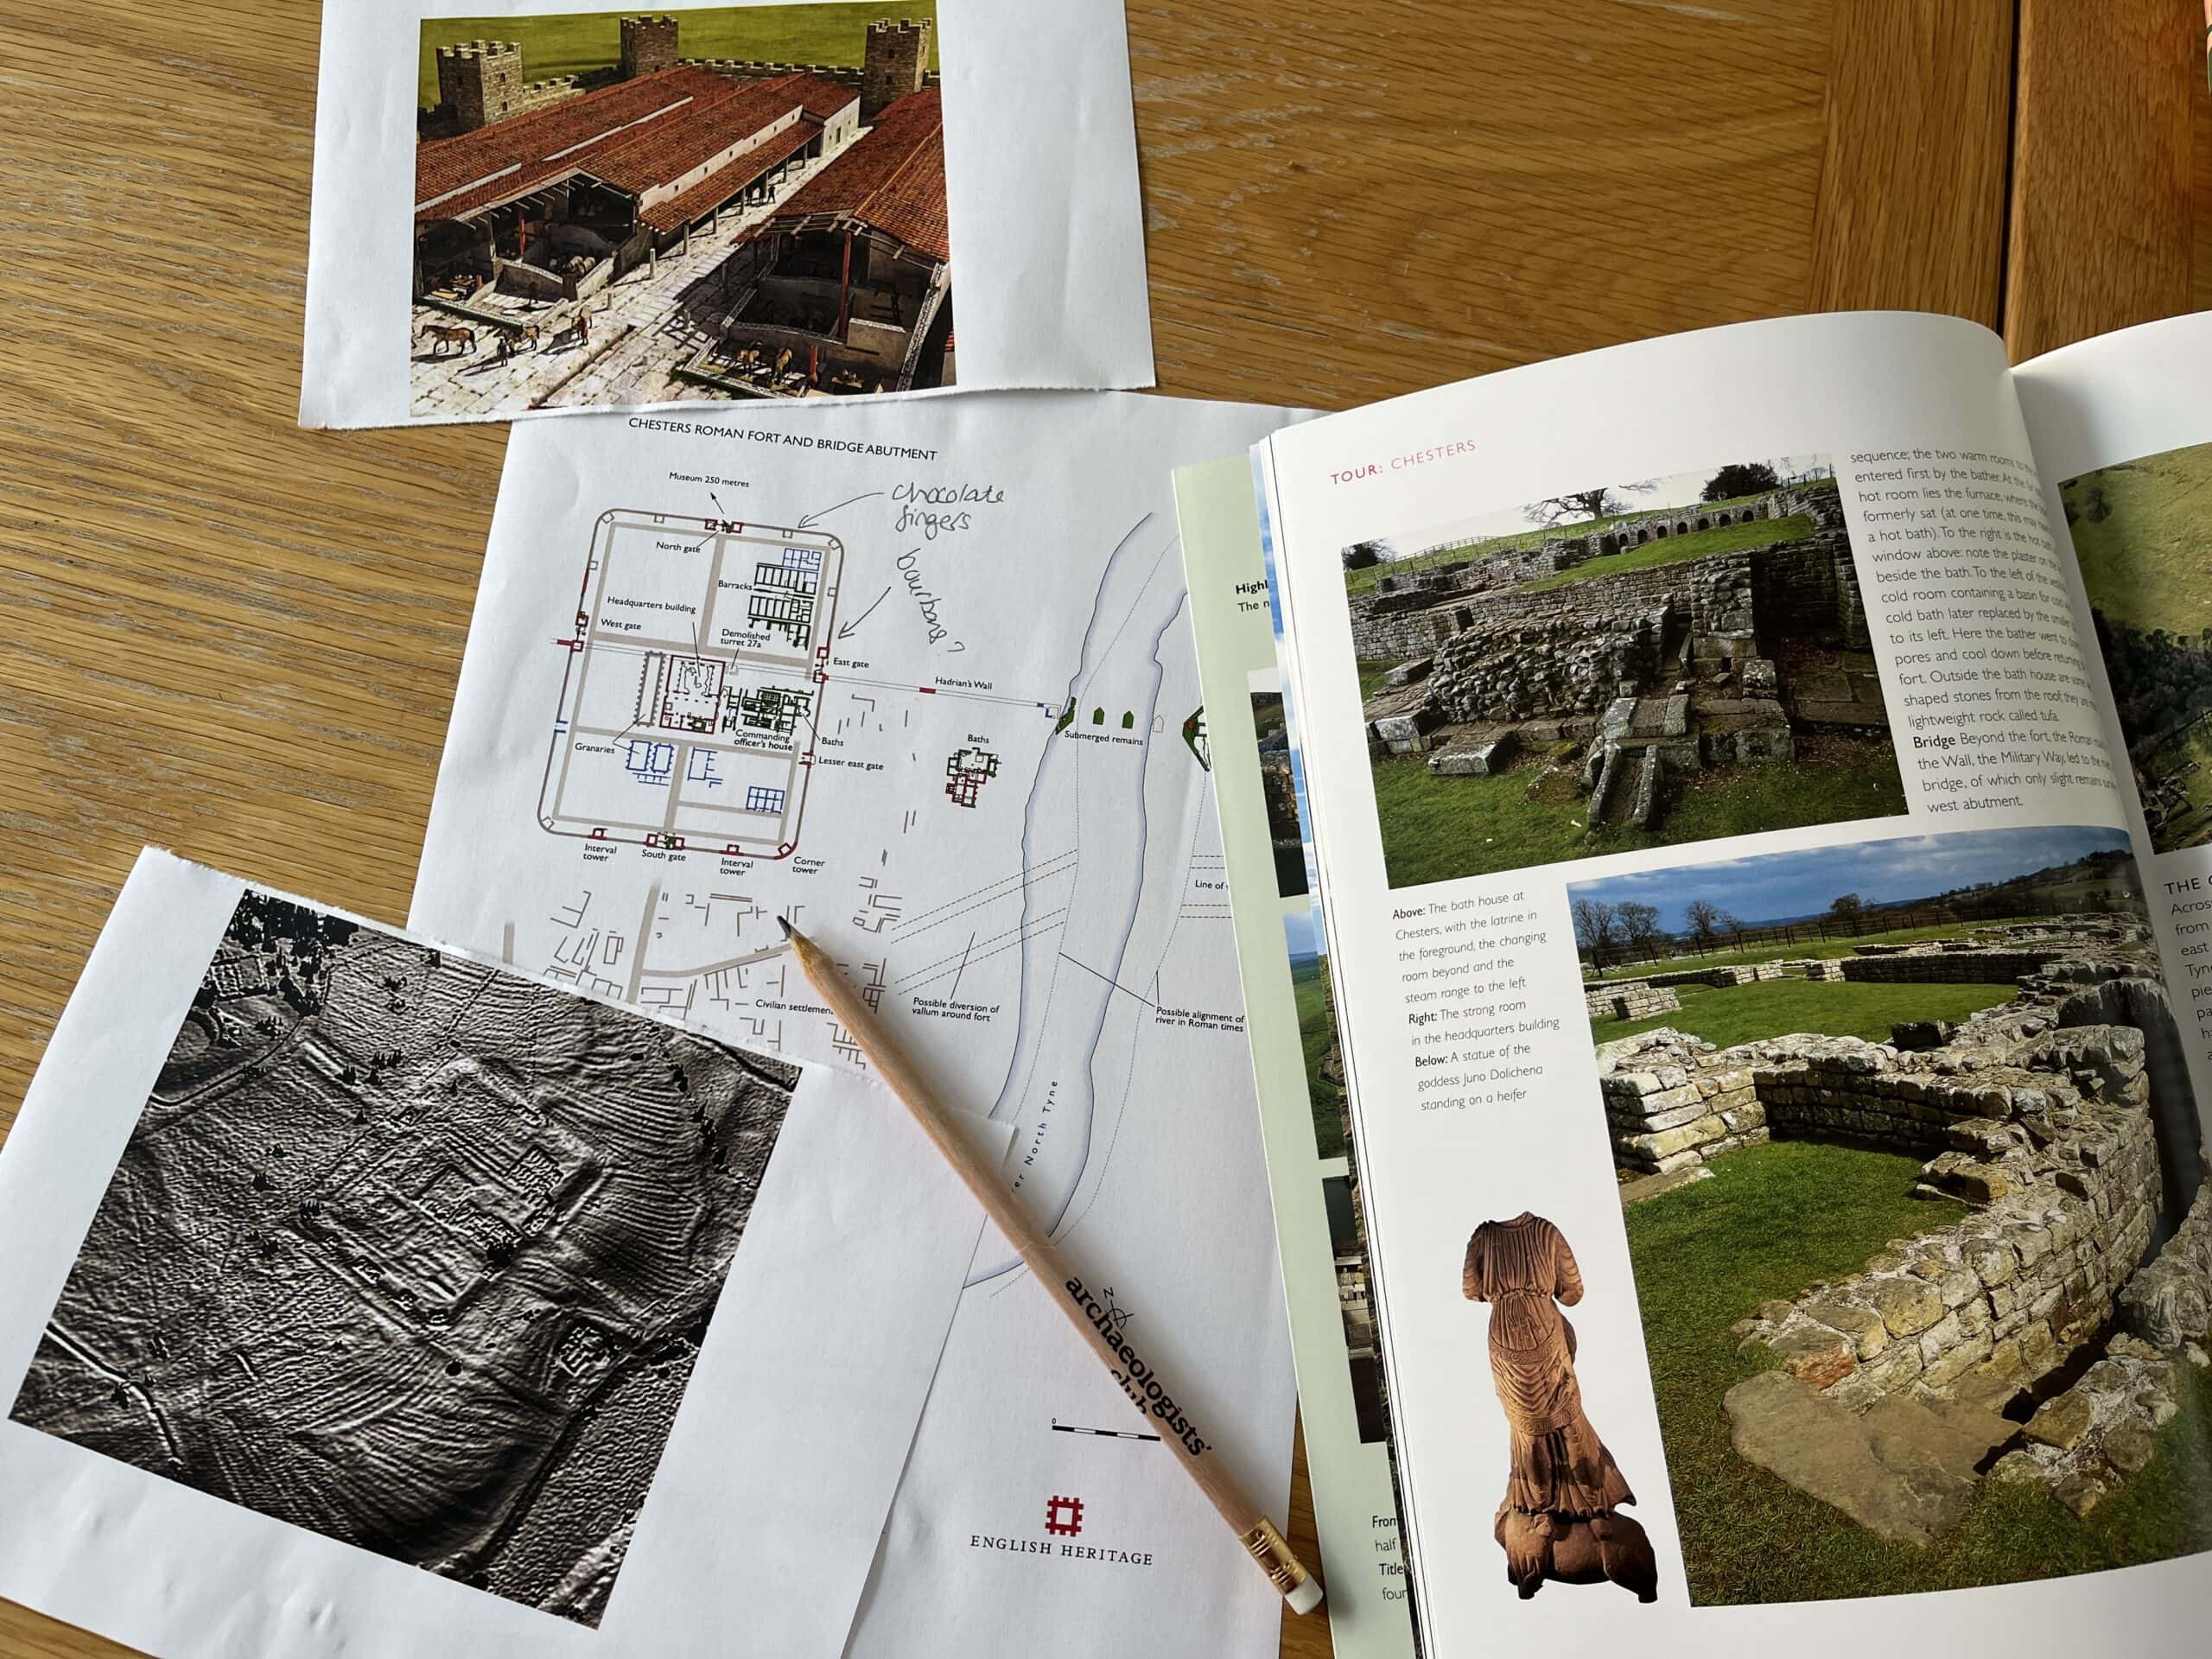
Plan out your Roman fort. You could base your edible version on a real fort, or make up your own! Ours was inspired by Chesters Roman Fort, which was one of 16 forts along Hadrian’s Wall and is now looked after by English Heritage. We looked at drawings, photographs and even LiDAR images to learn about the different entrances to the fort and the buildings within.
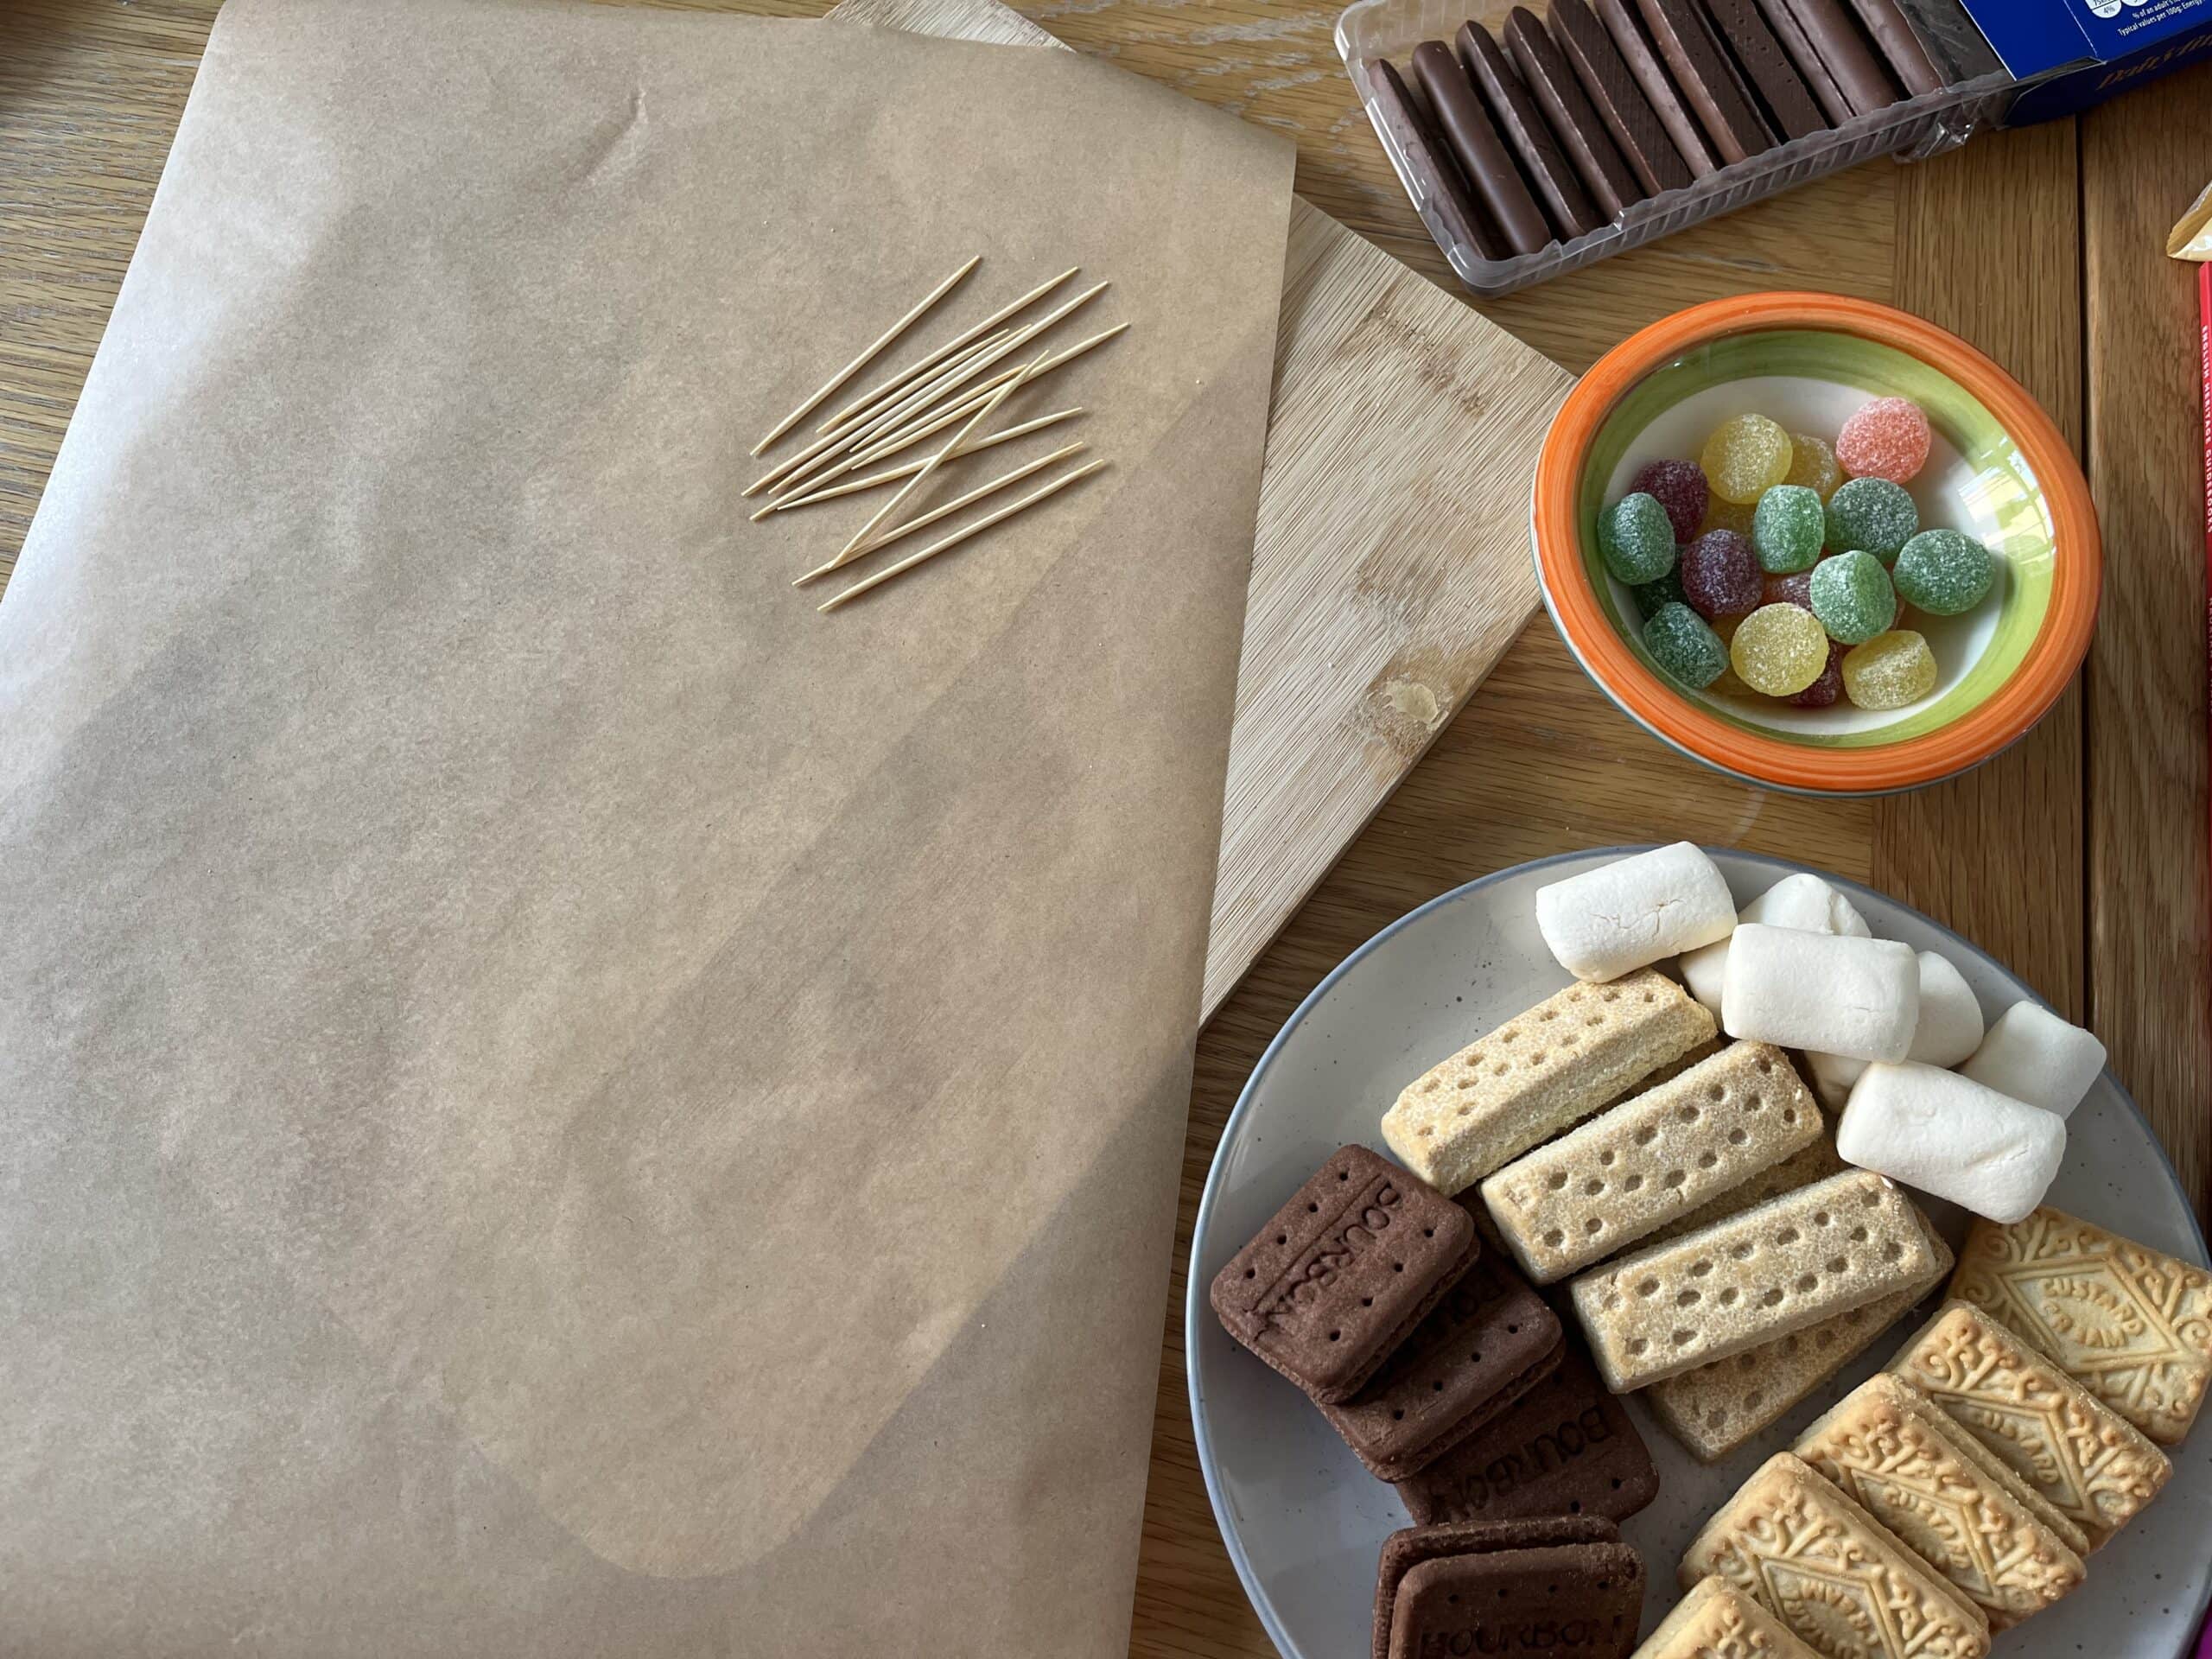
A sheet of greaseproof paper laid over a wooden chopping board, next to a plate of biscuits and a small bowl of colourful sweets

Step 2

Cut a large piece of greaseproof paper and lay it over your rectangular chopping board, cake board or tray. We found it helpful to stick it down with some spray-oil so it didn’t slide around.
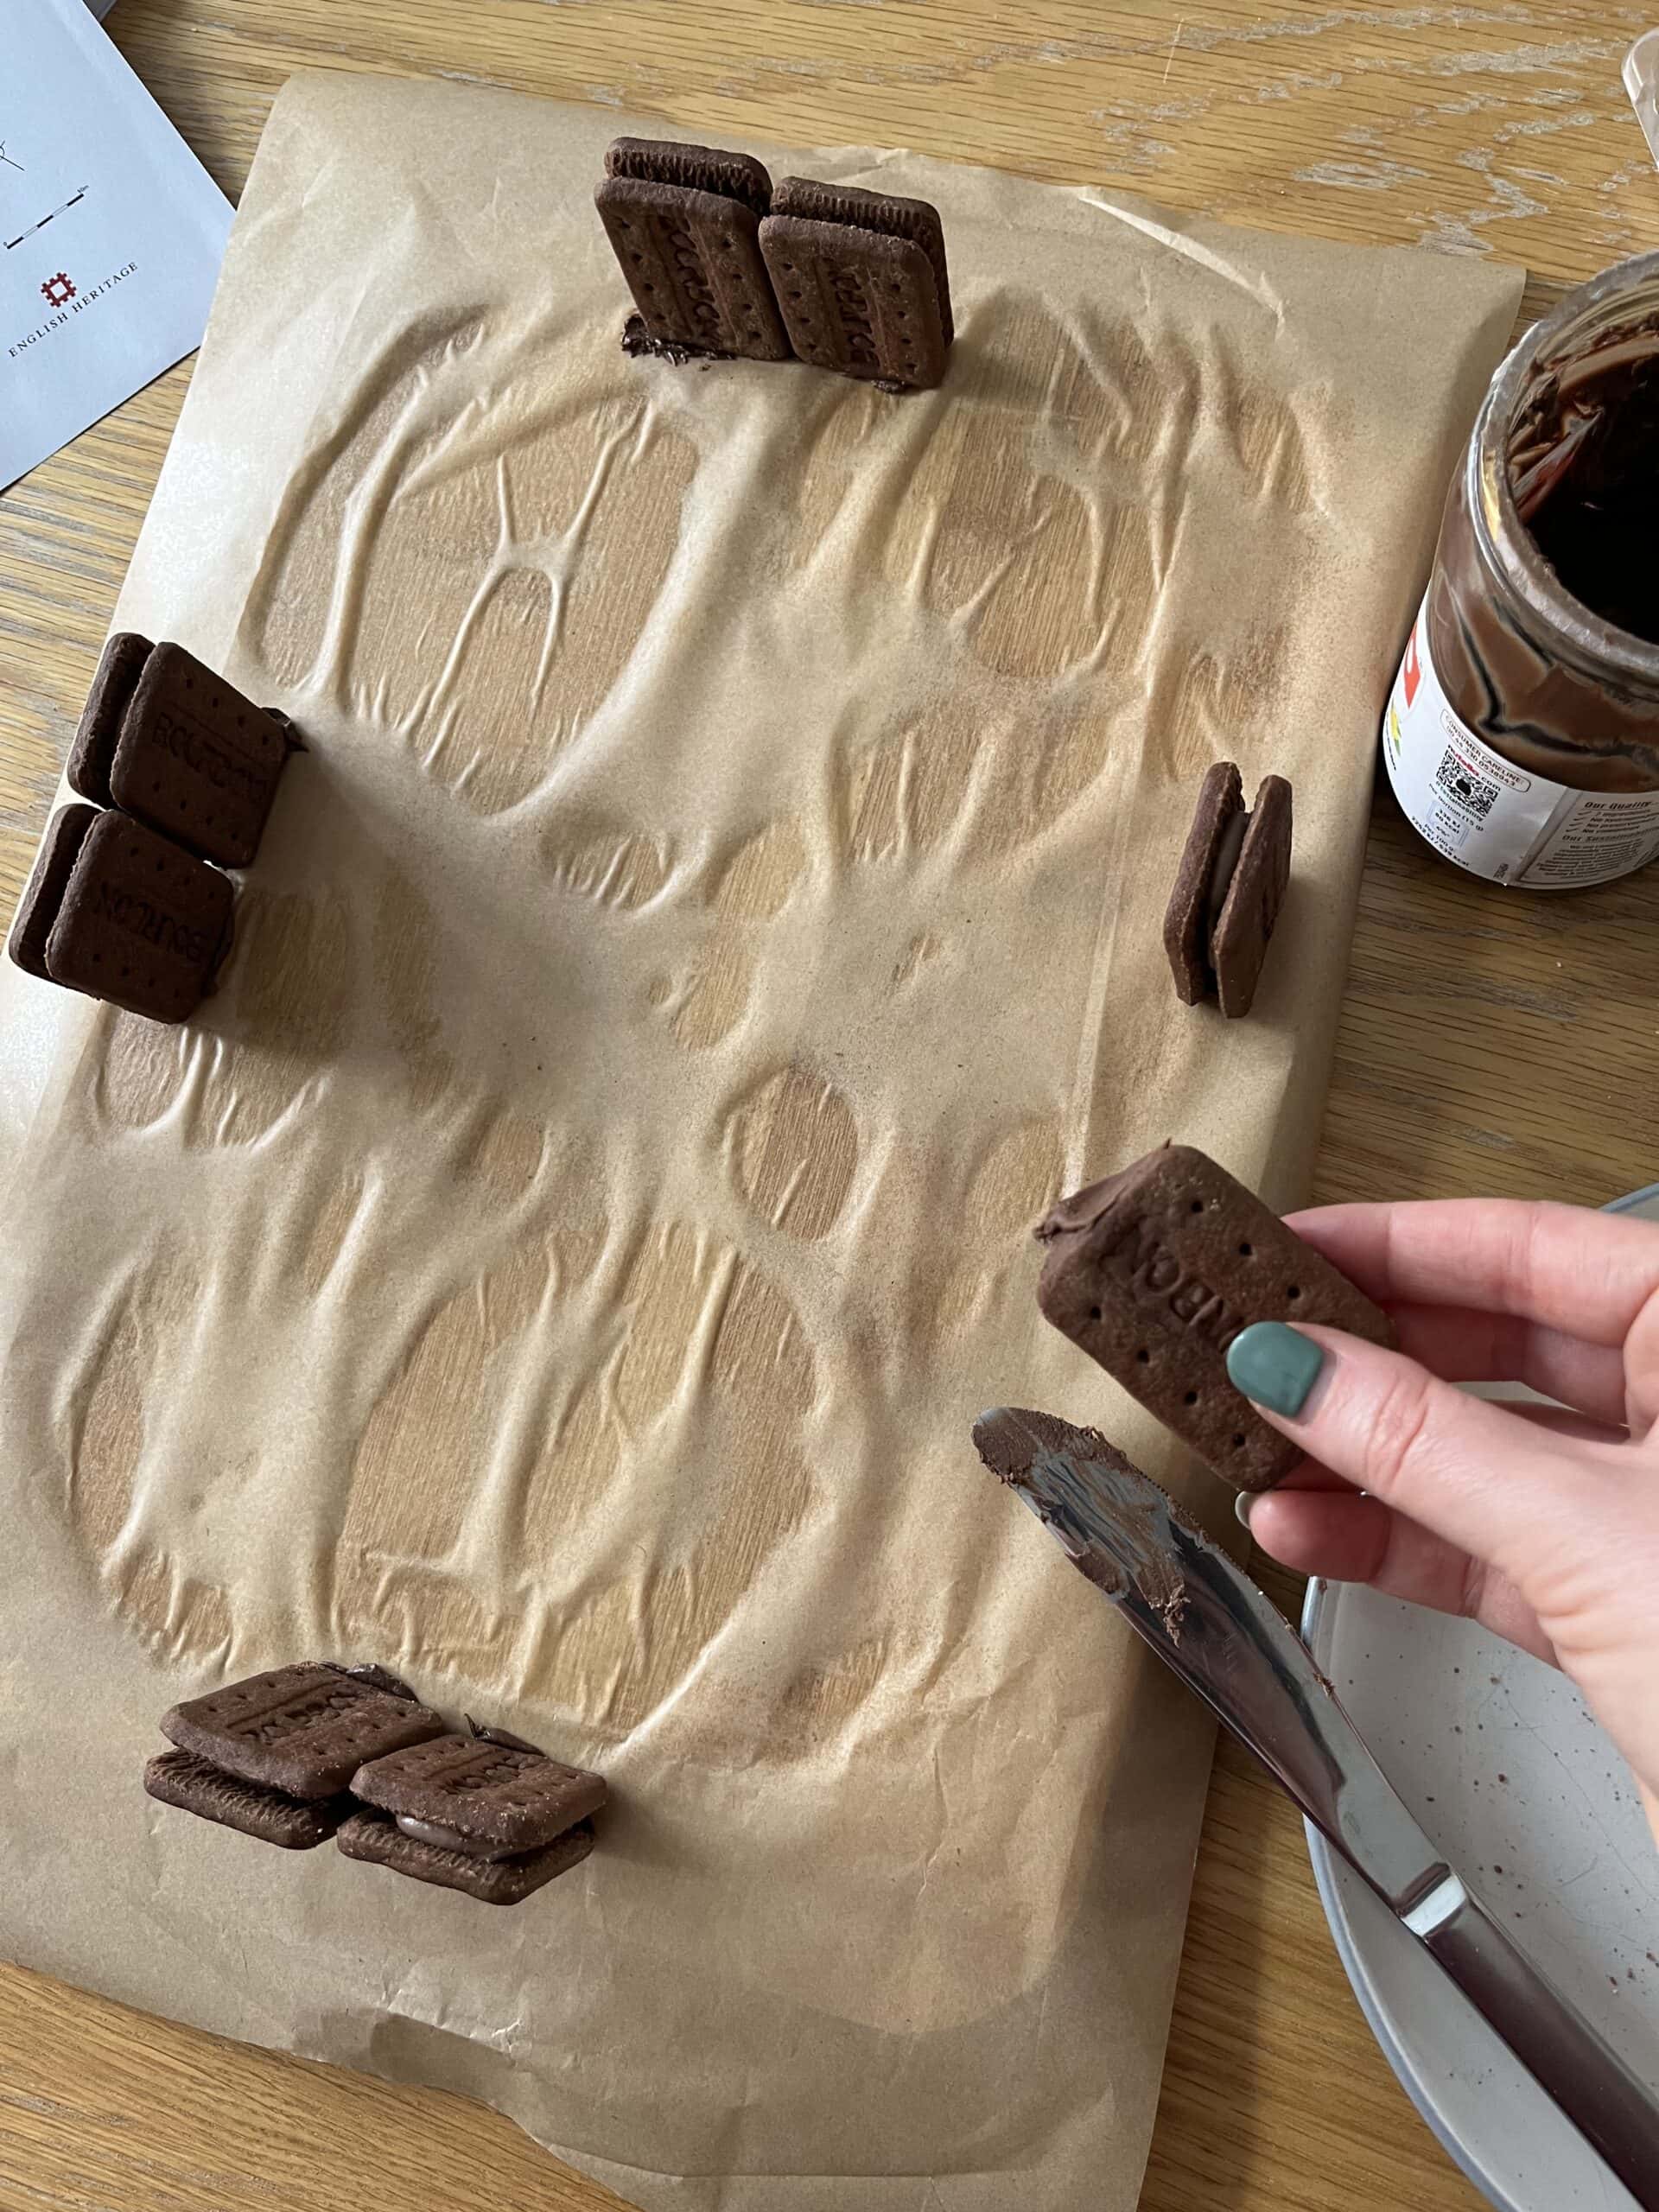
Four pairs of bourbon biscuits stuck upright onto a wooden chopping board covered with brown paper, next to a jar of chocolate spread.

Step 3

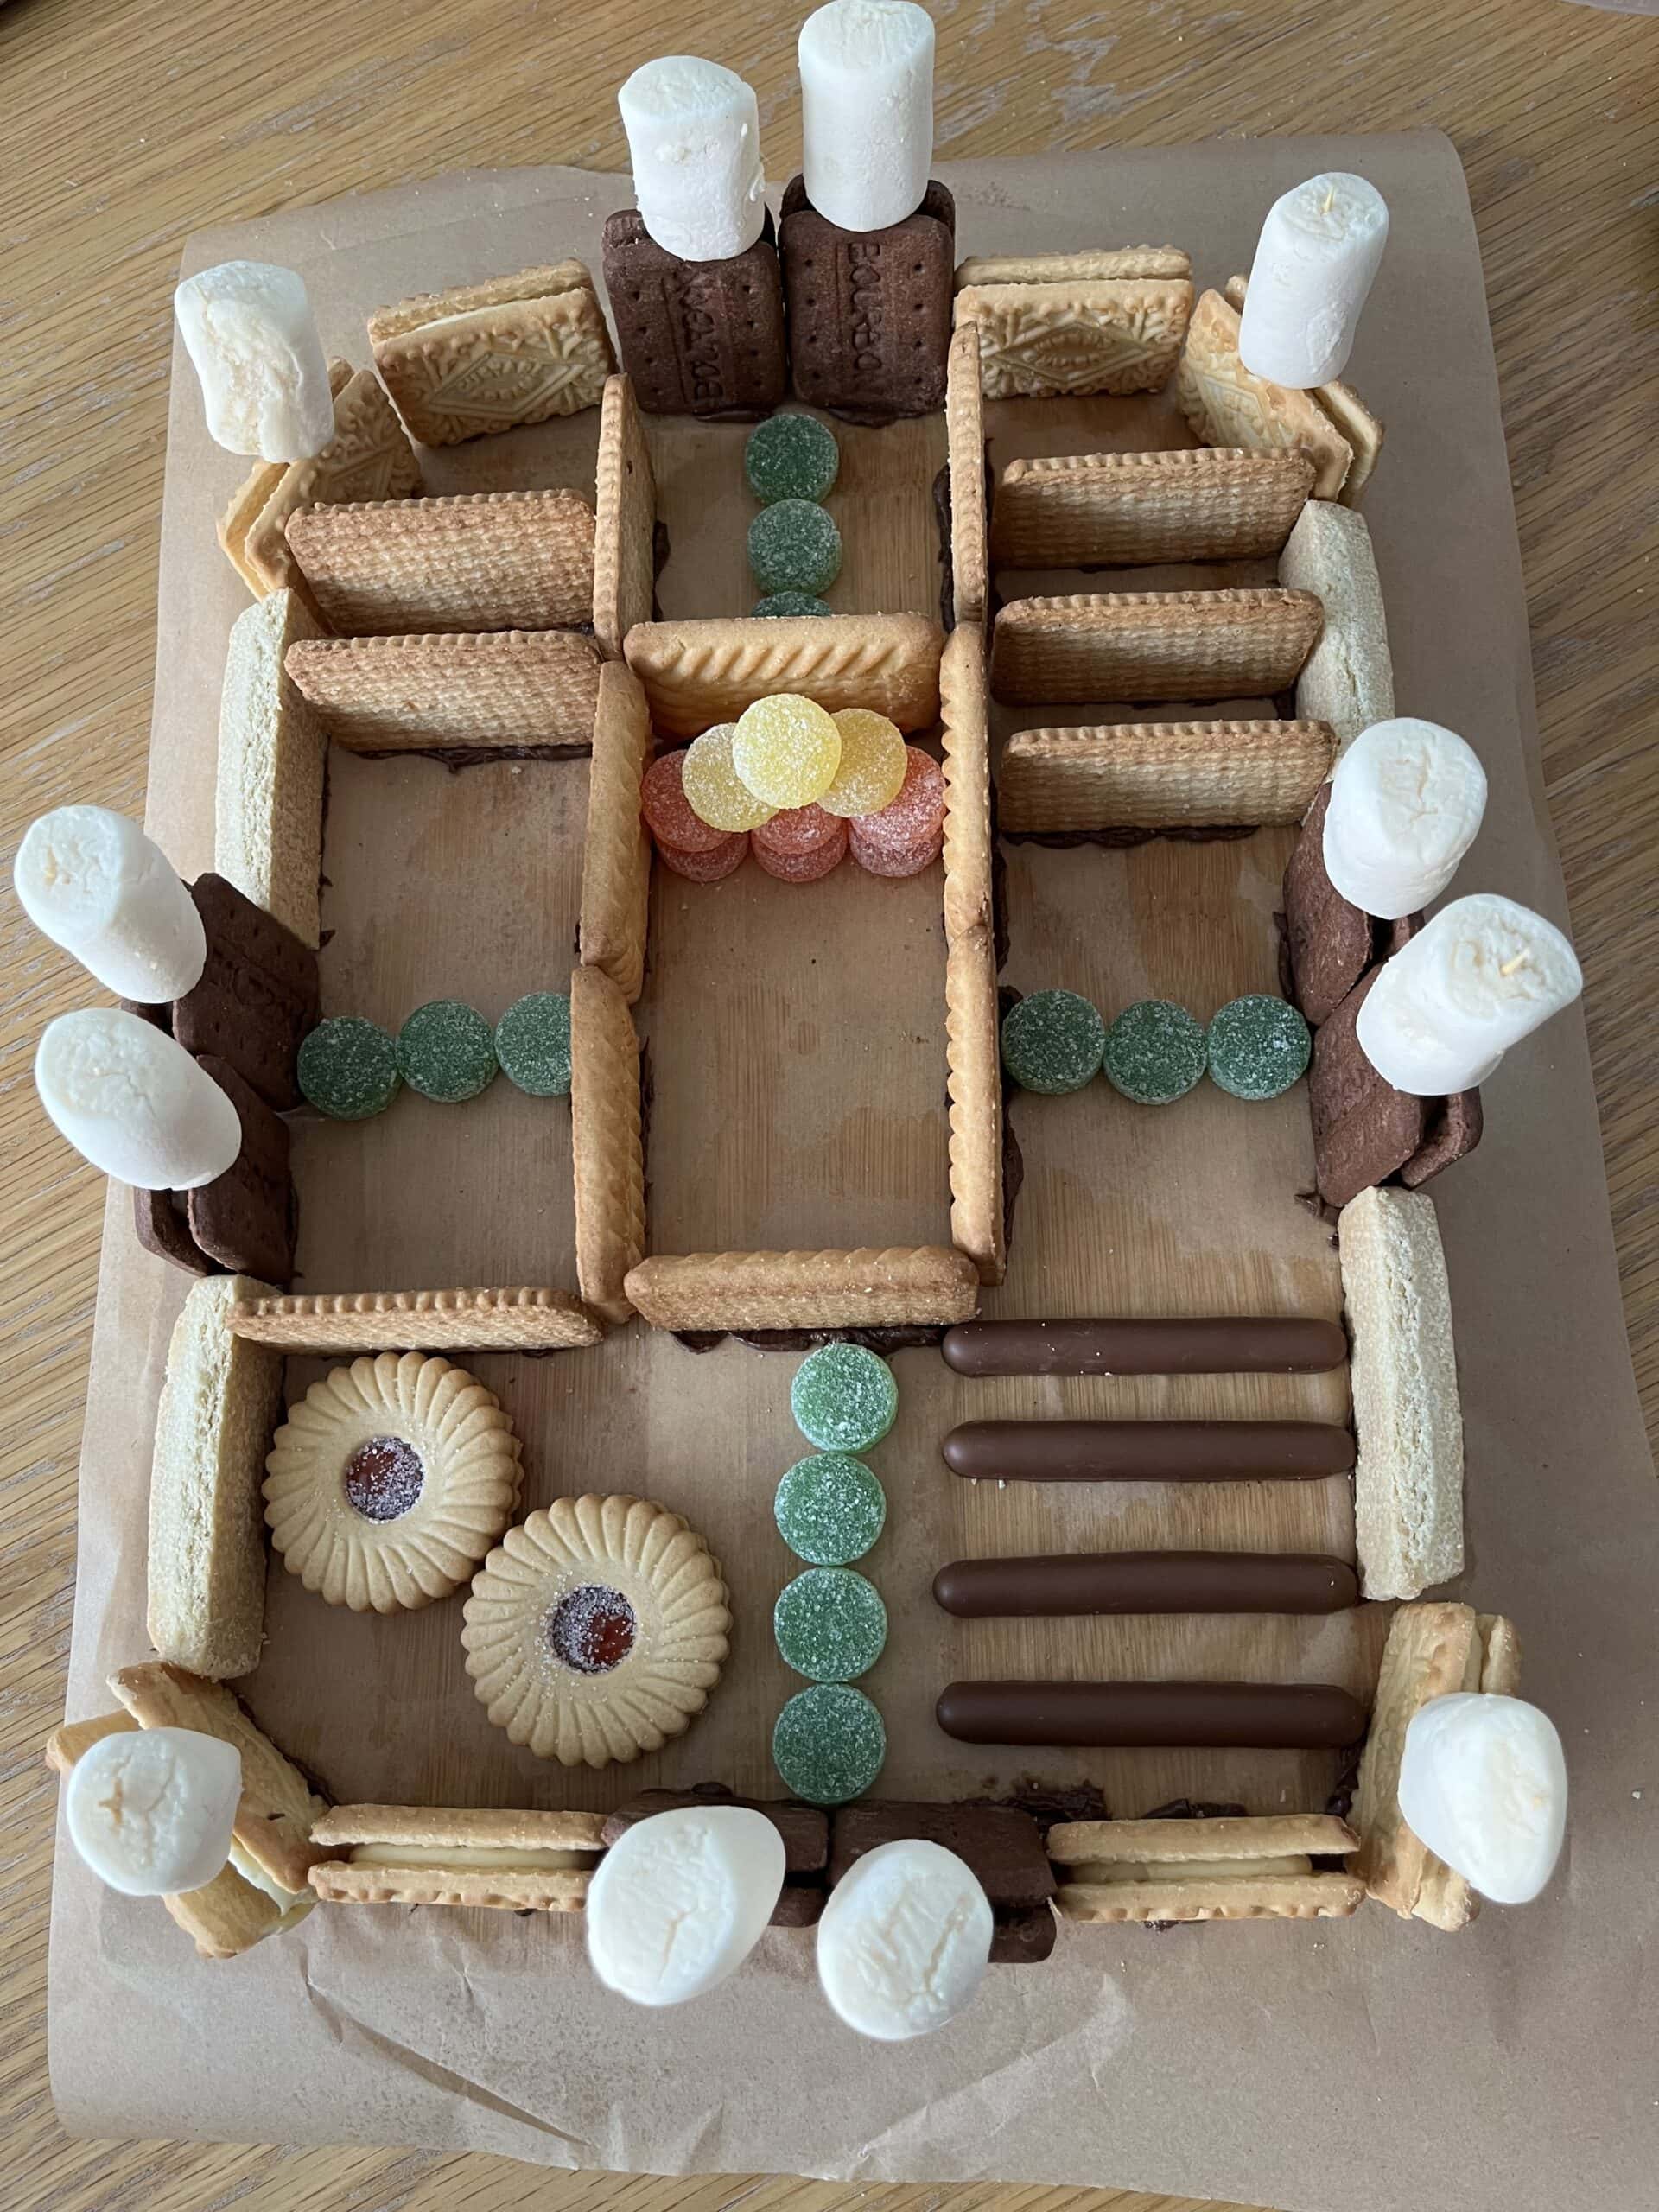
Start with creating the gates to your fort. Many forts such as Chesters Roman Fort had four main entrances positioned north, south, east and west. Position pairs of sandwich biscuits small-edge down to represent the gates to your fort. Stick them down with a little chocolate spread along one of their edges.
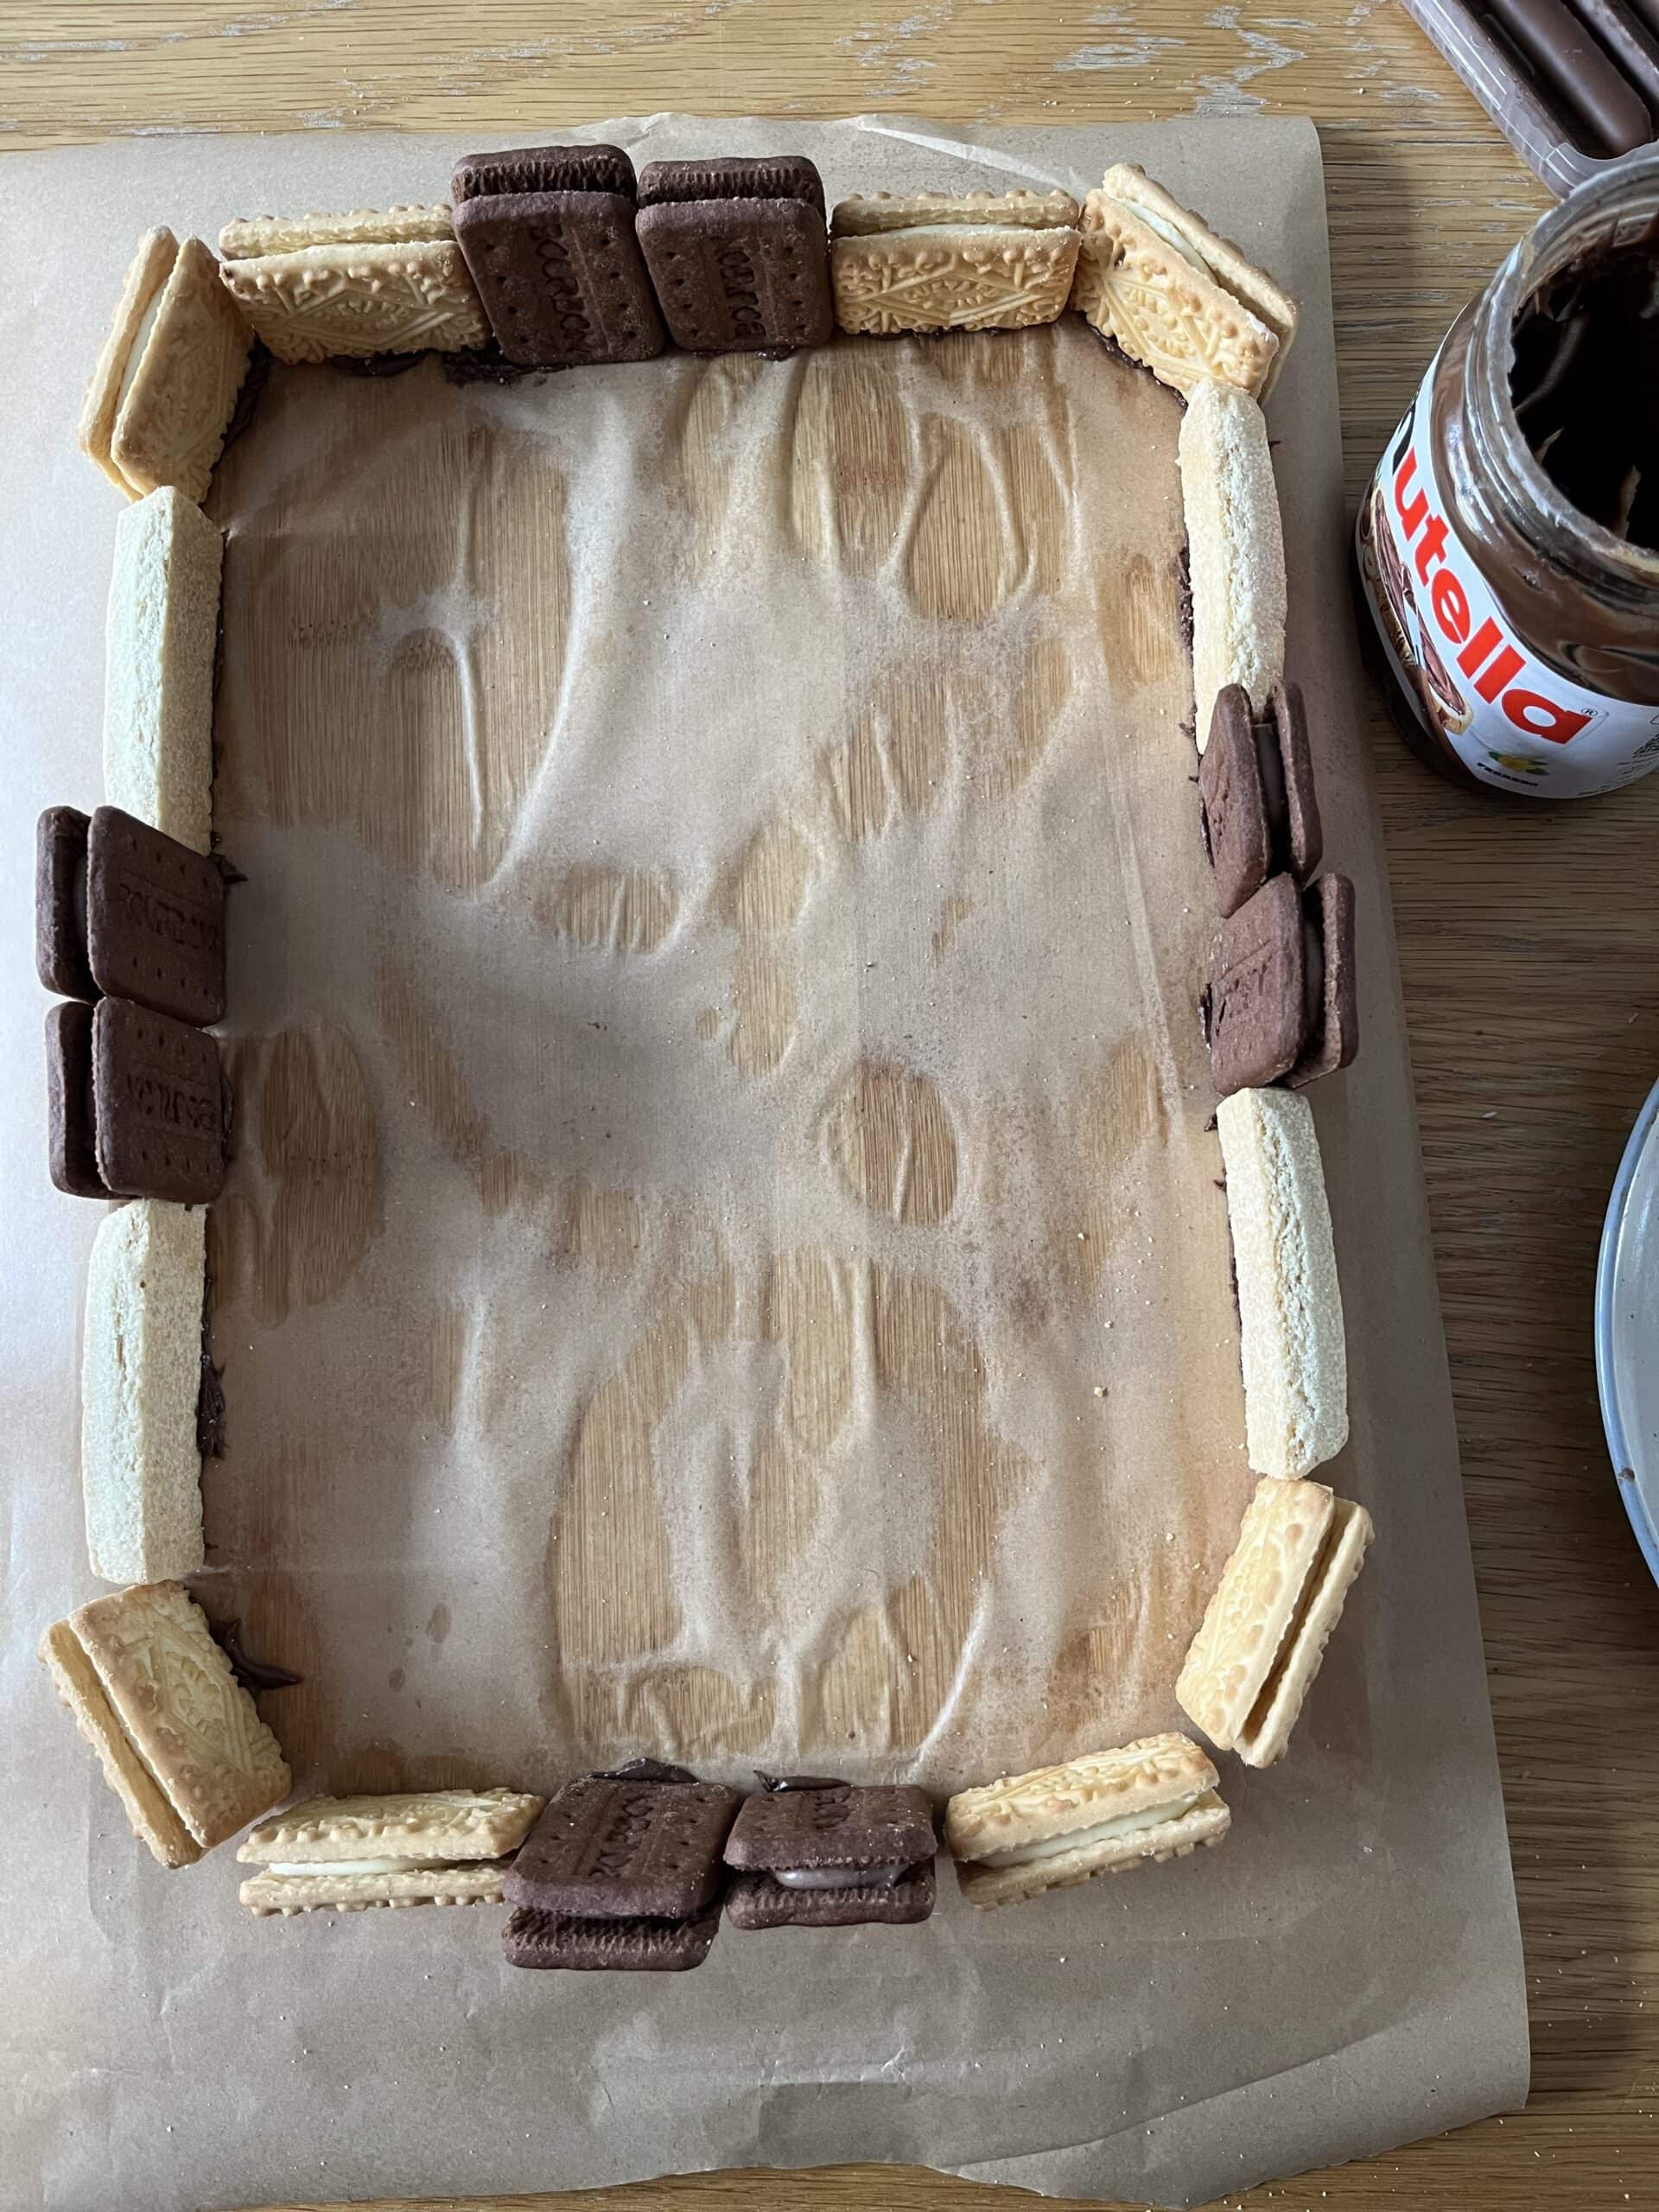
Biscuits arranged in a rectangular shape next to a jar of chocolate spread

Step 4

Now that you have the gates to your fort in place, create the walls of your fort with some thick rectangular biscuits such as shortbread. Roman forts had a distinctive ‘playing card’ shape with slightly rounded corners so we used a pair of smaller custard creams to create this shape. Make sure all these biscuits are securely stuck on your base with more chocolate spread.
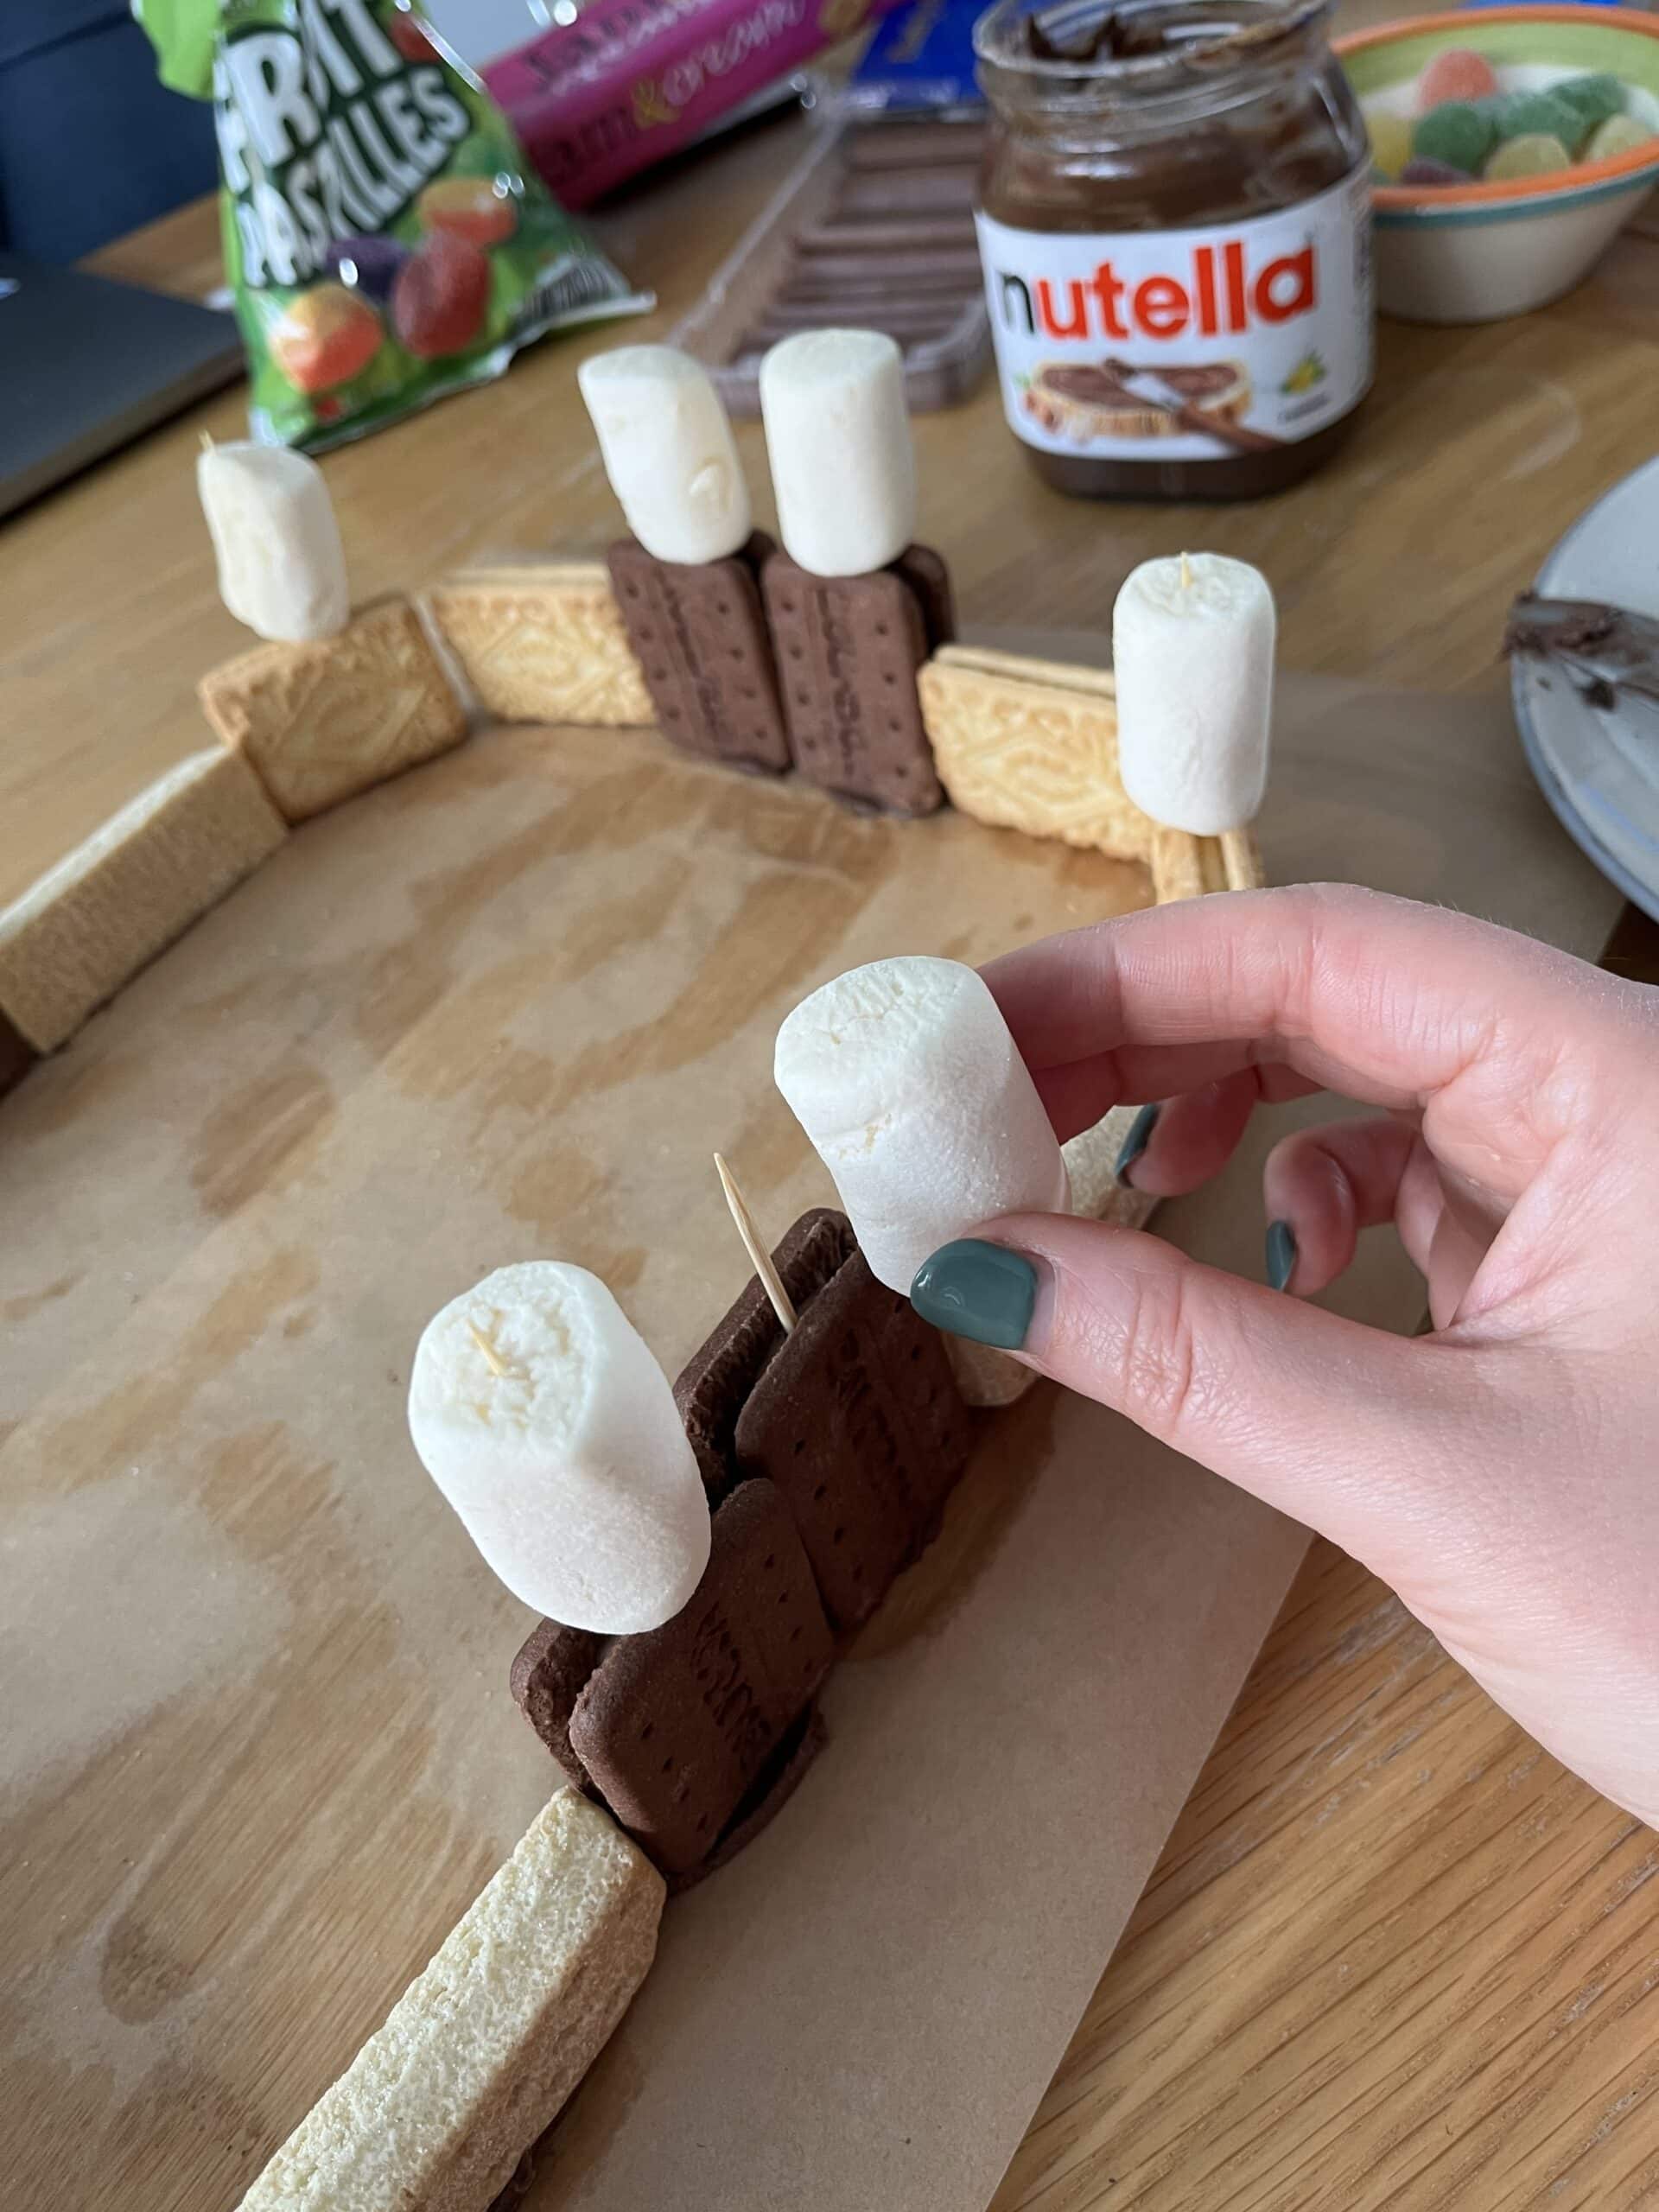
Large white marshmallows attached with cocktail sticks to the filling of sandwich biscuits, arranged in a rectangular shape to represent a fort.

Step 5

Next, it’s time to add some defensive watch towers to the outer walls of your fort. Carefully push a cocktail stick into the cream filling of your sandwich biscuits and then push some sweets or marshmallows on top to represent towers.
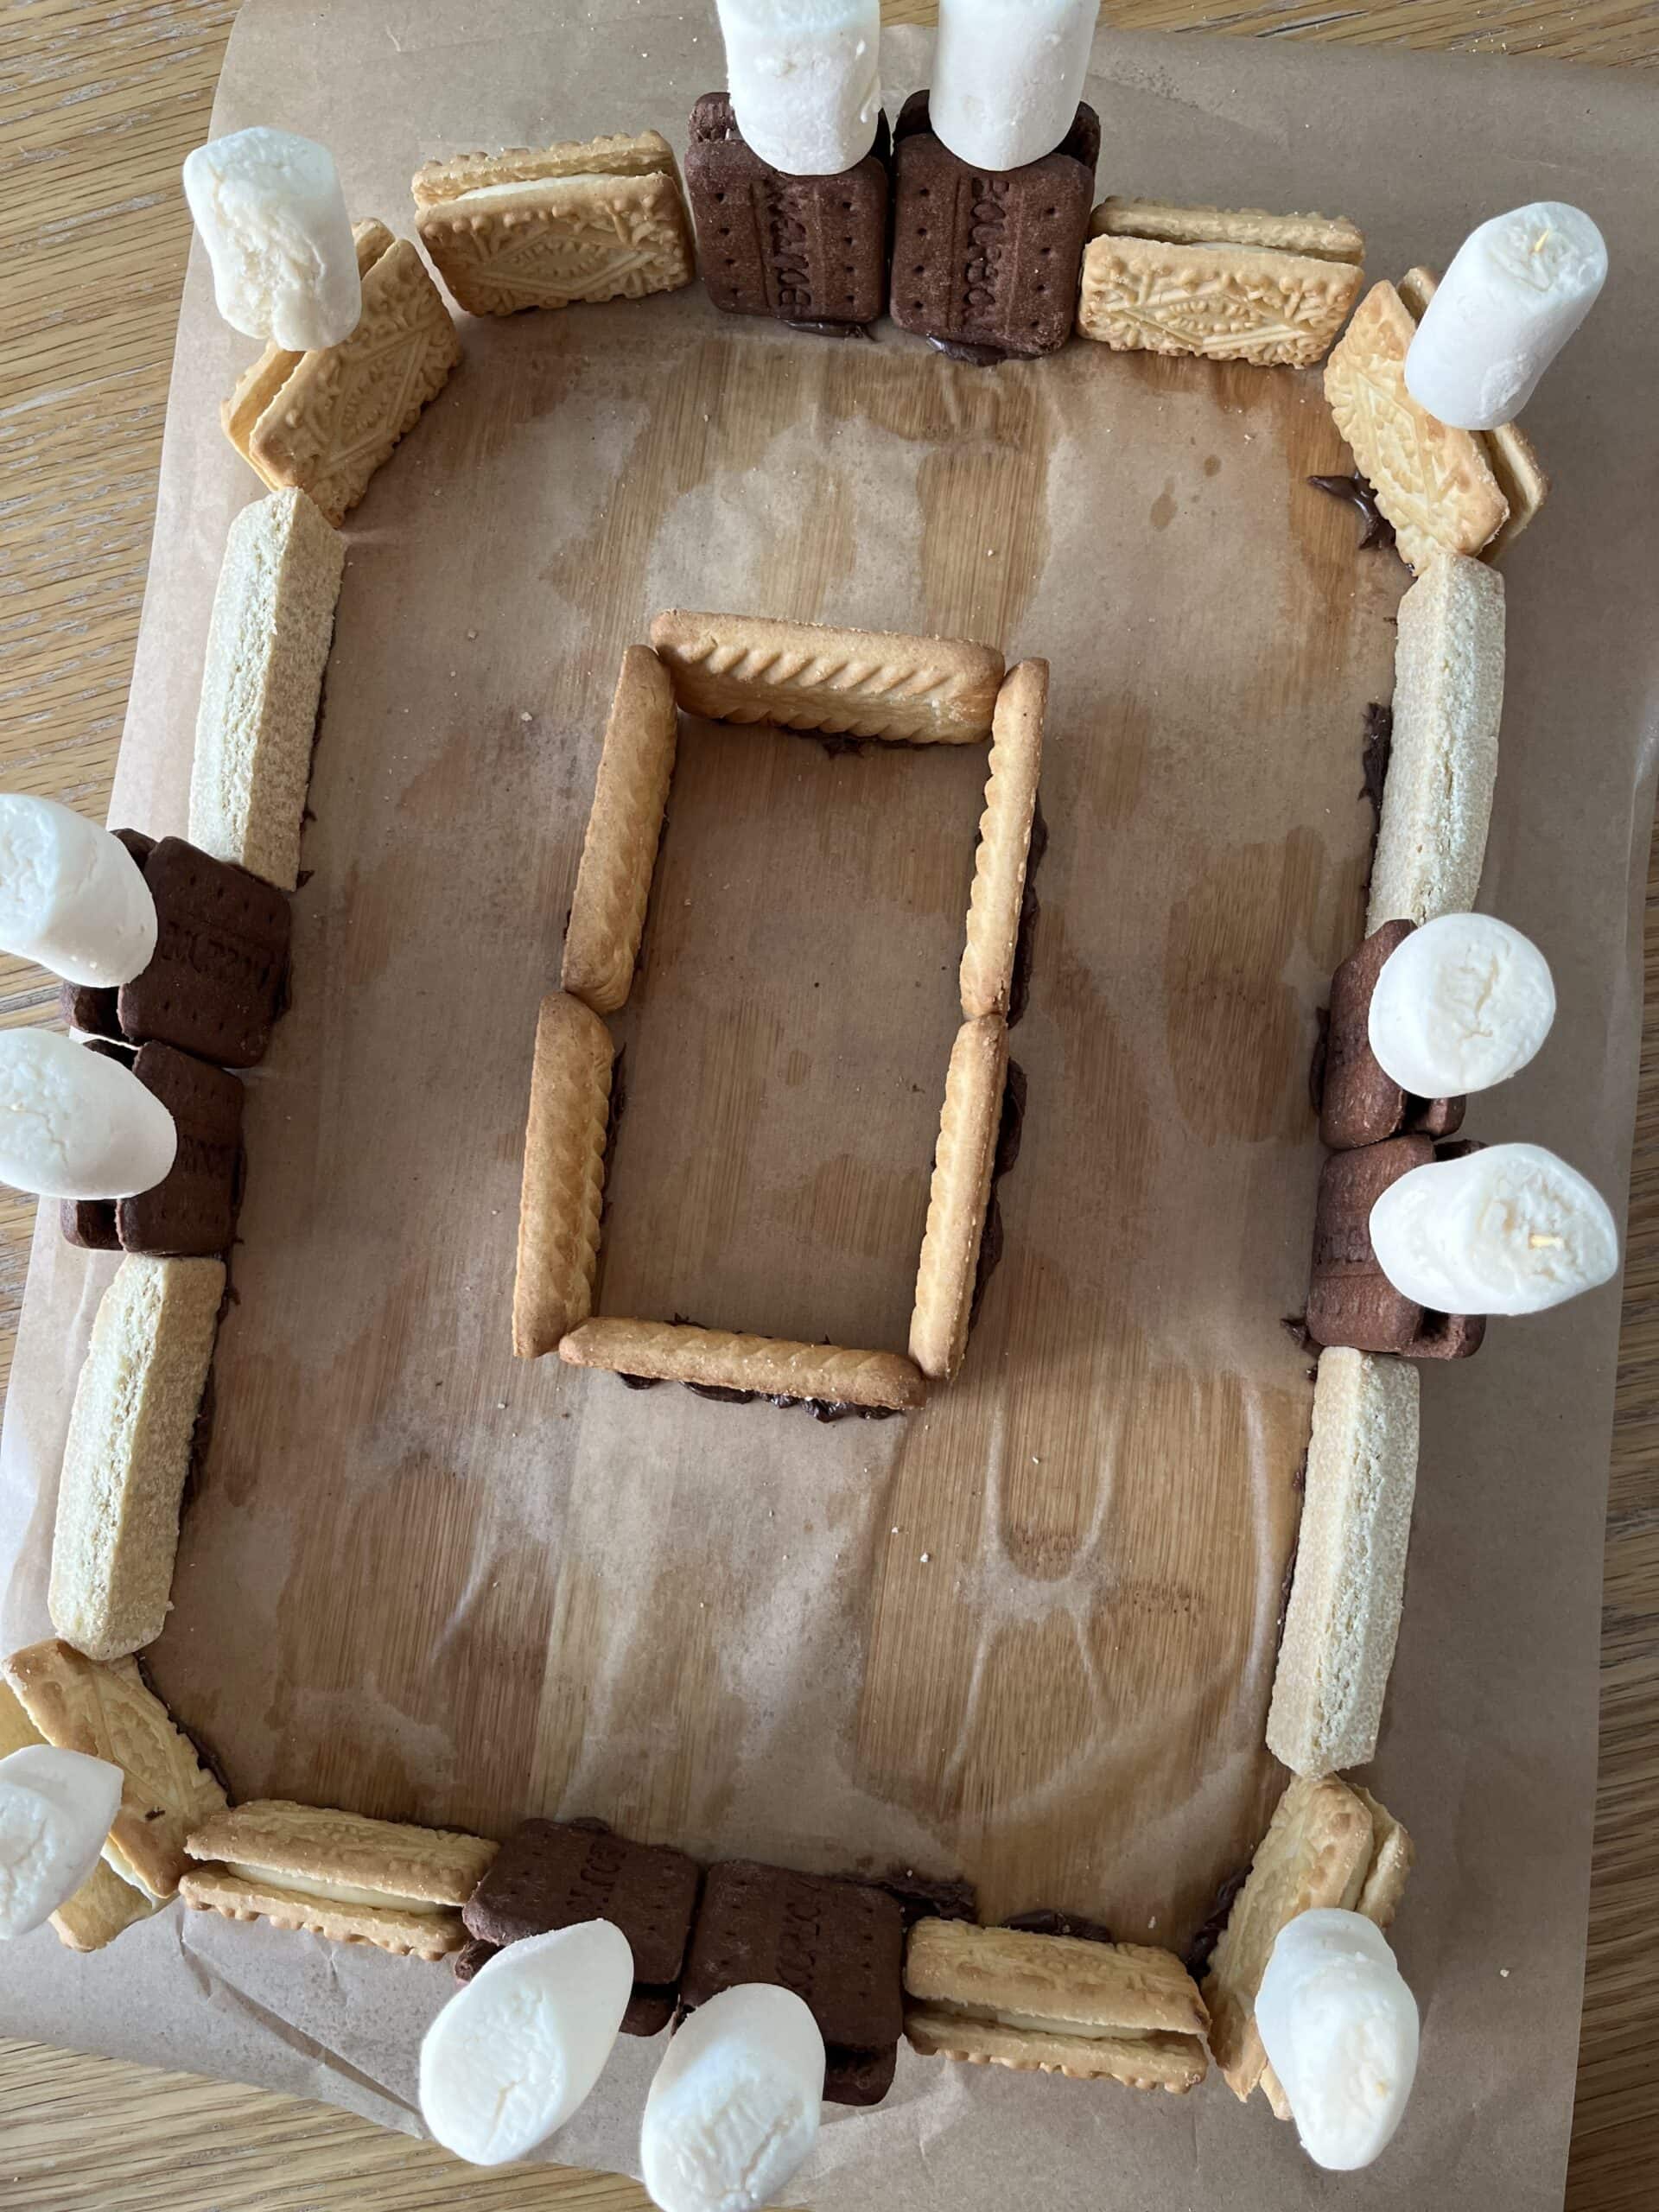
A rectangular structure made from biscuits and marshmallows, with a smaller rectangular structure in the centre.

Step 6

Now that your outer walls are finished, it’s time to build the inside of your fort. At the centre of a Roman fort was the principia, the headquarters that served as the command centre, home to the most senior Roman soldiers or important visitors and where religious activities took place. Create a rectangle of biscuits in the centre of the fortress and stick them down with more chocolate spread.
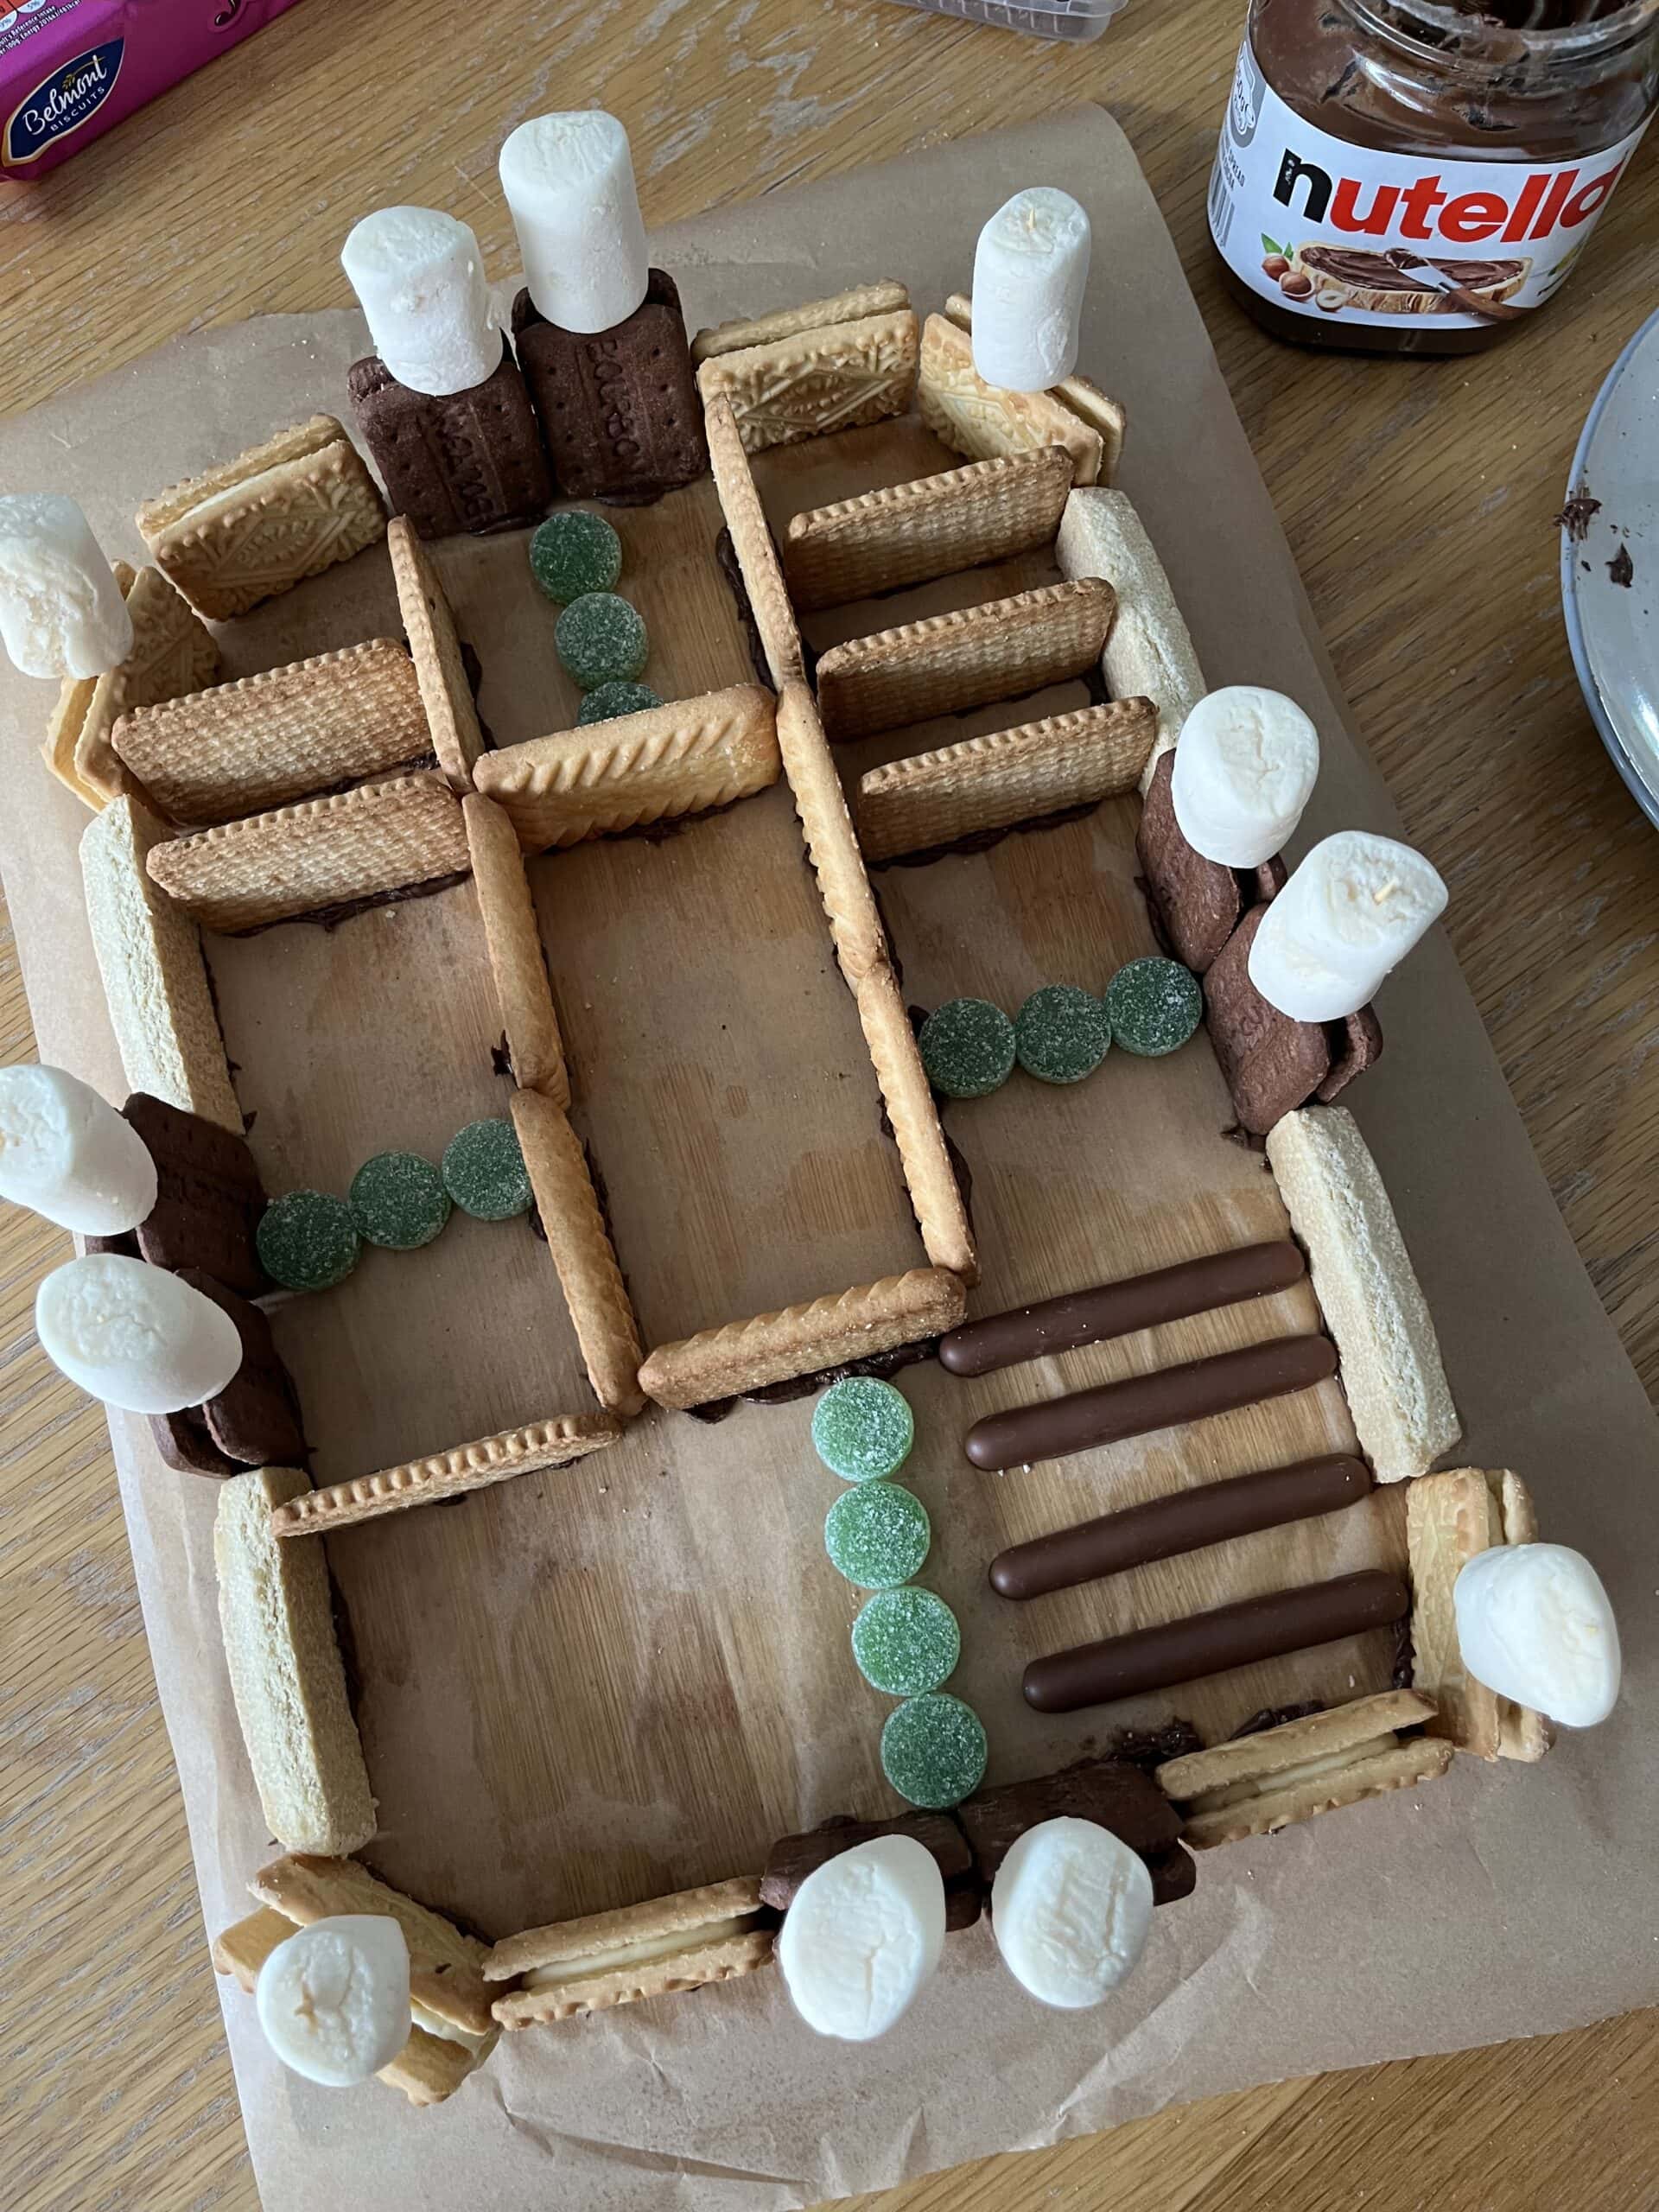
A rectangular structure made from biscuits and marshmallows representing an Roman fort

Step 7

Add some more features to the inside of your Roman fort. We created stables from chocolate fingers, barrack blocks (where the soldiers would live) from slightly smaller biscuits and roads leading from the gates to the principia using sweets.
A rectangular structure made from biscuits and marshmallows representing an Roman fort

Step 8

Finally, use any extra sweets and biscuits to add some extra details to your fort. We used two circular biscuits to represent bathhouses (although the baths at Chesters Roman fort were actually outside the fort itself!) and some additional sweets to build a religious altar inside the principia.