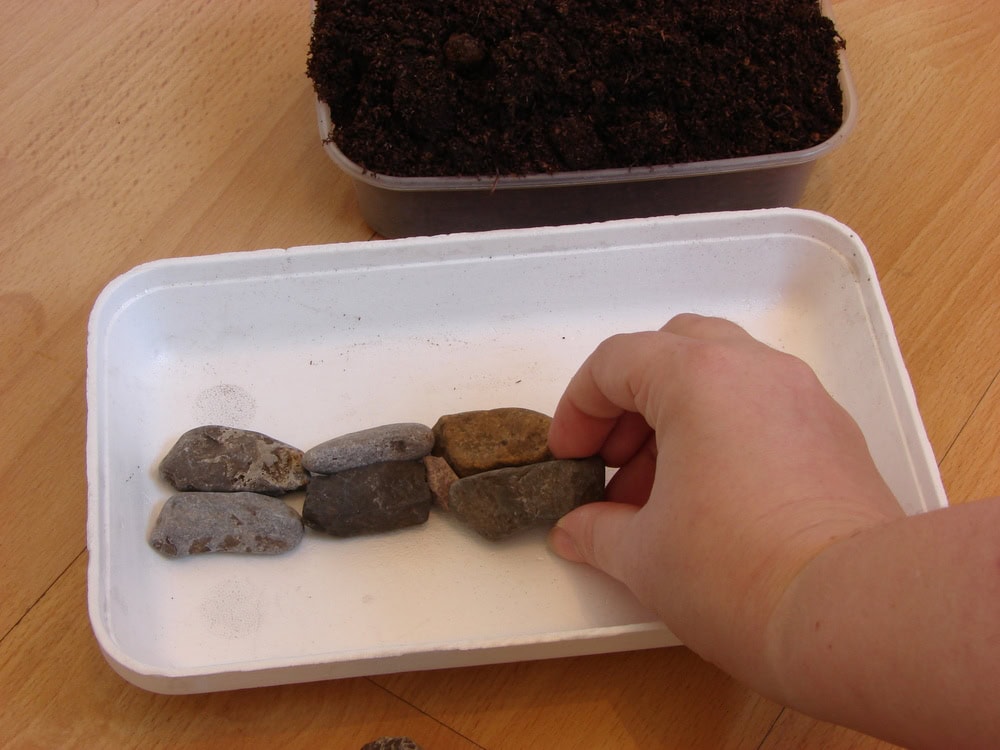
Grow your own Cropmarks!

One of the most fascinating ways of spotting archaeological sites is through recognising “cropmarks”. Cropmarks occur when there are ditches or features, such as a stone wall, buried underneath an area used for growing crops. The  archaeology below the surface can then affect the topsoil and subsoil and this then affects the way that the crops grow.

Crops growing over a buried ditch will result in taller plants because the ditch will have collected more moisture and nutritious organic matter than the ordinary soil around it. The opposite happens when there is a buried wall. The buried remains get in the way of moisture gathering and the plant roots that are trying to grow. This means that the growing conditions are not good and crops will be smaller and of poor quality. Crop marks show up particularly well when the weather and soil is very dry and the crops above features like walls are even more short of water than usual. Most crops can produce marks but cereal crops like wheat and barley make especially clear marks.

Grow your own cropmark with this activity!

YAC HQ

Adult supervision is not required for this activity.

Type of Activity : Crafting

How many people required (minimum) : 1

Safety Measures : Make sure to wash your hands afterwards

Ages : All Ages

Time Required: 30 minutes to build your cropmark; 1 week to see the results!

Step 1

Build a wall down the middle of the tray using small stones. Fill in any gaps with smaller bits of gravel.
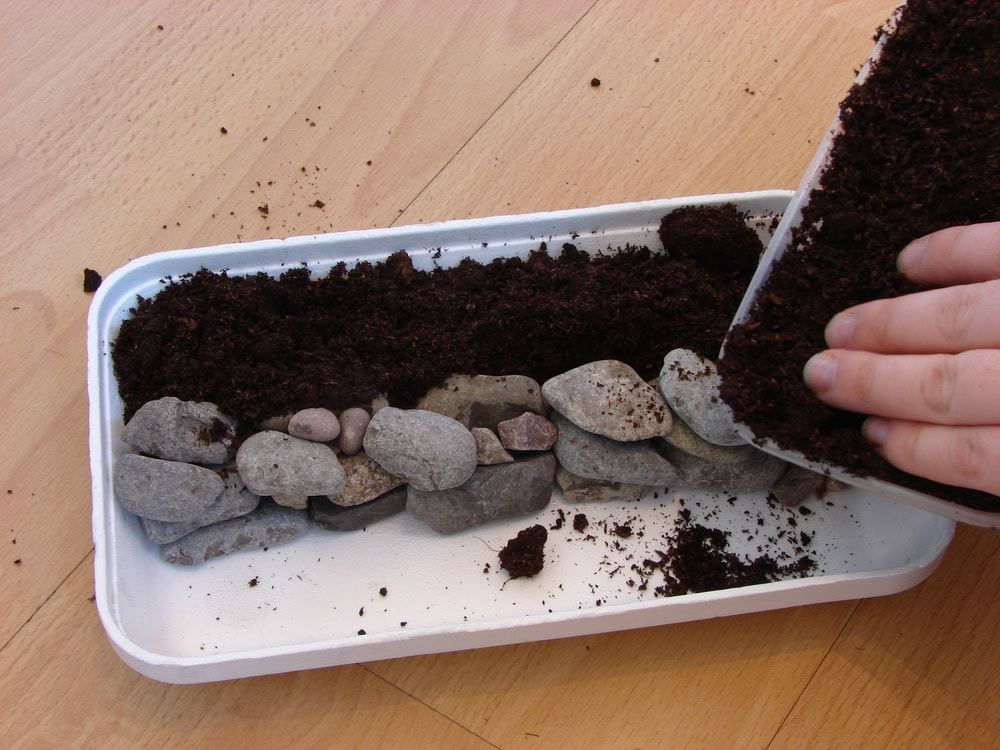
Step 2

Fill the space around the wall with compost.
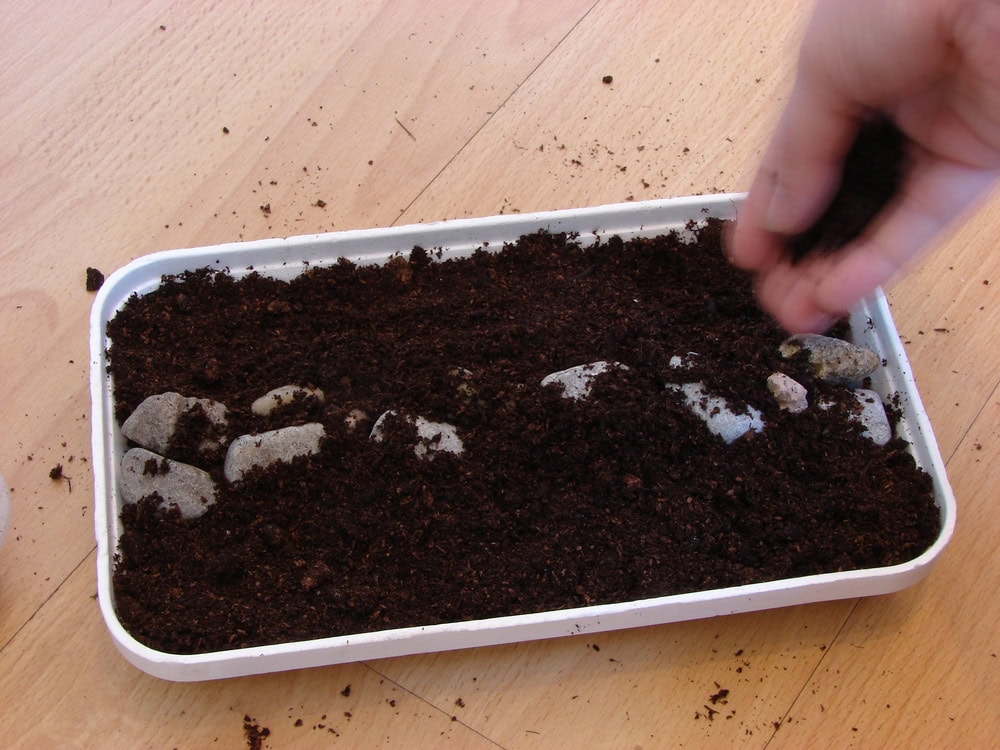
Step 3

Sprinkle a small amount of compost over the top of the wall.
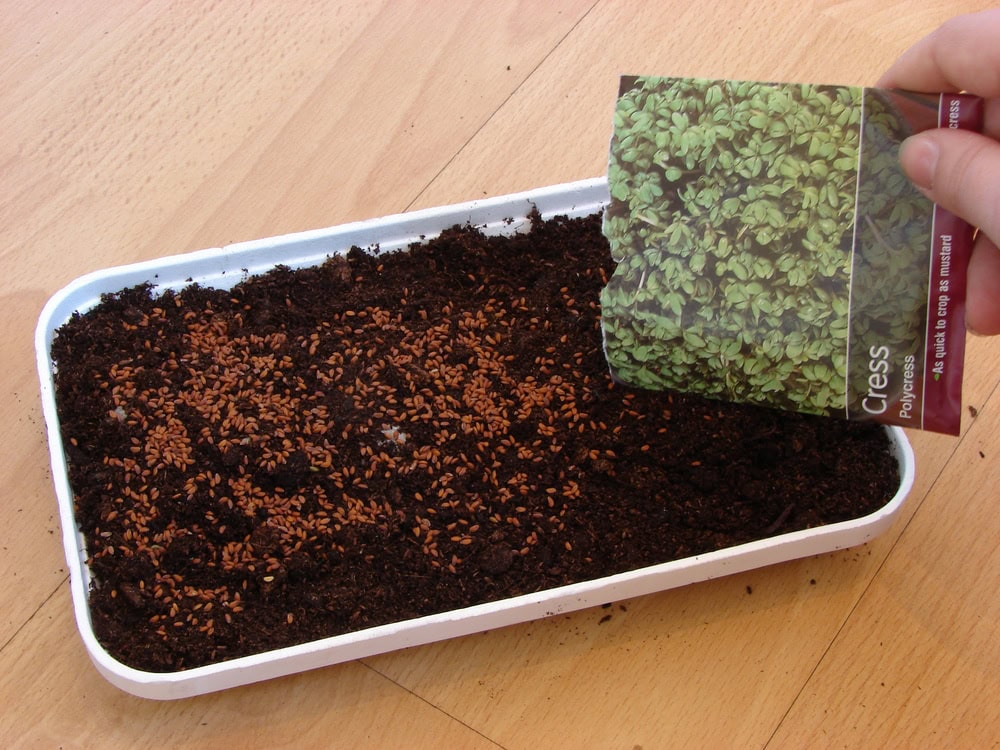
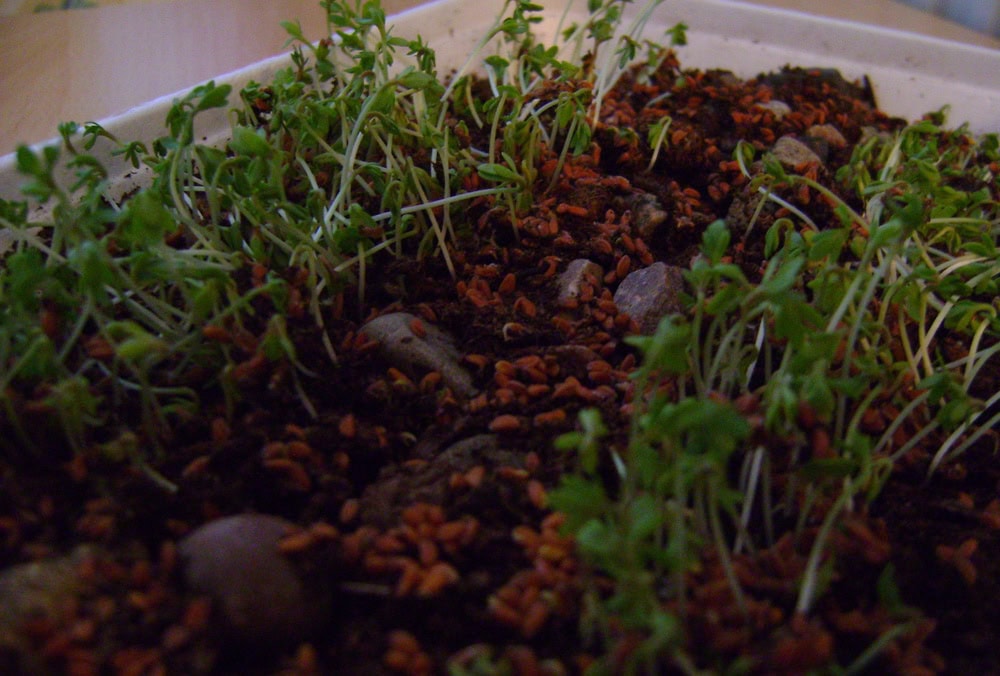
Step 4

Scatter cress seeds over the whole of the tray.
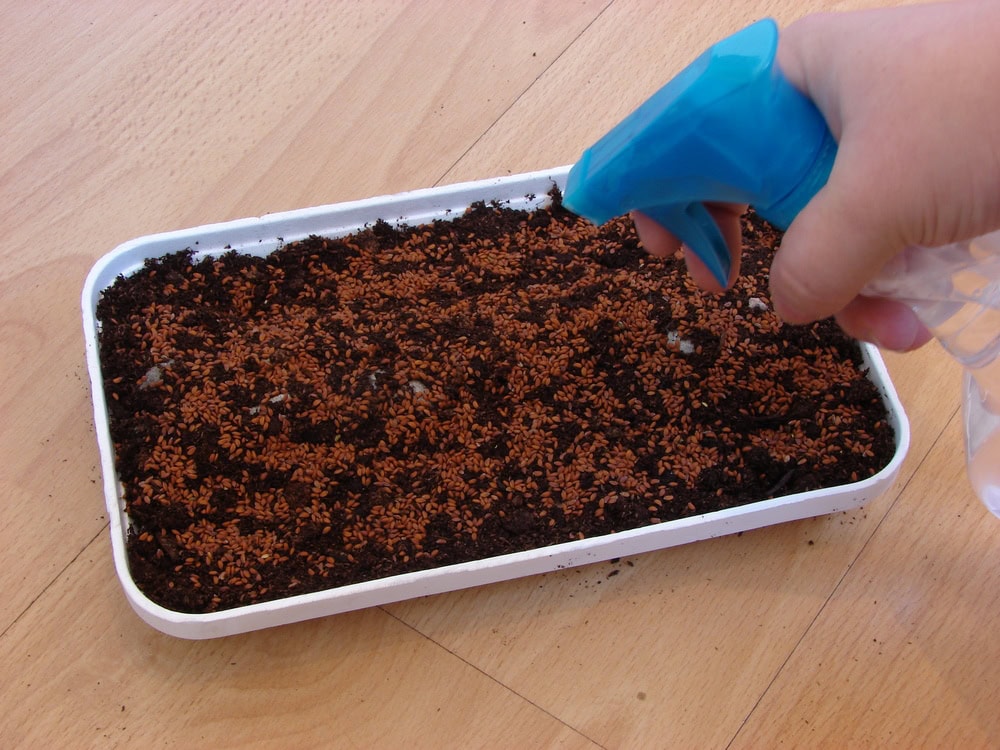
Step 5

Spray with water so that the seeds stick to the compost. Write the date on a label and stick it to the tray to show when the seeds were planted.

Step 6

Cover the tray with cling film and put it somewhere warm (approx 25°C). The seeds do need some light to grow, so don't leave it anywhere dark!

Step 7

Leave for 2 days... the seeds will begin to sprout! Remove the cling film and water occasionally.

Step 8

After about a week, the cress will have grown enough to show a cropmark! There will be lots of cress growing on either side of the wall, but very little growing above it.