Step 1
When you first open Blender, click to open a new “General” file. You will be greeted with this screen.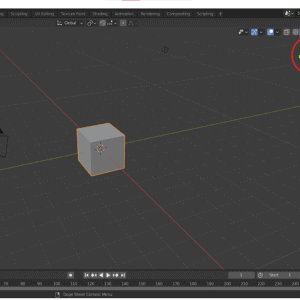
Step 2
First things first! We need to get used to moving ourselves around the 3D space in Blender. There are lots of ways we can do this, but the main ones to remember are: Scroll wheel = Zoom in/out Middle mouse button (click the wheel in) = Orbiting camera Shift + Middle mouse = Pan camera You can also click on the axis (red circle) to change the camera view. This is really helpful if you want to look from the side or directly above your object. If you lose track of your object, you can select it in the 'Scene Collection' menu in the top right (yellow circle). Then click the 'View' tab (green circle) and then “Frame selected” to get back to look at your object.Step 3
You can also try playing around with this cube a little. The main tools we have to work with are Move, Rotate and Scale. These can be chosen in the left side menu (blue circle). Try selecting your object, picking one of these functions, and then clicking and dragging inside the circle which appears over the object. Pressing Ctrl+Z, or right-clicking before you release the left mouse button during an action, will undo the action. Don’t worry about messing anything up. We’ll be using a different object for our pot.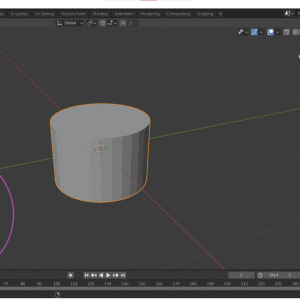
Step 4
Time to start making a pot. First, either delete or move the cube well out of the way. Then, go to “Add” (green circle), “Vertex” and then “Cylinder”. Before we do anything else, we now have to set the initial dimensions of the object using the menu that has appeared in the bottom left corner (purple circle). Vertices will affect the smoothness of your pot whilst Radius and Depth affect the size of the pot. Normally 3D modelling archaeologists will have real-world measurements to put in, but for now, just using something similar to what is in the screenshot.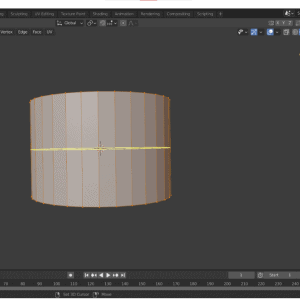
Step 5
Now we can start modifying our cylinder. To do this, we need to change Blender from “Object mode” to “Edit mode”. This can be done by either pressing the Tab key or clicking the menu in the top left (orange circle).
Step 6
Once in edit mode, select the “Loop Cut” function (white circle). This allows us to add more loops which can make it easier to shape our cylinder into a pot. The yellow line you can see shows where you are adding a loop. Change the camera view so it is face on and add some loops until you end up with something like this.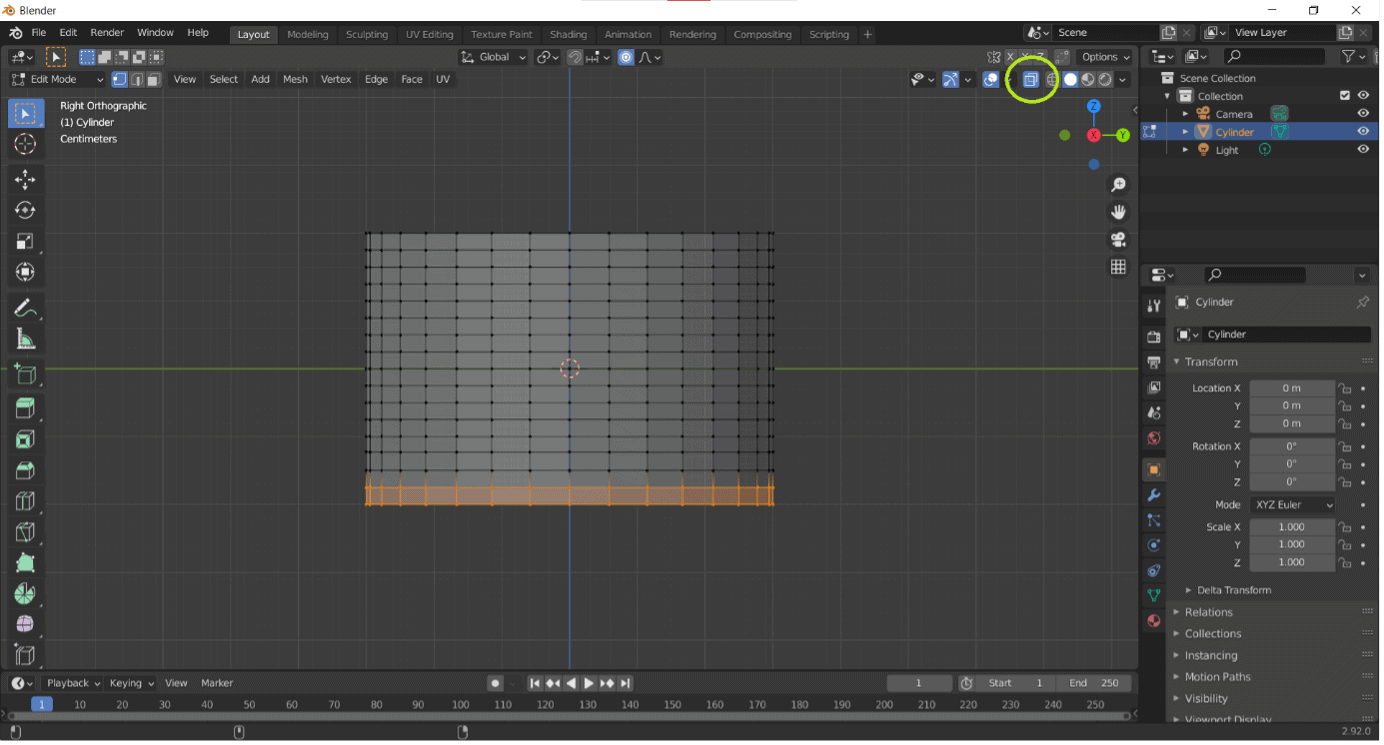
Step 7
Now we can start to actually change the shape itself. Be sure to toggle the “X-ray” view (lime green circle) on as this will make it a lot easier to select all the points you want. Let’s try shrinking the bottom a bit first so we can get a nice pot base. Click and drag to select the bottom sets of points on the cylinder.
Step 8
With those points selected, turn on the “Proportional Editing” button (pink circle). This will save us from having to change each edge one at a time. Now click the Scale function and start changing the size of the pot base. You’ll notice that it’s not changing very much. No worries, we just have to adjust the Proportional Editing scale. Whilst holding the left mouse button as you’re changing the scale, scroll your middle mouse wheel forwards. You should see a grey circle appear on the screen, as it does on this screenshot. Try setting it to a size which is letting you get the base shape you want.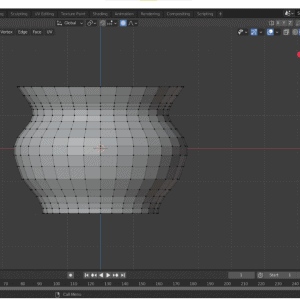
Step 9
Next, start to work on reshaping the rest of the pot. Try making it tall and thin, short and wide or anything in-between. Aim to have the middle bulge and top rim be the widest parts of the pot.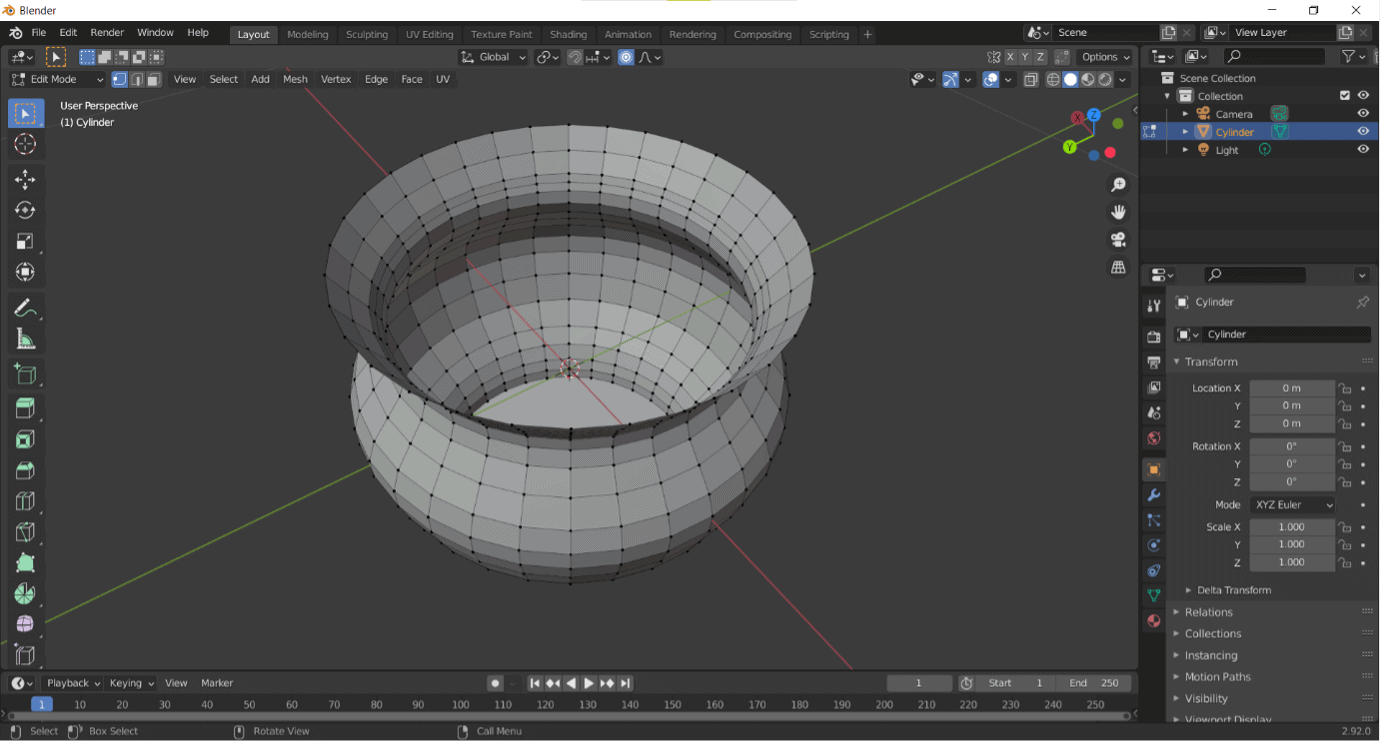
Step 10
Once you are happy with the outer shape, we need to get rid of that lid covering the top rim. Select the top set of points just as you did before. .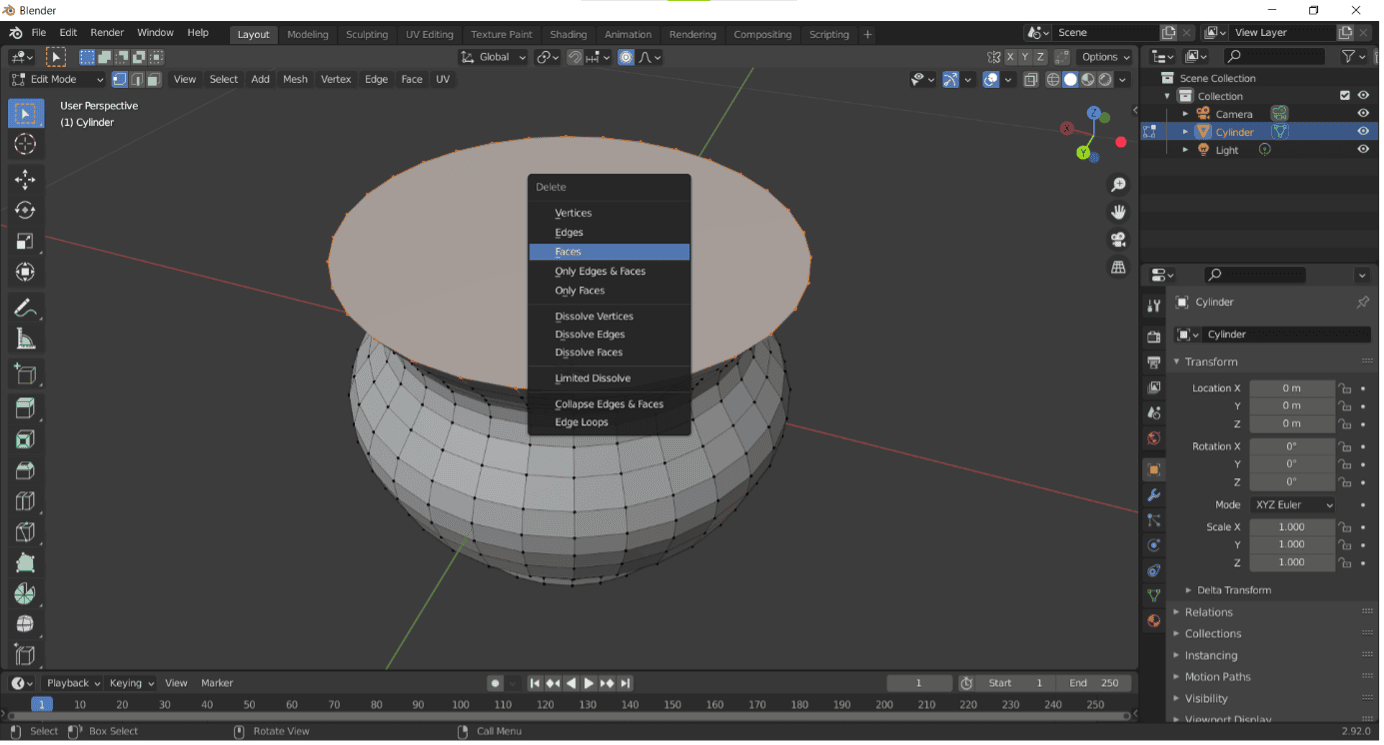
Step 11
Next, press the delete key. This will bring up a delete menu, from which you can pick “Faces”.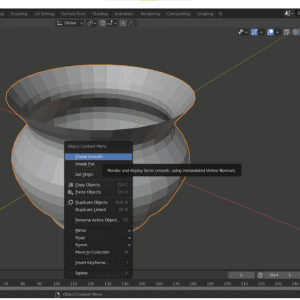
Step 12
We now have our pot shaped as we wanted. But does look rather blocky at the moment, doesn’t it? Lucky for us, there is an easy way to make it look smooth and round. Switch back from “Edit” to “Object” mode and then right-click your pot. Then click “Shade Smooth”.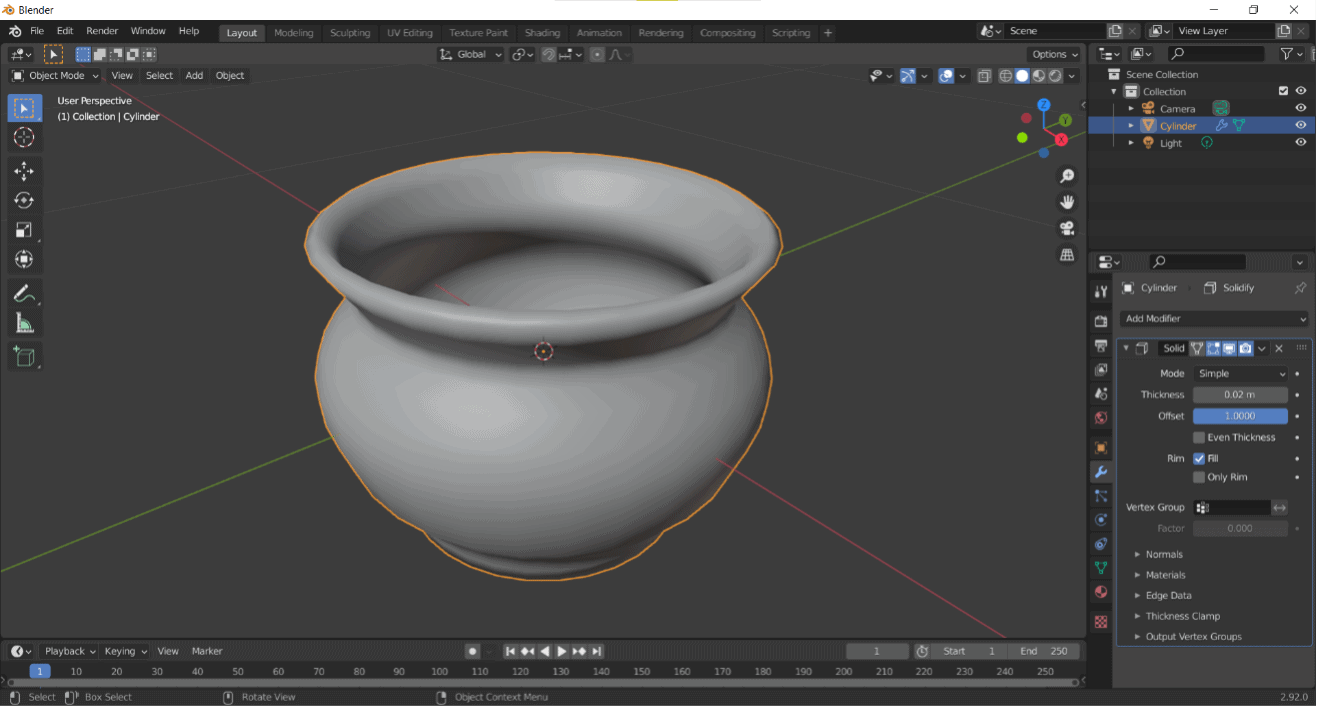
Step 13
Now our pot looks smoother but also rather thin. To fix this, we need to add a modifier. Modifiers are basically sets of functions which 3D artists can add to objects to allow them to make more advanced changes. With your pot selected, click on the blue wrench symbol (brown circle) on the lower-right side of the screen.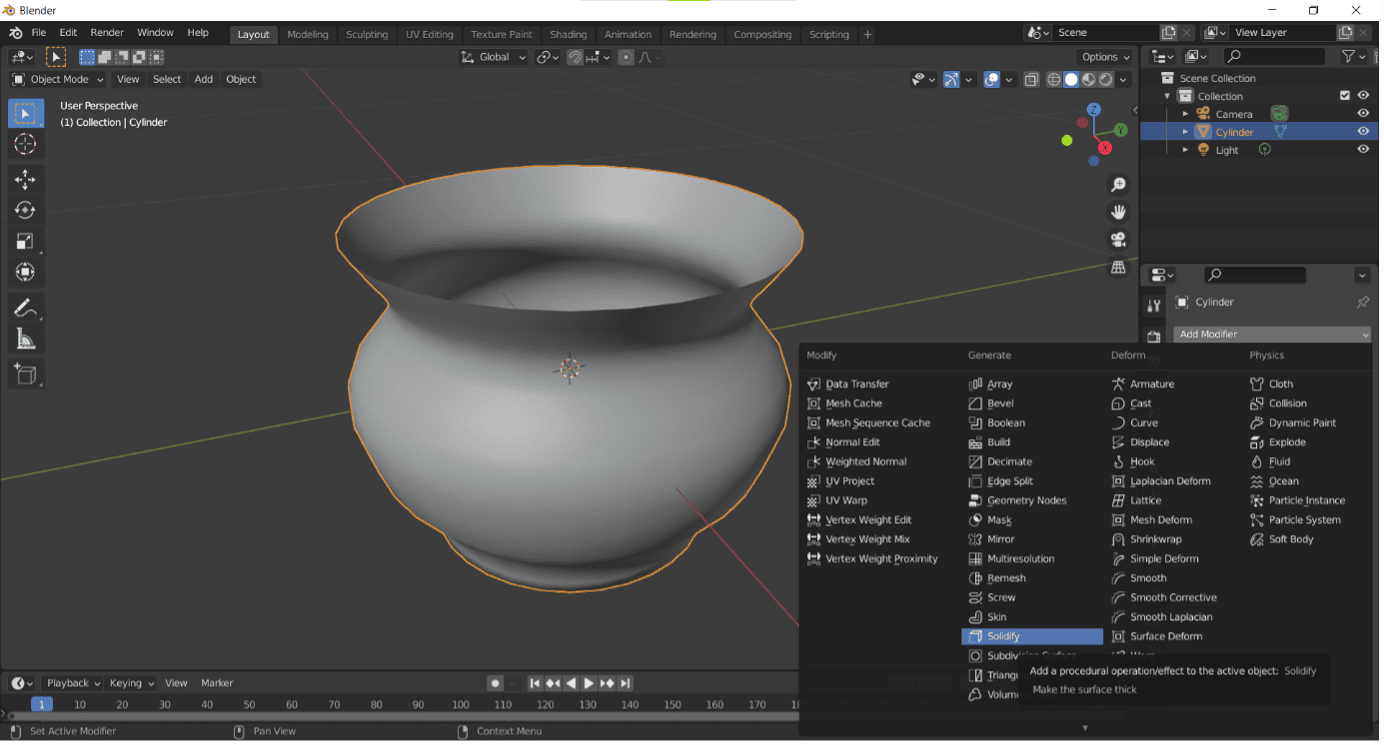
Step 14
Click the “Add Modifier” drop-down menu and then click “Solidify”. Change the thickness to a value no greater than 2cm and then change the offset from -1 to 1.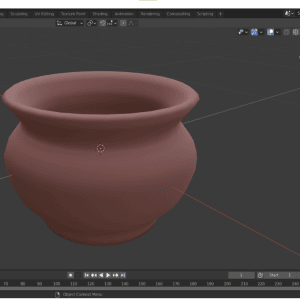
Step 15
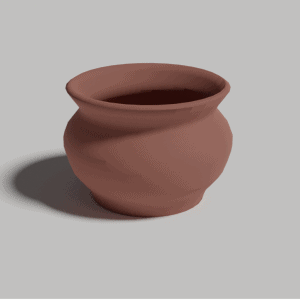
Now we have the shape, what about the colour? To change this, we need to change the material qualities of our object. This is done in the “Material Properties” menu, which is found in the bottom right (red circle). You will also want to change your “Viewport Shading” to “Material Preview” in the top right (yellow circle) so that you can see what you’re material changes look like. There are a lot of settings here, but the only ones you need to worry about now are “Base Colour” and “Roughness”. First, set the base colour the way you want it (here we’ve gone for a red glazed pot). Then, try increasing the roughness to make your pot less shiny, helping it seem more like it is made of clay.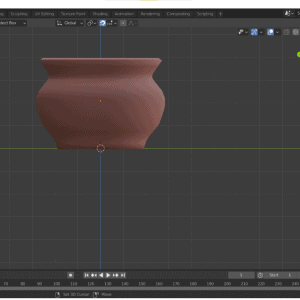
Step 16
Your pot is now ready. All we need to do is take a nice-looking render of it. But to do this, we should first set the scene for it by adding a flat surface for the pot to rest on. Start by moving your pot vertically along the blue Z axis so it is sitting just on top of the green and red X/Y axis lines.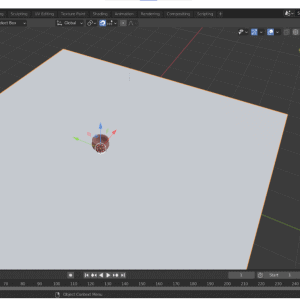
Step 17
Next, go to “Add”, “Mesh” and then “Plane”. We recommend setting its size to around 10m so that it will all fit in the camera view later.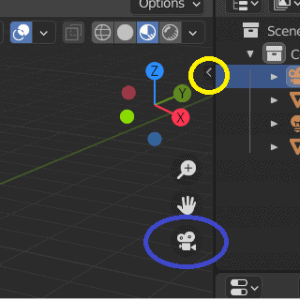
Step 18
You may have noticed a couple of weird black lined objects floating around your scene. These are the camera and light objects and now we get to finally play with them.
Step 19
We’ll start with the camera. We can move the camera just like any other object. However, this can be awkward if we want to make sure we get the angle and view as we want it.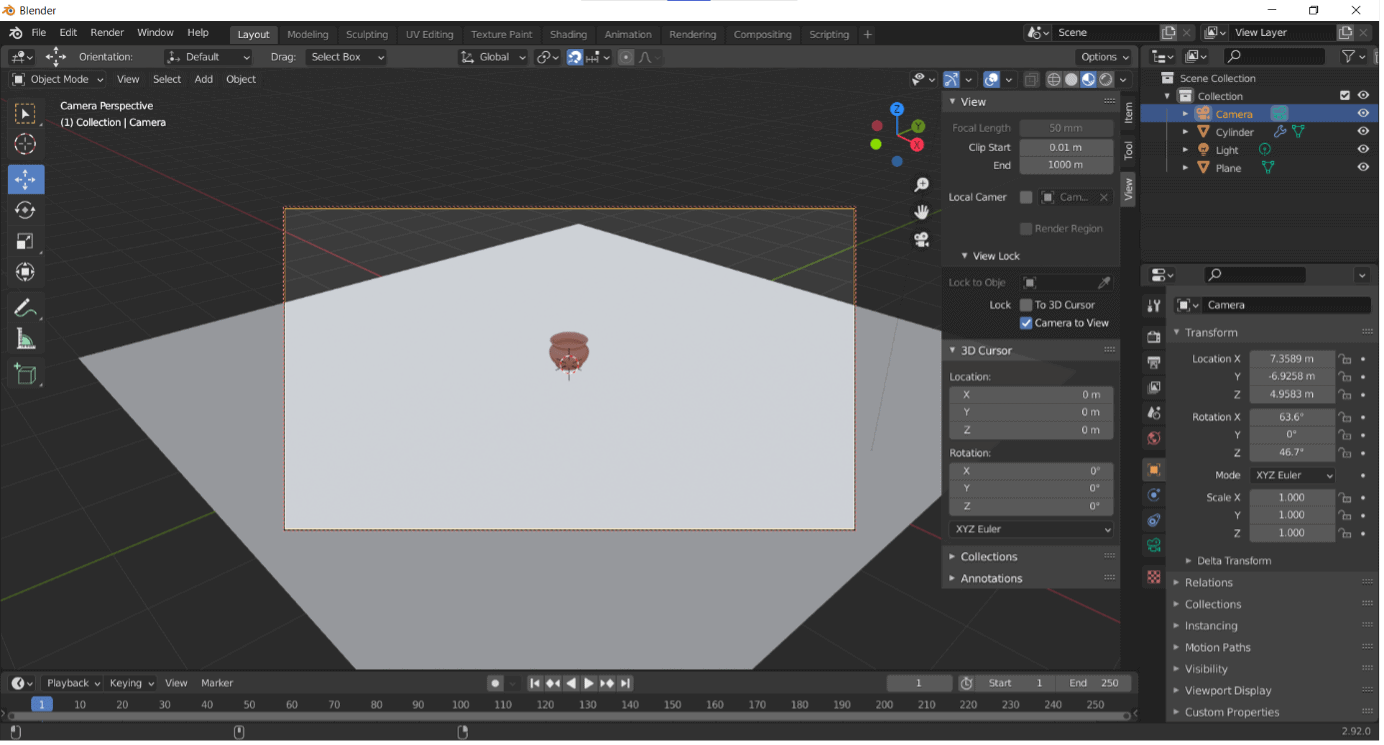
Step 20
You can switch to camera view at any time by pressing the camera-shaped button (blue circle). Then, we recommend clicking the small arrow next to the axis. This will bring up a new menu which, in the View tab, has an option to “Lock Camera to View”. But turning this on, we can move the camera in Camera View using the same controls (eg. scrolling middle mouse to zoom) that we use to normally move around Blender. Use this to set up your camera like you are taking a photograph of your pot. Be sure to toggle off the “Lock Camera to View” function when you’re done.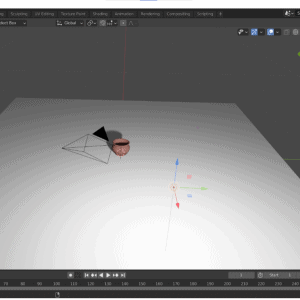
Step 21
Next up is the light. To see how it is working, change the “Viewport Shading” to “Rendered” (purple circle).Step 22
Move your light into position. Keep checking back in the camera view to make sure you have it the way you want it.
Step 23
We can make this lighting look better by changing the type of light. Currently, it is a “Pointer”. We want it to be a “Sun”. This can be done in the “Light Object Properties” menu in the bottom left (orange circle). You will need your light selected to access this. The Sun light will be far too strong at first, so be sure to decrease the strength to around 2 or so.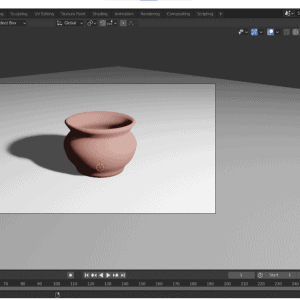
Step 24
The final stage is to render your model image. Blender has two different rendering engines we can use which can change the quality of our image. Eevee is more simplistic but much easier for computers to run. Cycles is more detailed but use more computer power. You can change the engine in the “Render Properties” menu (white circle). Try out the Cycles engine. If your computer starts slowing down too much, switch back to Eevee.