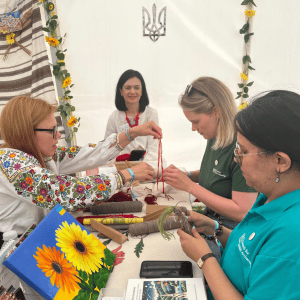
The YAC HQ team are grateful to Ukrainian Community United for sharing this craft activity with us. You can find out more about their work at salisburyukrainehub.org.uk.
Step 1
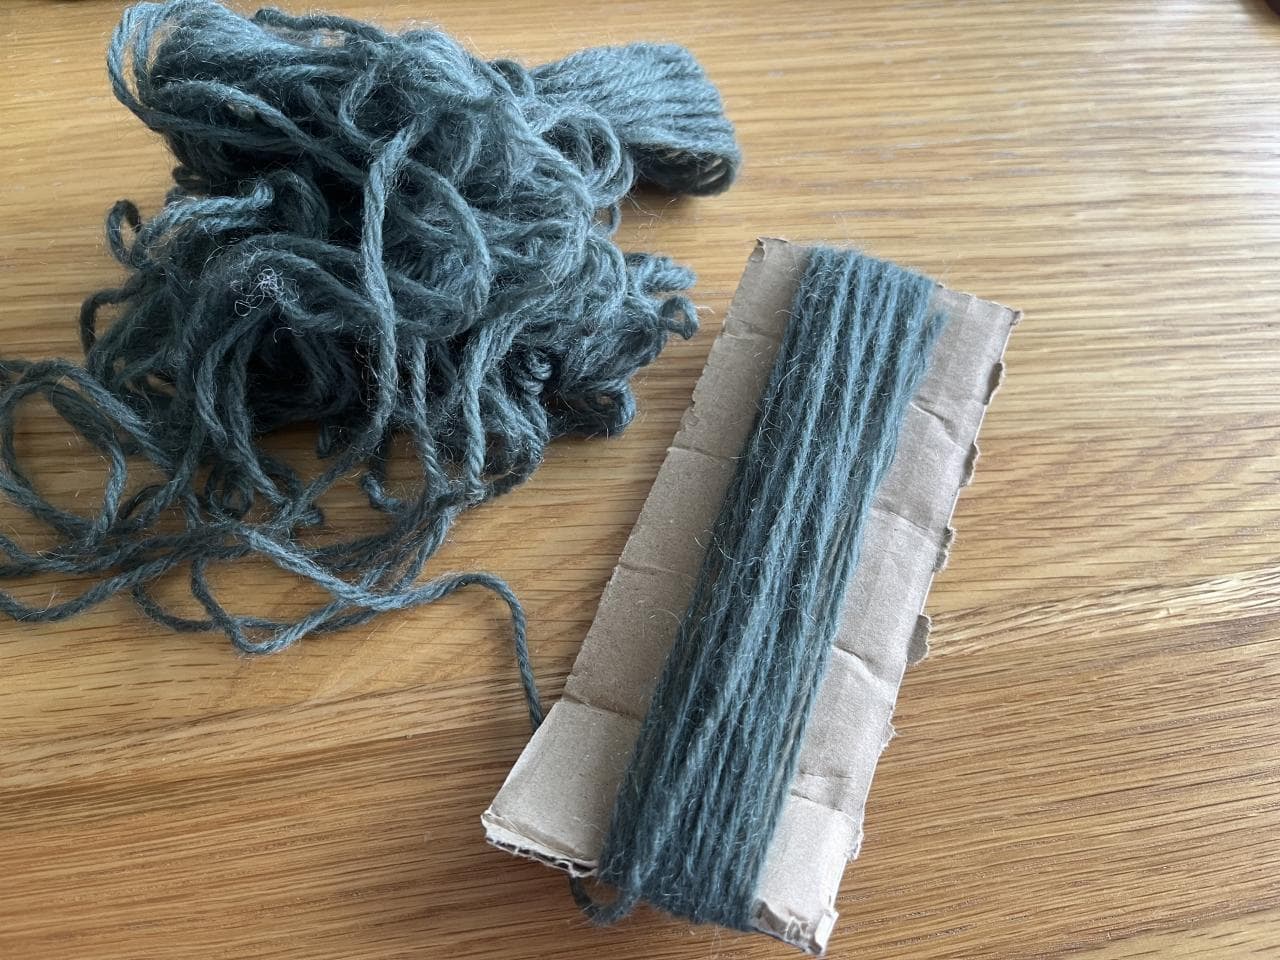
Choose one colour of yarn for the body of your doll. Taking your longer piece of cardboard, begin to wrap your wool lengthways around cardboard approximately 30 times. Be sure not to wrap it too tight or too loosely.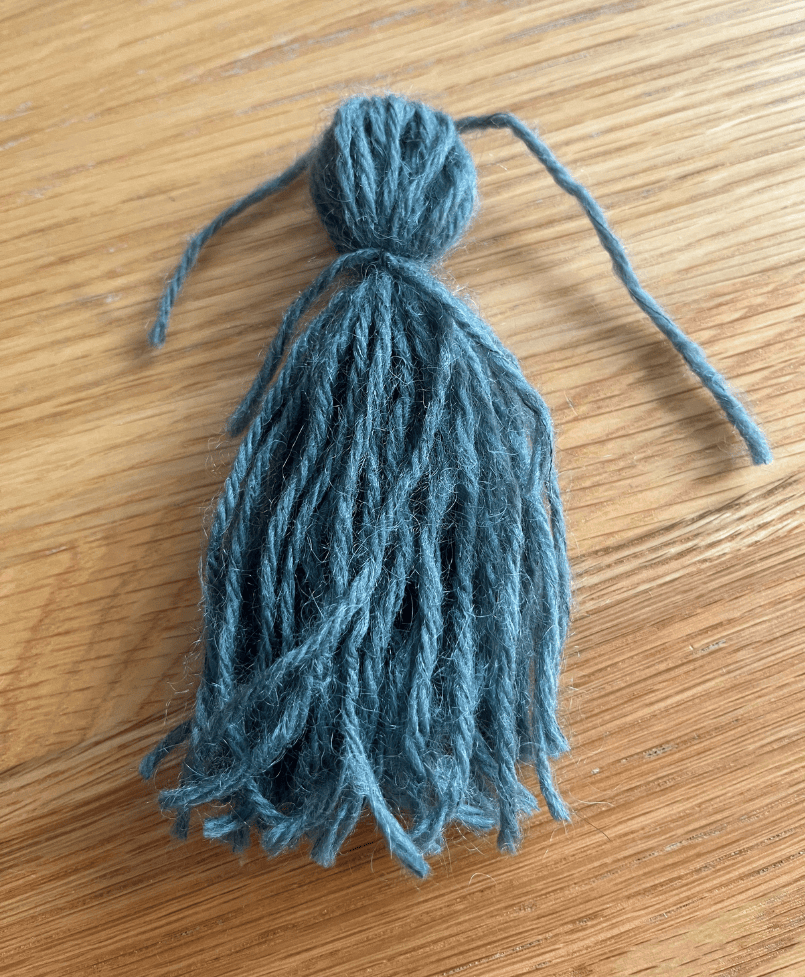
Step 2
Cut a piece of yarn of the same colour (approx. 10cm long) and loop it through the top of your wrapped yarn. Tie it tightly in a double knot – this is to secure the top of your doll’s head. Then, carefully cut along one end of the wrapped yarn and remove the card. Tie a second smaller piece of yarn about one fifth of the way down your bundle of yarn and tie it tightly. You have now created your doll’s head and body. Leave the extra threads for now – you can tidy them up when you have finished.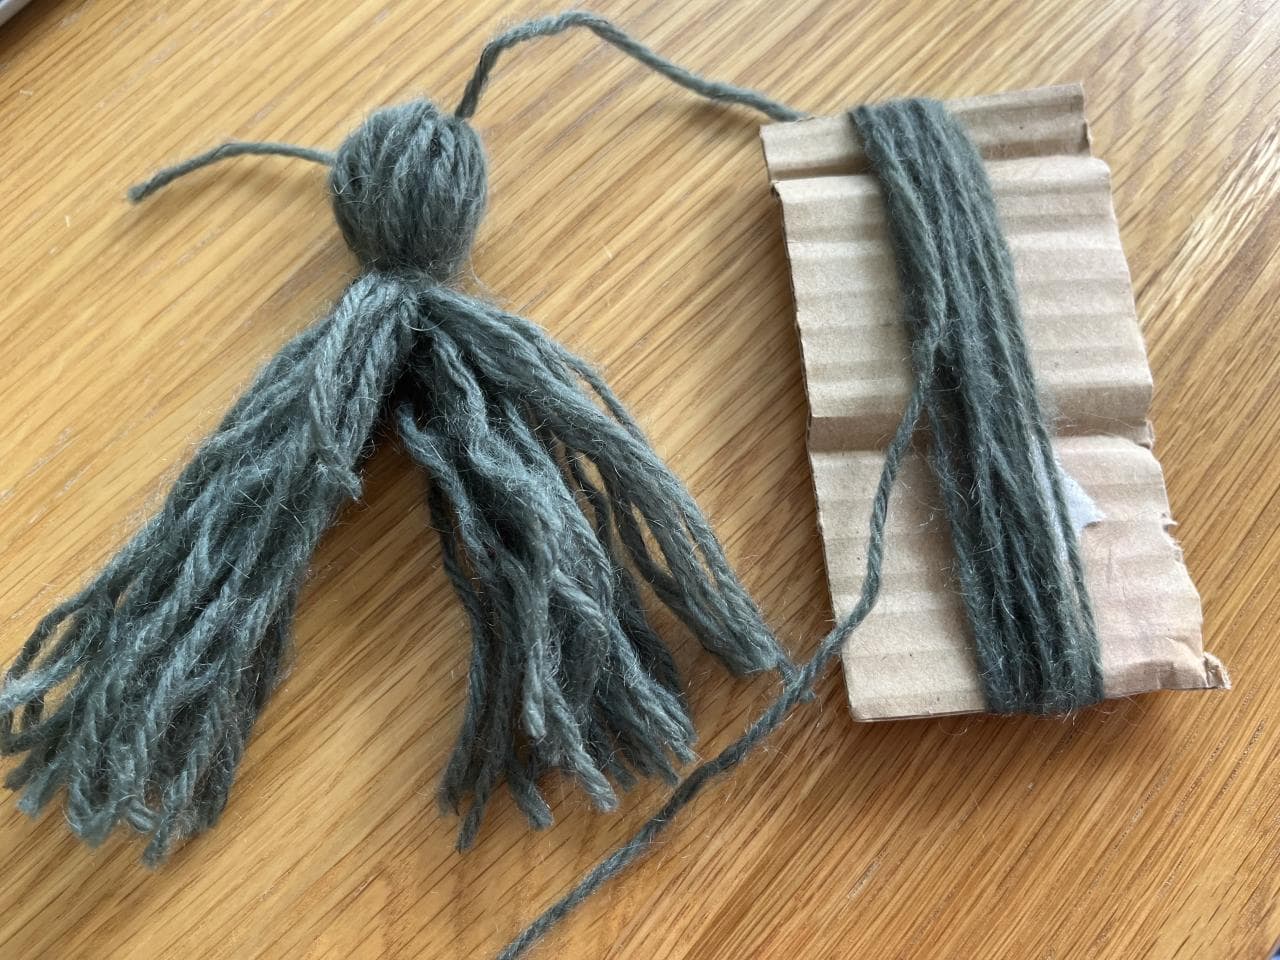
Step 3
Next, make your doll’s arms. Divide the threads forming your doll’s body into two equal-sized bundles and set aside. Choose some yarn for your doll’s arms – this can be the same colour as the body or a different colour. Take your smaller piece of cardboard and wrap this yarn around it around 12-15 times.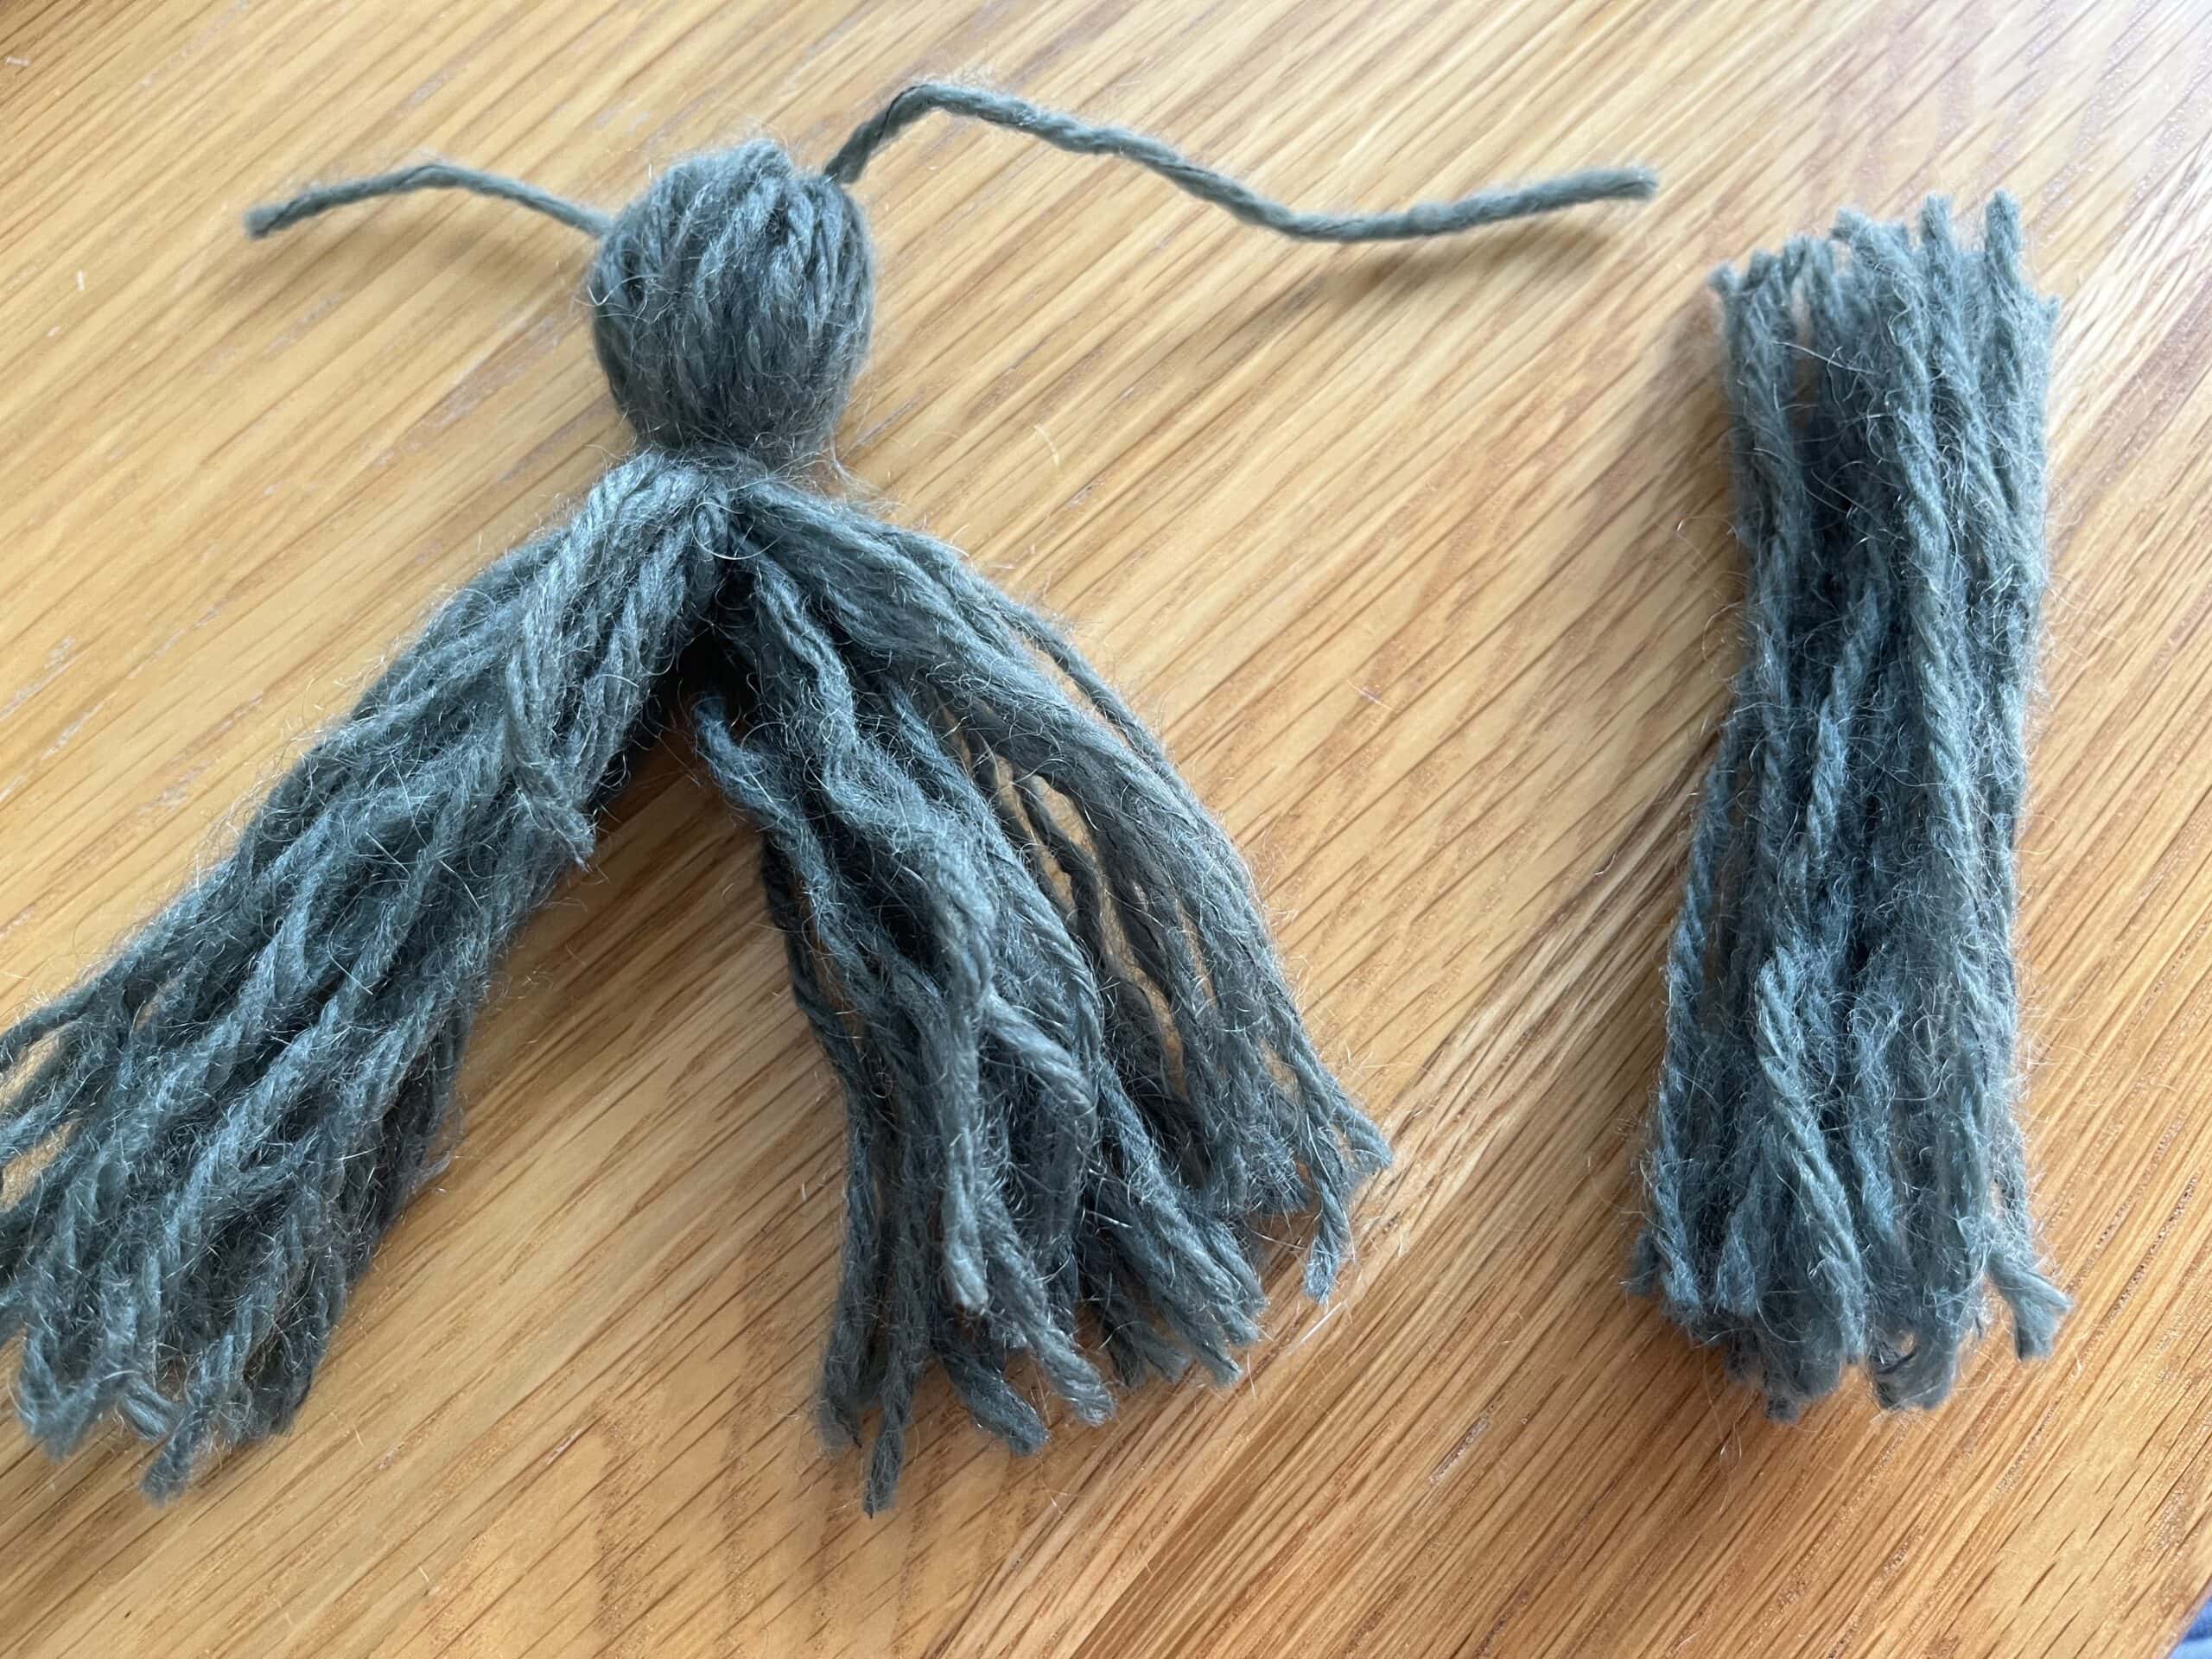
Step 4
Cut this wrapped yarn at both ends of the cardboard so that you have a small bundle of yarn...
Step 5
...then arrange this bundle in between the two halves of your doll’s body.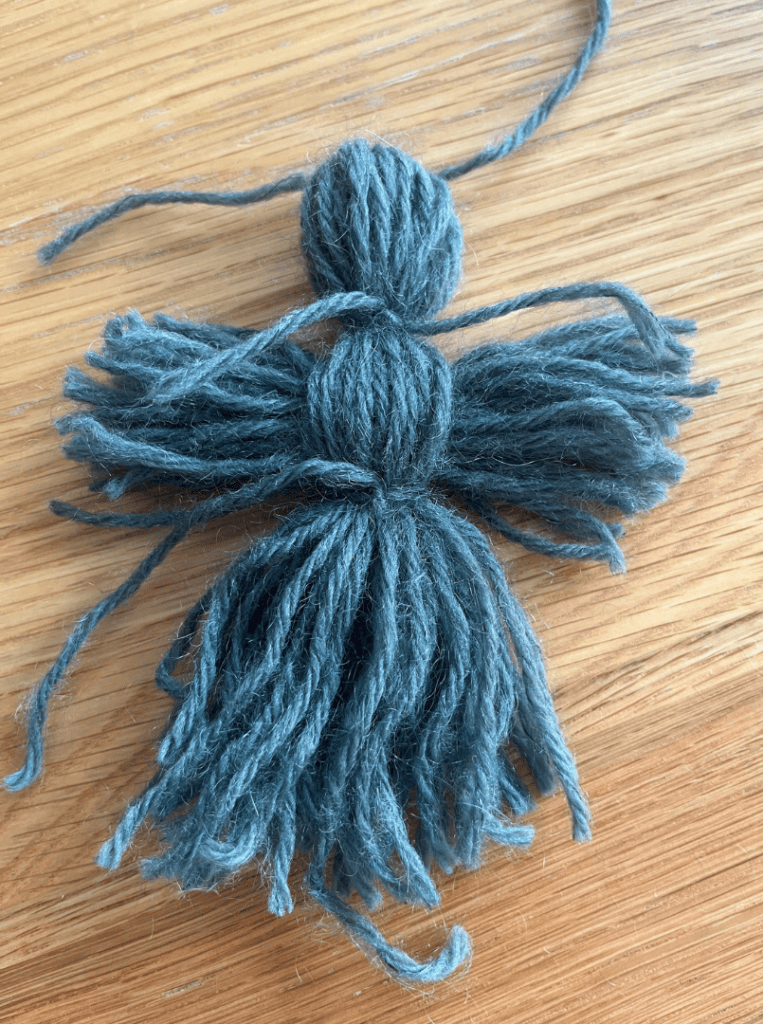
Step 6
Make sure that the ‘arms’ are roughly the same length, then tie a small piece of yarn tightly around the doll’s body just beneath the arms. This will secure the arms and create your doll’s waist.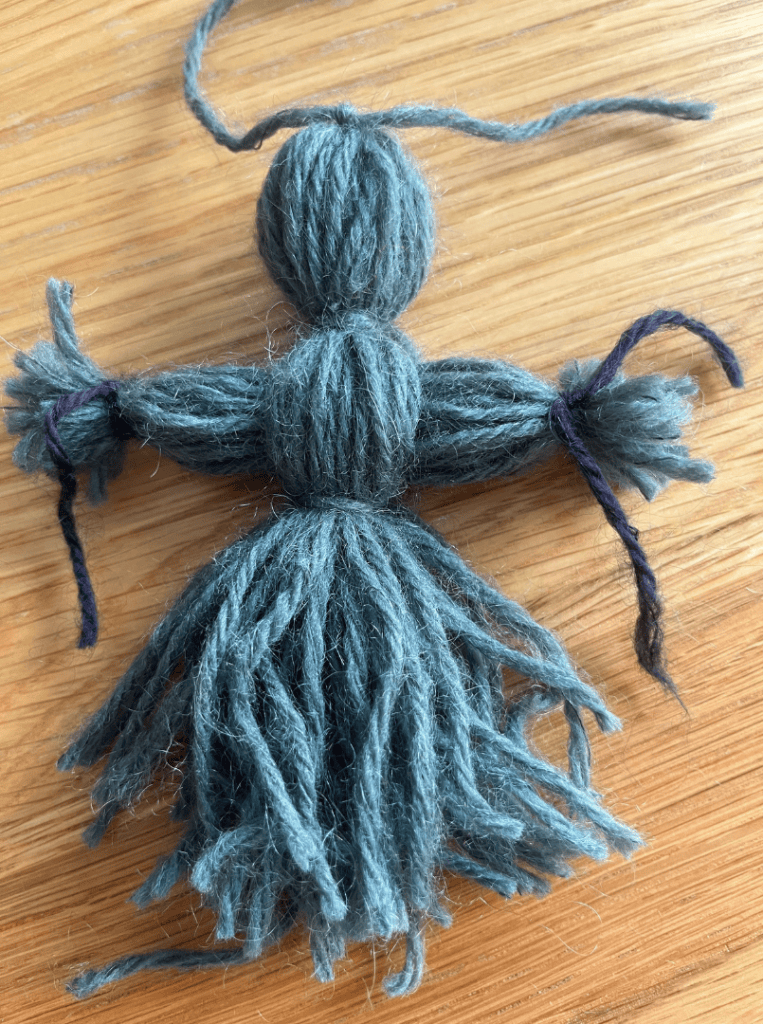
Step 7
Complete the arms by cutting two small pieces of yarn (either the same colour or a different colour) and tying one to the end of each arm. This will secure the threads and create wrists.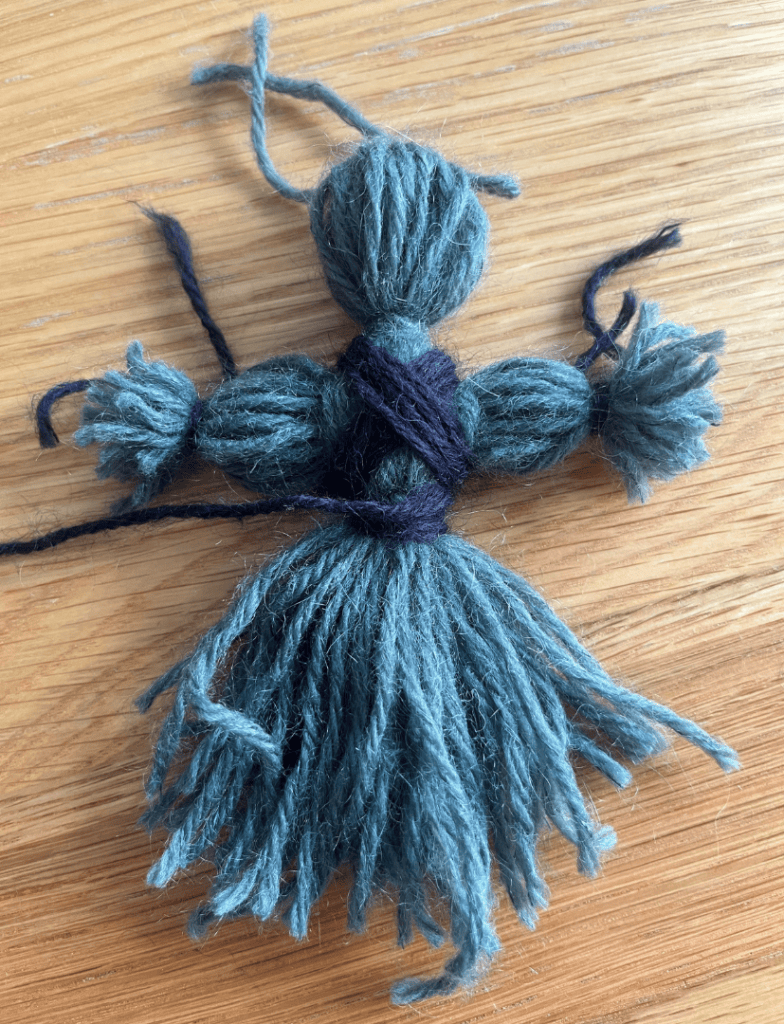
Step 8
Now cut a piece of yarn in a contrasting colour, around 40cm long and tie one end around your doll’s waist. Wrap it around the waist 3-5 times. Then wrap it diagonally across your doll’s torso in one direction 3-5 times and repeat crossing to the other direction, to create an X-shape. Wrap it around the waist once more and then carefully thread it through one of the earlier wraps you made and tie it securely (this can be a bit fiddly – a small crochet hook or a bodkin needle can help with this).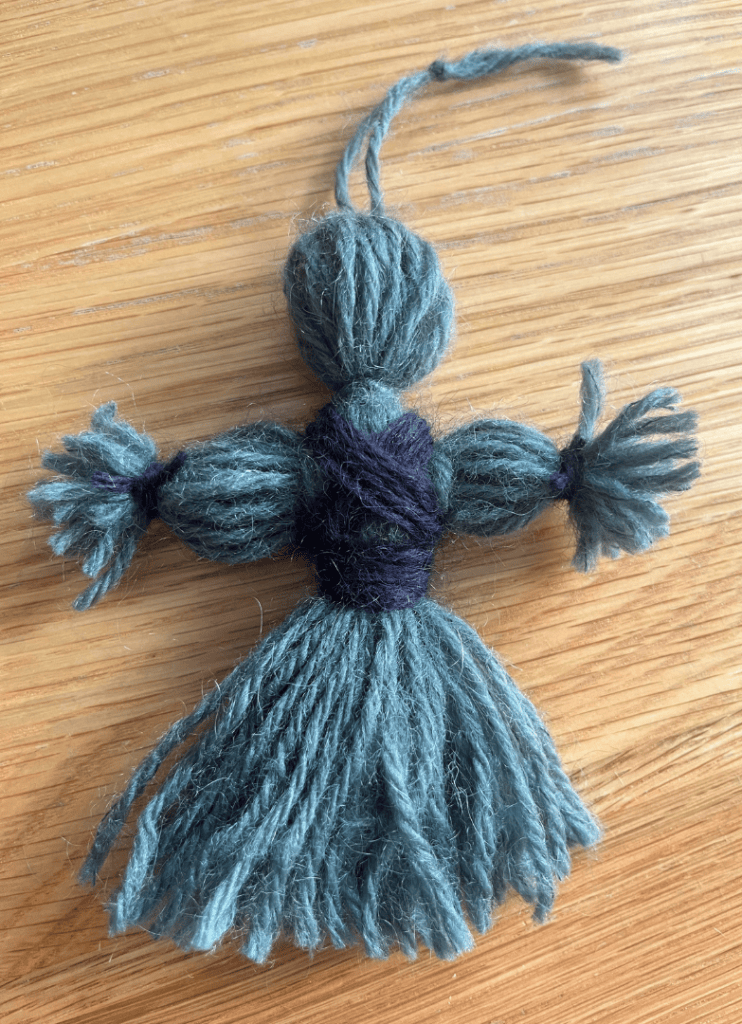
Step 9
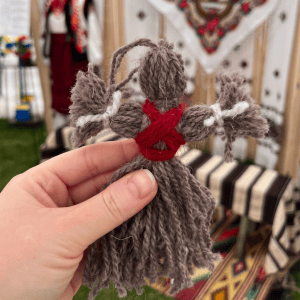
Your doll is nearly finished! The final step is to use scissors to even-up the doll’s skirt and arms by carefully trimming the yarn so that it is all the same length. Trim any other pieces of yarn that you used to tie the body and arms.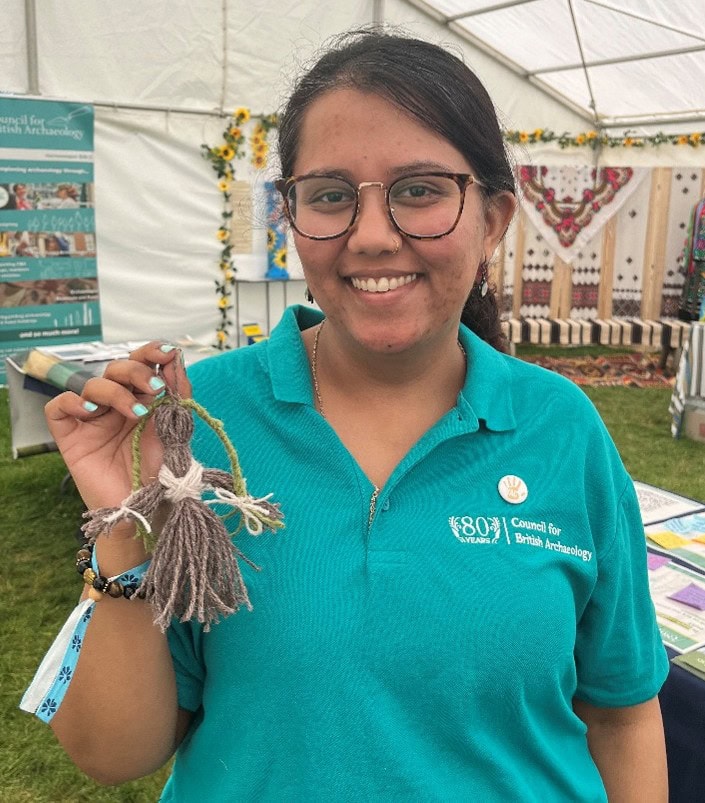
Step 10
Finally, for the two threads sticking out of the top of your doll’s head you have 3 options. 1) trim them off with scissors, 2) tie them in a knot so that your doll can be hung up, or 3) use them to secure some optional hair for your doll. You could plait some yarn in a different colour, tie both ends to secure it and then use those threads of the head to tie it in place to give your doll a braided hairstyle, as shown by Tejaswi in this photo!