Step 1
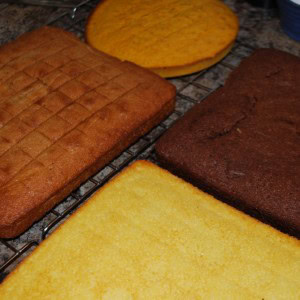
Make at least three layers of cake. These need to all be the same size. Each cake needs to be a different colour. For our stratigraphy cake, we made three rectangular cakes: a vanilla sponge (pale yellow), a chocolate sponge (dark brown), and a coffee sponge (mid brown). Alternatively, you could use food colourings to make different coloured cakes, or make different types of cakes, such as fruit cake or chocolate chip songe cake. We also made an extra round cake which we dyed using yellow food colouring – this will be used later to make a ‘pit’!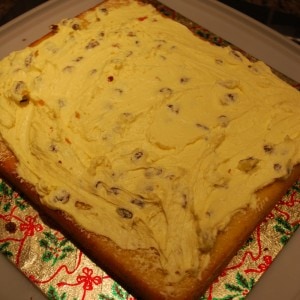
Step 2
It’s now time to start building up your archaeological trench! Choose which layer is going to be the bottom, and put this on your cake board. Add a layer of something sticky – jam, cream, butter icing or peanut butter all work well! We included some dried fruit in our ‘sticky’ layer.Step 3
Keep going adding a layer of cake and then a layer of something sticky until you have used all three layers of cake.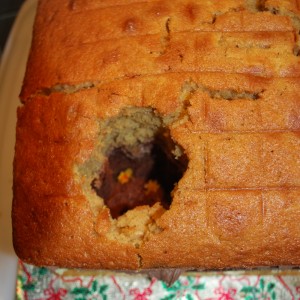
Step 4
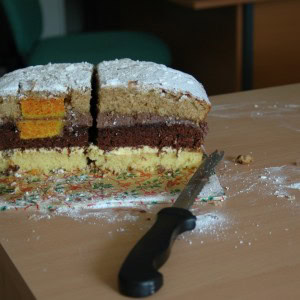
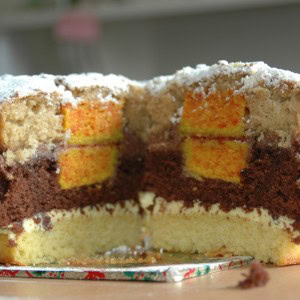
Now you need to add some features. We cut two ‘pits’ into our cake. To do this, use a cookie cutter or sharp knife to cut down through the top two cake layers of your cake. You might need an adult to help! Remove the circle of cake leaving a hole.Step 5
Fill your pits in using your extra coloured cake. Use the same cookie cutter to cut out circles of cake from your coloured extra cake – this will ensure that they will fit the pits! You will probably need several layers of the extra cake to completely fill the pits – use some jam or buttercream icing to make sure that the layers that fill the pits stick together.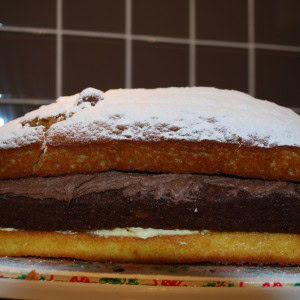
Step 6
Cover the top of your pits with a small slice of the top cake layer that you removed in order to make your pits – this will mean that it is not obvious where the pits are until you cut the cake. If you want to, you can ice the top of your completed cake. We used icing sugar to make it look like a snow-covered trench. Green icing – for grass – also works well! You might also want to ice the sides of the cake too, so that you cannot see the layers.