Step 1
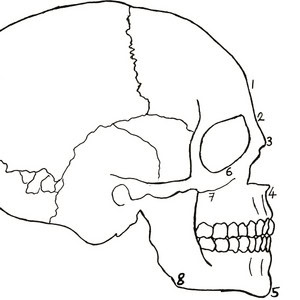
Look at the diagrams. Each number refers to a point on the skull where you will need to attach a peg (matchstick). The points have special names, and each peg is a different length. The peg lengths have been worked out by experts who have studied lots of different skulls and faces. The pegs tell experts how deep the tissue and muscle is at various points on the skull. The measurements we are using are for an adult female. We have rounded each measurement to the nearest millimetre (mm).
Step 2
(Forwards facing diagram for step 1).
Step 3
Draw the points from the diagrams onto your skull using a marker pen.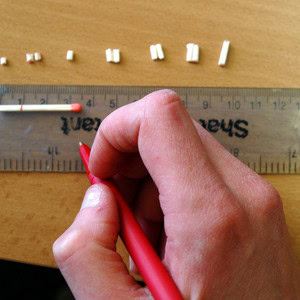
Step 4
Use the list below to cut make your pegs out of matchsticks: Peg 1. Glabella; length 6mm Peg 2. Nasion; length 8mm Peg 3. End of nasal/rhinion; length 2mm Peg 4. Subnasale/nasospinale; length 6mm Peg 5. Gnathion; length 8mm Peg 6. Orbitale; length 5mm Peg 7. Zygomaxillare; length 10mm Peg 8. Gonion; length 11mm Make sure you measure and cut your pegs carefully. You will need one of each of the pegs for points 1–5, and two of each of the pegs for points 6–8. You should end up with 11 pegs in total.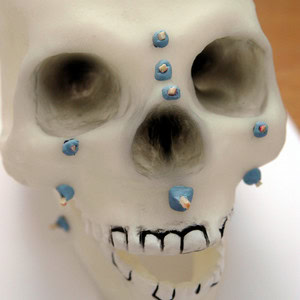
Step 5
Attach your pegs to the correct points on your skull using blutack. Make sure that one end of each peg is touching the skull to ensure that the pegs are the correct depth.
Step 6
Roll out sausages of clay and begin to build up the muscles and fatty deposits on the face, using the pegs as guides. You should still be able to see the tops of the pegs. Also make two eyeballs and put them into the eye sockets.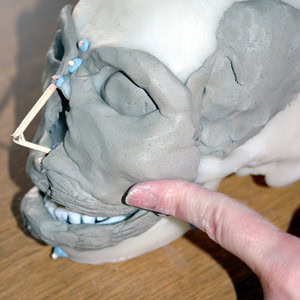
Step 7
Use a bent matchstick to make a template for the nose. This should start from the rhinion bone and end at the nasospinale bone (see diagram). You will need to decide how big the angle of the nose will be. Noses are one of the most difficult parts of a face to reconstruct accurately. At this stage you also need to build up the tissue around the eye sockets.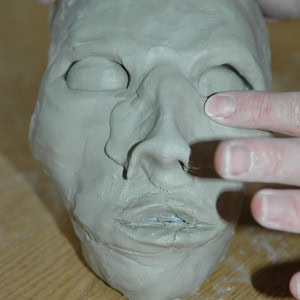
Step 8
Roll out a thin piece of clay and place it carefully over your nose template. Smooth in the edges to the cheeks, using a little bit of water to ensure that it sticks.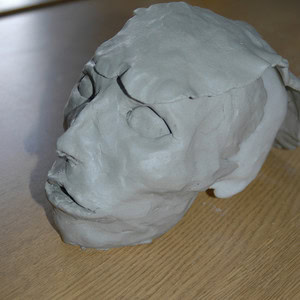
Step 9
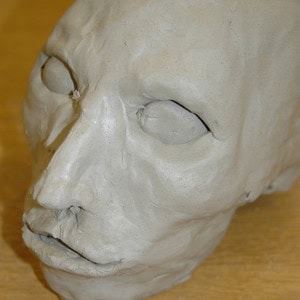
By this stage you should have built up all the muscles and tissue to the level of the pegs, and made your nose and eyes. It is now time to add a layer of skin. Roll out thin sheets of clay (about 3mm thick) and carefully lay them over the muscle layer. Start with pieces going over the top of the skull and then work your way around the rest of the head.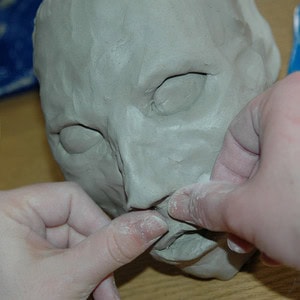
Step 10
Roll out sausages for the lips, and finish shaping the nose.