Completed Victorian toys.

Make a Victorian Toy

Have you ever wondered what toys children played with in the Victorian era? Try this fun activity to create a popular Victorian toy called a thaumatrope, invented in 1825 by an English doctor, John Ayrton Paris. Thaumatrope sounds like an odd name, but it actually means “turning marvel” or “wonder turner”.

By quickly spinning a small disc with a different picture on each side, you can make the two images look like they have combined into one – totally tricking your brain! The most famous thaumatrope example is a bird on one side of the disc and its cage on the other. This type of optical illusion (called persistence of vision), is now used to produce film animations, meaning the thaumatrope is an ancestor of your favourite cartoon films.

Chiltern YAC

Adult supervision is not required for this activity.

Type of Activity : Crafting

How many people required (minimum) : 1

Safety Measures : Be careful when using scissors and the hole punch!

Ages : 8+

Time Required: 20-30 minutes

Step 1

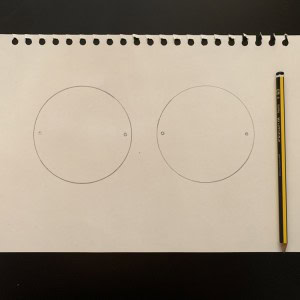
After collecting all the required materials, draw two circles on a piece of card using a round object. Then, lightly mark where you will punch two holes on each side of the circle (these are only needed if you are going to be using string, not a paper straw).
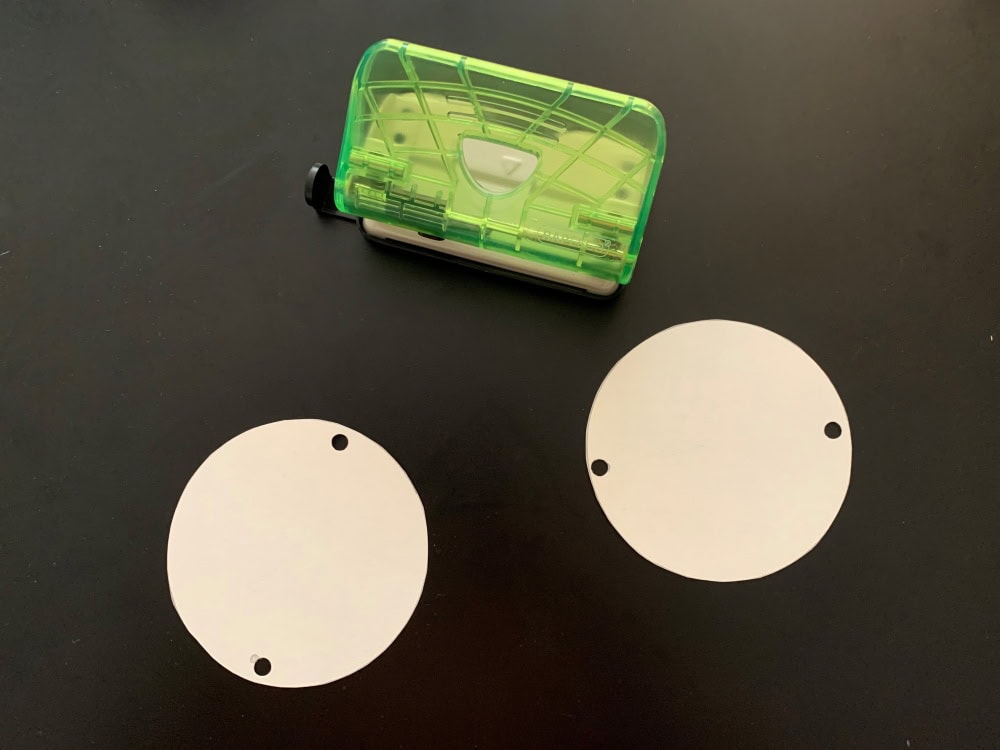
Two neatly cut out circles with two holes punched at both sides of each circle.

Step 2

Carefully cut out the circles using scissors and punch out the holes using the hole punch. Make sure the holes are not too close to the edge, otherwise the disc may split.
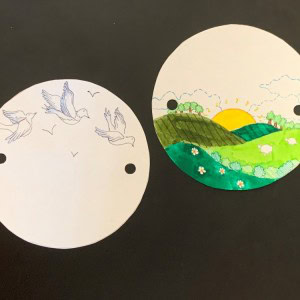
Step 3

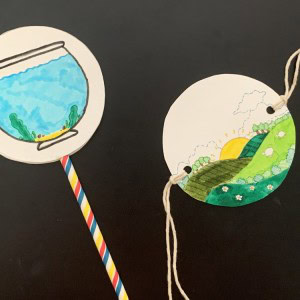
It is now time to draw two different images on the circles. You can draw anything, as long as the pictures combine together to make a complete scene. We created countryside fields with birds in the sky, and a fish with its fishbowl. Top tip: Your thaumatrope will work better if it is really bright and bold!
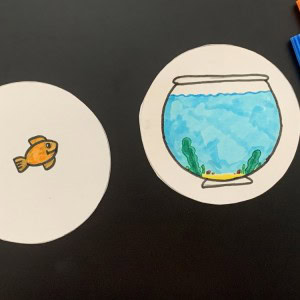
Step 4

Once you have completed your drawings, glue together the backs of the two circles. Watch out – if you are using the string method, one of the images needs to be glued upside down for the thaumatrope to work.

Step 5

Next, attach either the string or straw to the disc. If using string cut out two short pieces and loop them through the holes you have made. You can use tape or glue to secure the paper straw.
Completed Victorian toys.

Step 6

Your thaumatrope is now complete, time to spin it and watch the two images magically join together! Tightly pull the two strings, hold their ends, and rub your fingertips together to turn the disc. Or simply twist the paper straw in the palms of your hands. Try twirling the thaumatrope at different speeds to see how it works best – why do you think this is?

Step 7

Repeat and make as many thaumatropes as you want, testing different designs and ideas. For example, you could try putting two halves of a word (like your name) on each side and see if this works too. Why not also have a go at our making stop motion activity, to create your own animation using the same persistence of vision illusion.